Plugging in the Program Feed from your Switcher
Connect the program output from your switcher to your ATEM Talkback Converter 4K’s
‘PGMSDI in’ connector. When connecting the program output from an ATEM switcher, tally is
also embedded in the SDI signal. This will enable tally lights when connected to
ATEM Camera Converters, Blackmagic Studio Cameras and Blackmagic URSA
Broadcast Cameras.
PGM SDI MIC H/PHONE
SDI 1 OUT CAM SDI
CAM OPT
OUT/IN
SDI 2 OUT CAM SDI
CAM OPT
OUT/IN
SDI 2 OUT CAM SDI
CAM OPT
OUT/IN
SDI 4 OUT CAM SDI
CAM OPT
OUT/IN
SDI 5 OUT CAM SDI
CAM OPT
OUT/IN
SDI 6 OUT CAM SDI
CAM OPT
OUT/IN
SDI 7 OUT CAM SDI
CAM OPT
OUT/IN
SDI 8 OUT CAM SDI
CAM OPT
OUT/IN
PGM SDI MIC H/PHONE
SDI 1 OUT CAM SDI
CAM OPT
OUT/IN
SDI 2 OUT CAM SDI
CAM OPT
OUT/IN
SDI 2 OUT CAM SDI
CAM OPT
OUT/IN
SDI 4 OUT CAM SDI
CAM OPT
OUT/IN
SDI 5 OUT CAM SDI
CAM OPT
OUT/IN
SDI 6 OUT CAM SDI
CAM OPT
OUT/IN
SDI 7 OUT CAM SDI
CAM OPT
OUT/IN
SDI 8 OUT CAM SDI
CAM OPT
OUT/IN
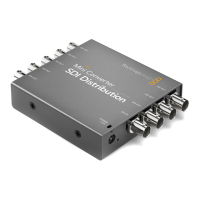
Plug the program SDI output from your switcher into your
ATEM Talkback Converter 4K’s ‘PGM SDI’ input.
Plugging in your Headset
Your ATEM Talkback Converter 4K uses aviation headsets that plug in via the 1/4” TRS
headphone and 0.206” microphone jacks.
If both a headset and an external microphone are plugged in, only the headset will be used.
Talkback audio is embedded into audio channels 15 & 16 of the SDI signal.
PUSH
1 2 3 4 5 6 7 8
1 2 3 4 5 6 7 8
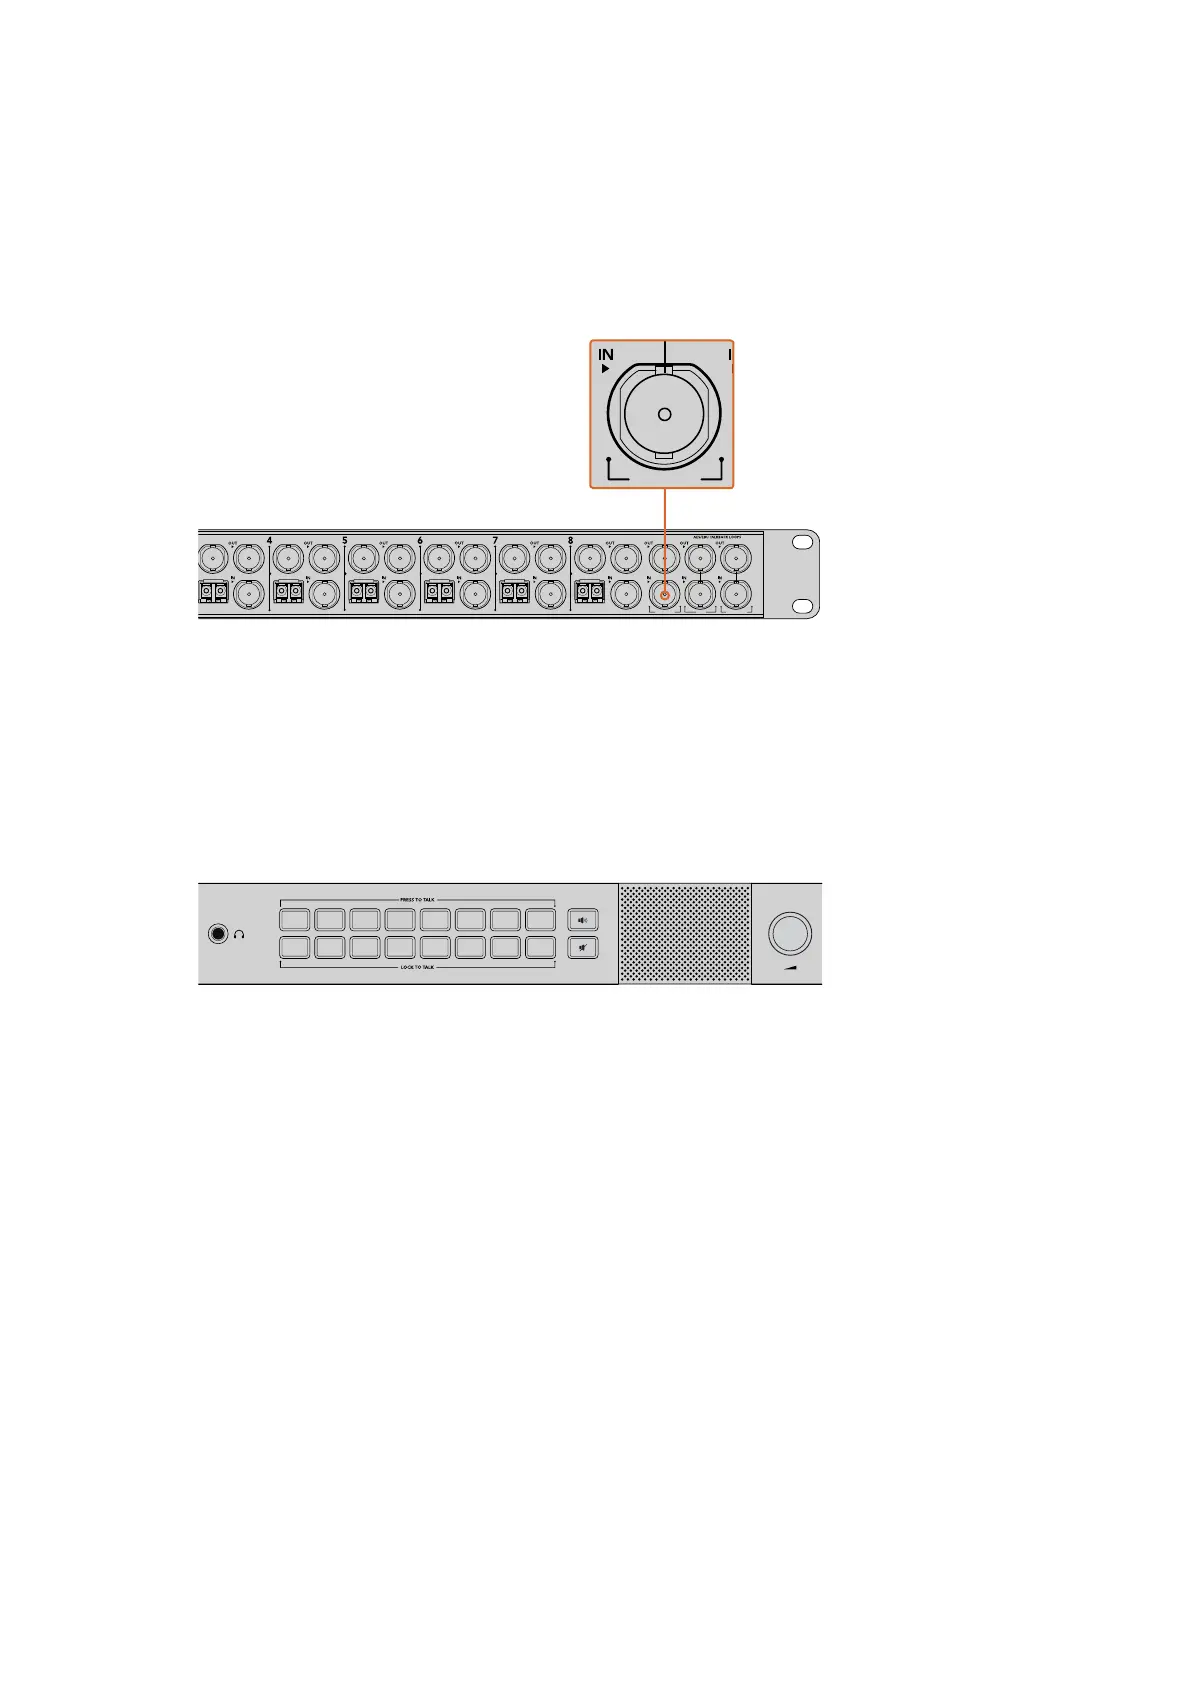
Connect your aviation headset via your ATEM Talkback Converter 4K front panel TRS connectors. You can also
plug in an external microphone via the balanced XLR analog input if you want to use talkback without a headset.
Plugging in your External Microphone
If you want to use an external microphone, plug in via the balanced XLR analog input on your
ATEM Converter’s front control panel.
Monitoring your Audio
If you want to monitor your program or talkback audio on external audio equipment such as a
Blackmagic Audio Monitor, connect via the RCA outputs on your ATEM Talkback Converter 4K
or ATEM Studio Converter’s rear panel.
Confirming your ATEM Converter Set Up
After connecting your ATEM Converters to a live production switcher you’ll want to confirm that
everything is working.
The first thing to do is check the switcher is getting a valid signal from your cameras. You can
check this by having the switcher operator switch each camera to the preview or program
output. If all your camera signals can be seen on the switcher’s preview or program output,
you’ll know your ATEM Converters are working.
12Getting Started

 Loading...