Fa
.
THE
AUTOMATIC TRANSMISSION
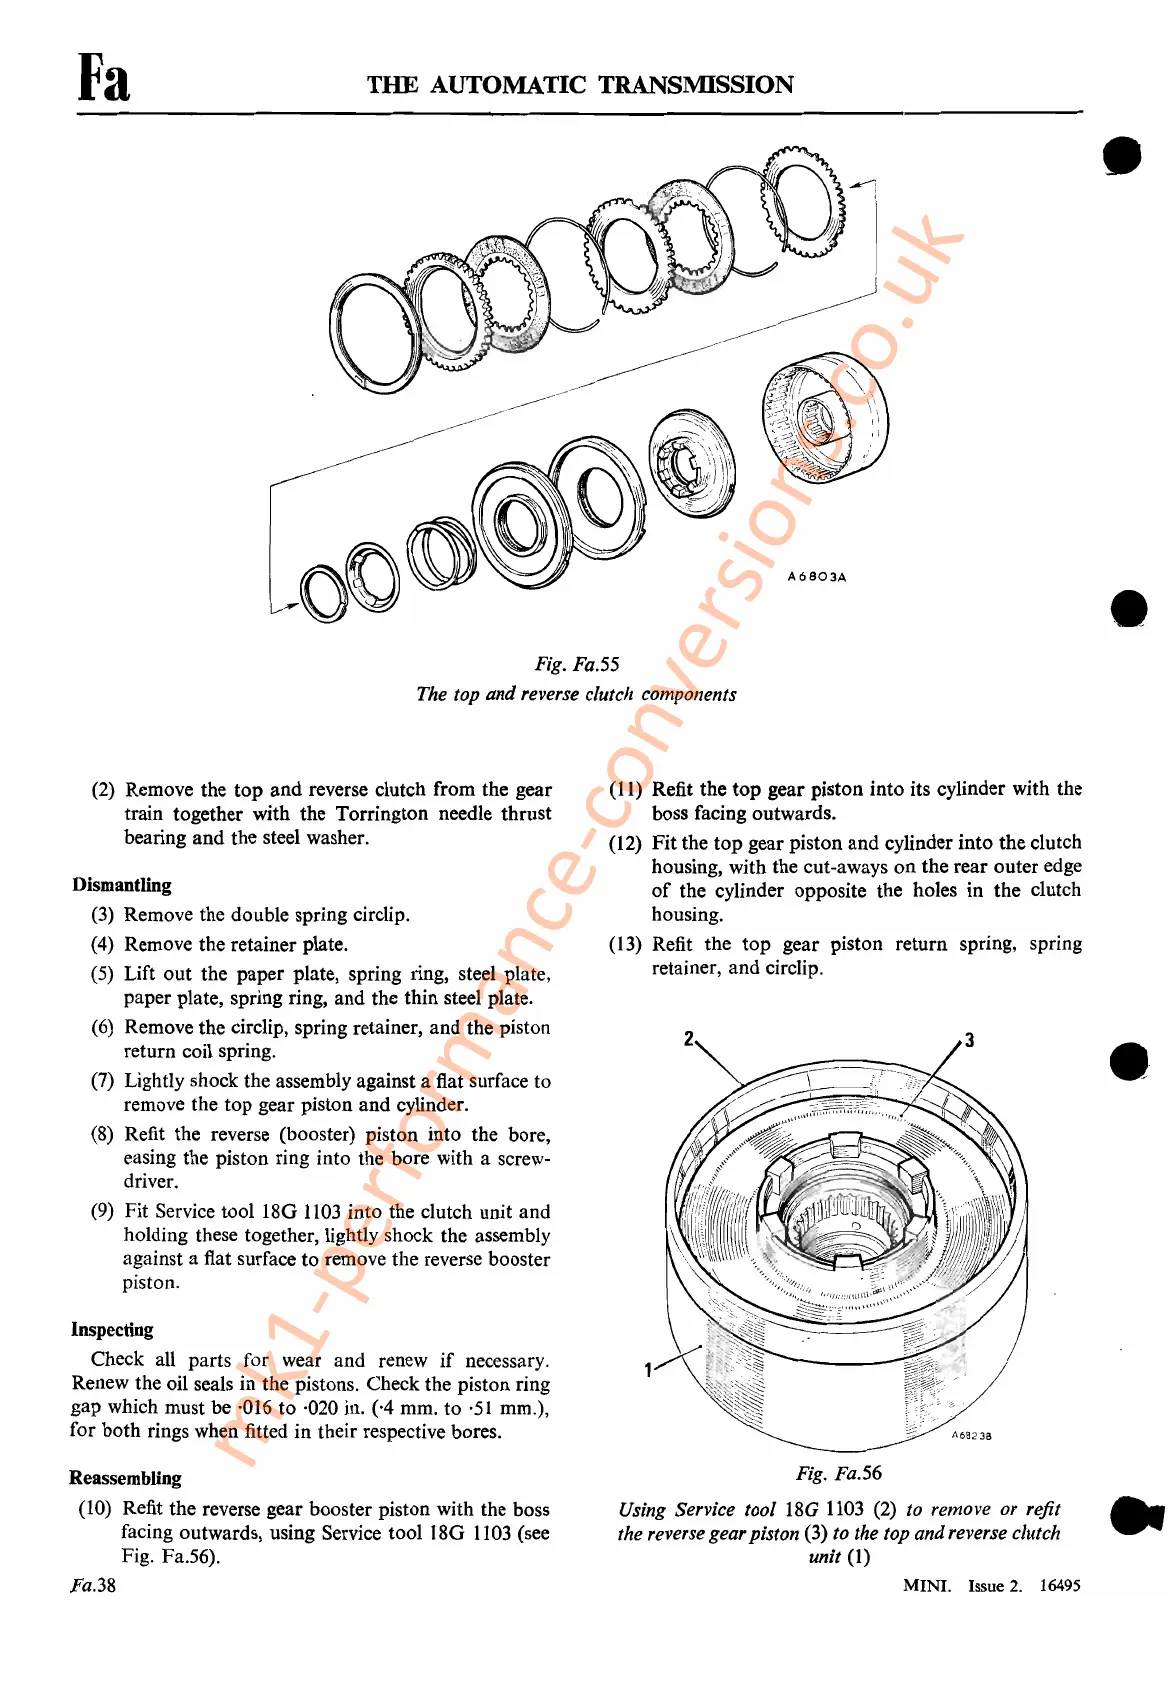
Fig.
Fa.55
The top and reverse clutch components
•
•
(2)
Remove the top and reverse clutch from the gear
train together with the Torrington needle thrust
bearing and the steel washer.
Dismantling
(3)
Remove the double spring circlip.
(4)
Remove the retainer plate.
(5)
Lift out the paper plate, spring ring, steel plate,
paper plate, spring ring, and the thin steel plate.
(6)
Remove the circlip, spring retainer, and the piston
return coil spring.
(7)
Lightly shock the assembly against a flat surface to
remove the top gear piston and cylinder.
(8)
Refit the reverse (booster) piston into the bore,
easing the piston ring into the bore with a screw-
driver.
(9)
Fit Service tool 18G
1103
into the clutch unit and
holding these together, lightly shock the assembly
against a flat surface to remove the reverse booster
piston.
Inspecting
Check all parts for wear and renew
if
necessary.
Renew the oil seals in the pistons. Check the piston ring
gap which must be ·016 to ·020 in.
(,4 mm. to
·51
mm.),
for both rings when fitted in their respective bores.
(11)
Refit the top gear piston into its cylinder with the
boss facing outwards.
(12)
Fit the top gear piston and cylinder into the clutch
housing, with the cut-aways
on
the rear outer edge
of
the cylinder opposite the holes in the clutch
housing.
(13)
Refit the top gear piston return spring, spring
retainer, and circlip.
•
•
/
Reassembling
(10)
Refit the reverse gear booster piston with the boss
facing outwards, using Service tool 18G
1103
(see
Fig. Fa.56).
Fa.38
Fig.
Fa.56
Using Service tool
18G
1103
(2) to remove or refit
...
the reverse gearpiston (3) to the top andreverse clutch
....
unit (1)
MINI. Issue
2.
16495
mk1-performance-conversions.co.uk



 To Next Page