Installation
EN
132 bora.com
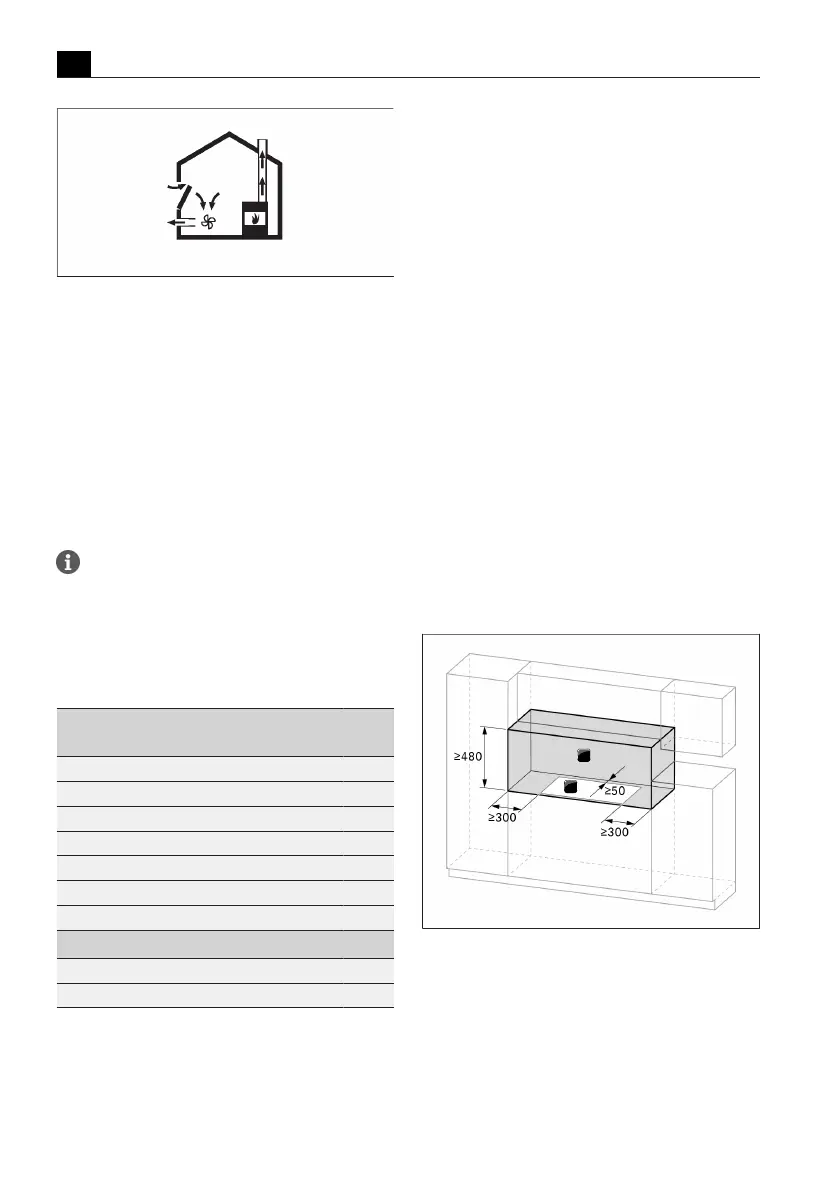
Fig.9.2
Exhaust air installation – correct
u
If simultaneously operating both a fireplace and the
cooktop extractor in the same room, ensure that:
T
the maximum low pressure is 4Pa (4 x 10⁻⁵bar);
T
a safety device (e.g. window contact switch, low
pressure warning device) is used to ensure that a
sufficient supply of fresh air is guaranteed;
T
the exhaust air is not channelled into a chimney that
is used for exhaust gases of appliances operated
with gas or other combustibles;
T
the installation is checked and approved by an
authorised certified engineer (e.g. heating engineer).
If the cooktop extractor is used exclusively in
recirculation mode, operation with an open
fireplace is possible without any additional
safety measures.
9.2
Scope of delivery
Scope of delivery Quanti
ty
Cooktop with integrated cooktop extractor 1
Air inlet nozzle 1
Stainless steel grease filter 1
Operating and installation instructions 1
Sealing tape 1
Height adjustment plate set 1
Bag containing various small parts for assembly 1
Additional scope of delivery PURSU
Activated charcoal filter 1
Template for back panel cut-out 1
Tab.9.1
Scope of delivery
Checking the scope of delivery
u
Make sure the delivery is complete and check it for
damage.
u
Immediately inform the BORA Service TeamTeam if
parts are missing or damaged.
u
Do not under any circumstances install parts which
are damaged.
u
Dispose of transport packaging in the proper manner
(see"10Decommissioning, disassembly and
disposal").
9.3
Tools and aids
The following tools, among others, are required to
correctly install the cooktop:
T
Jigsaw or handsaw
T
Template for cut-out on back panel (recirculation
only, included in scope of delivery)
T
size 20 Torx screwdriver key
T
black, heat-resistant silicone sealant
9.4
Assembly instructions
9.4.1
Installation clearances
u
Observe the required clearance around the worktop
cut-out.
Fig.9.3
Required clearance
[1]
Required clearance
[2]
Worktop cut-out