3-41
Confidential
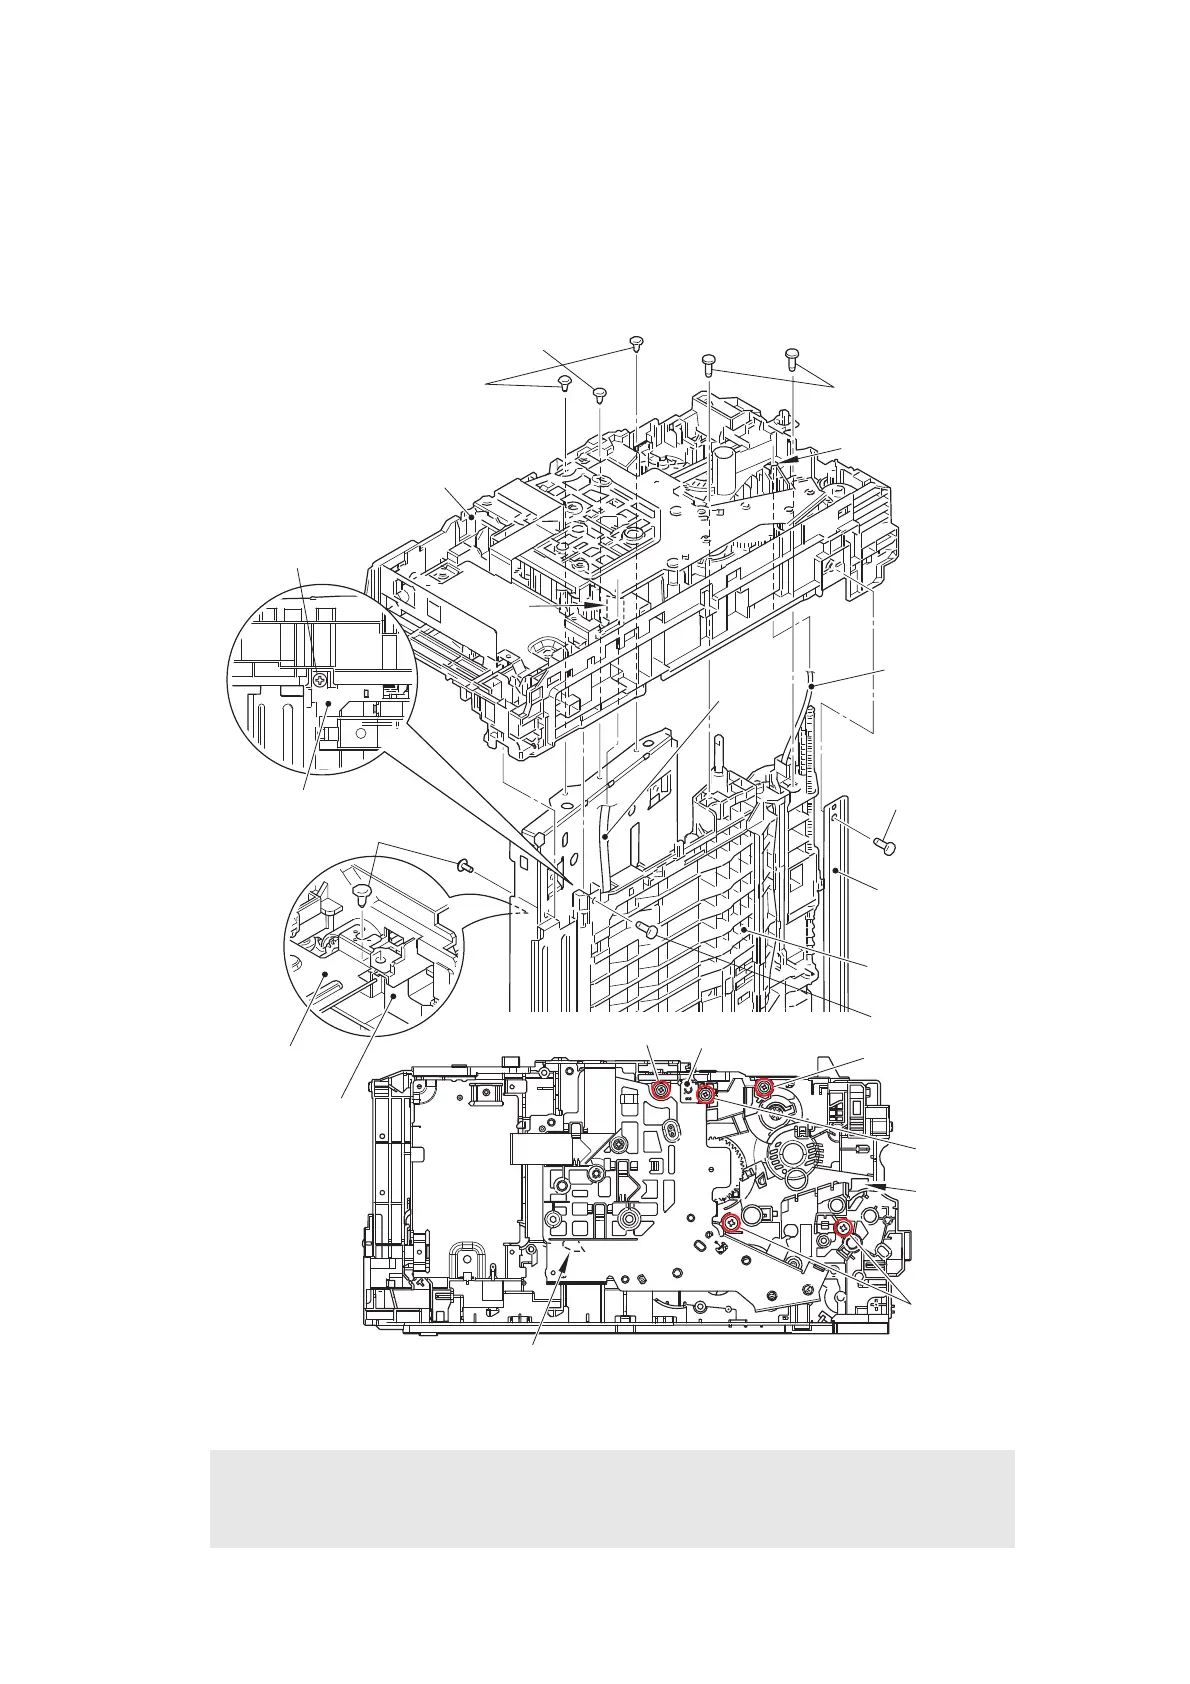
(6) Remove the taptite bind B M4x12 (6a) screw (for securing the under bar), the taptite cup
S M3x6 SR (6b) screw (for securing the chute ground plate), the taptite bind B M4x12
(6c) screw (for securing the registration chute) and the taptite cup S M3x8 SR (6d) screw
(for securing the laser L FG plate).
(7) Remove the two taptite bind B M4x12 (7a) screws and the two taptite cup S M3x8 SR
(7b) screws, and remove the main frame L ASSY. Pull out the paper feed sensor
harness ASSY and the LVPS harness from the holes.
Fig. 3-42
Harness routing: Refer to “4. Left side of the machine”.
Assembling Note:
• When assembling the main frame L ASSY, make sure that the chute ground plate is
above the main PCB FG plate 2.
Taptite cup S M3x8 SR (6d)
Taptite cup S M3x8 SR (7b)
Taptite bind B M4x12
(7a)
Main frame L ASSY
Taptite bind B M4x12 (6c)
Registration chute
Taptite cup S M3x6 SR (6b)
Chute ground plate
Taptite bind B
M4x12 (6a)
Under bar
Registration chute
Taptite bind B
M4x12 (6c)
7b
Laser L FG plate
6d
7a
7b
<Upper side of frame L>
Main PCB FG
plate 2
Hole
Hole
Paper feed sensor
harness ASSY
LVPS
harness
Hole
Hole
<Bottom view>
<Overhead view
of frame L>
 Loading...