3-40
Confidential
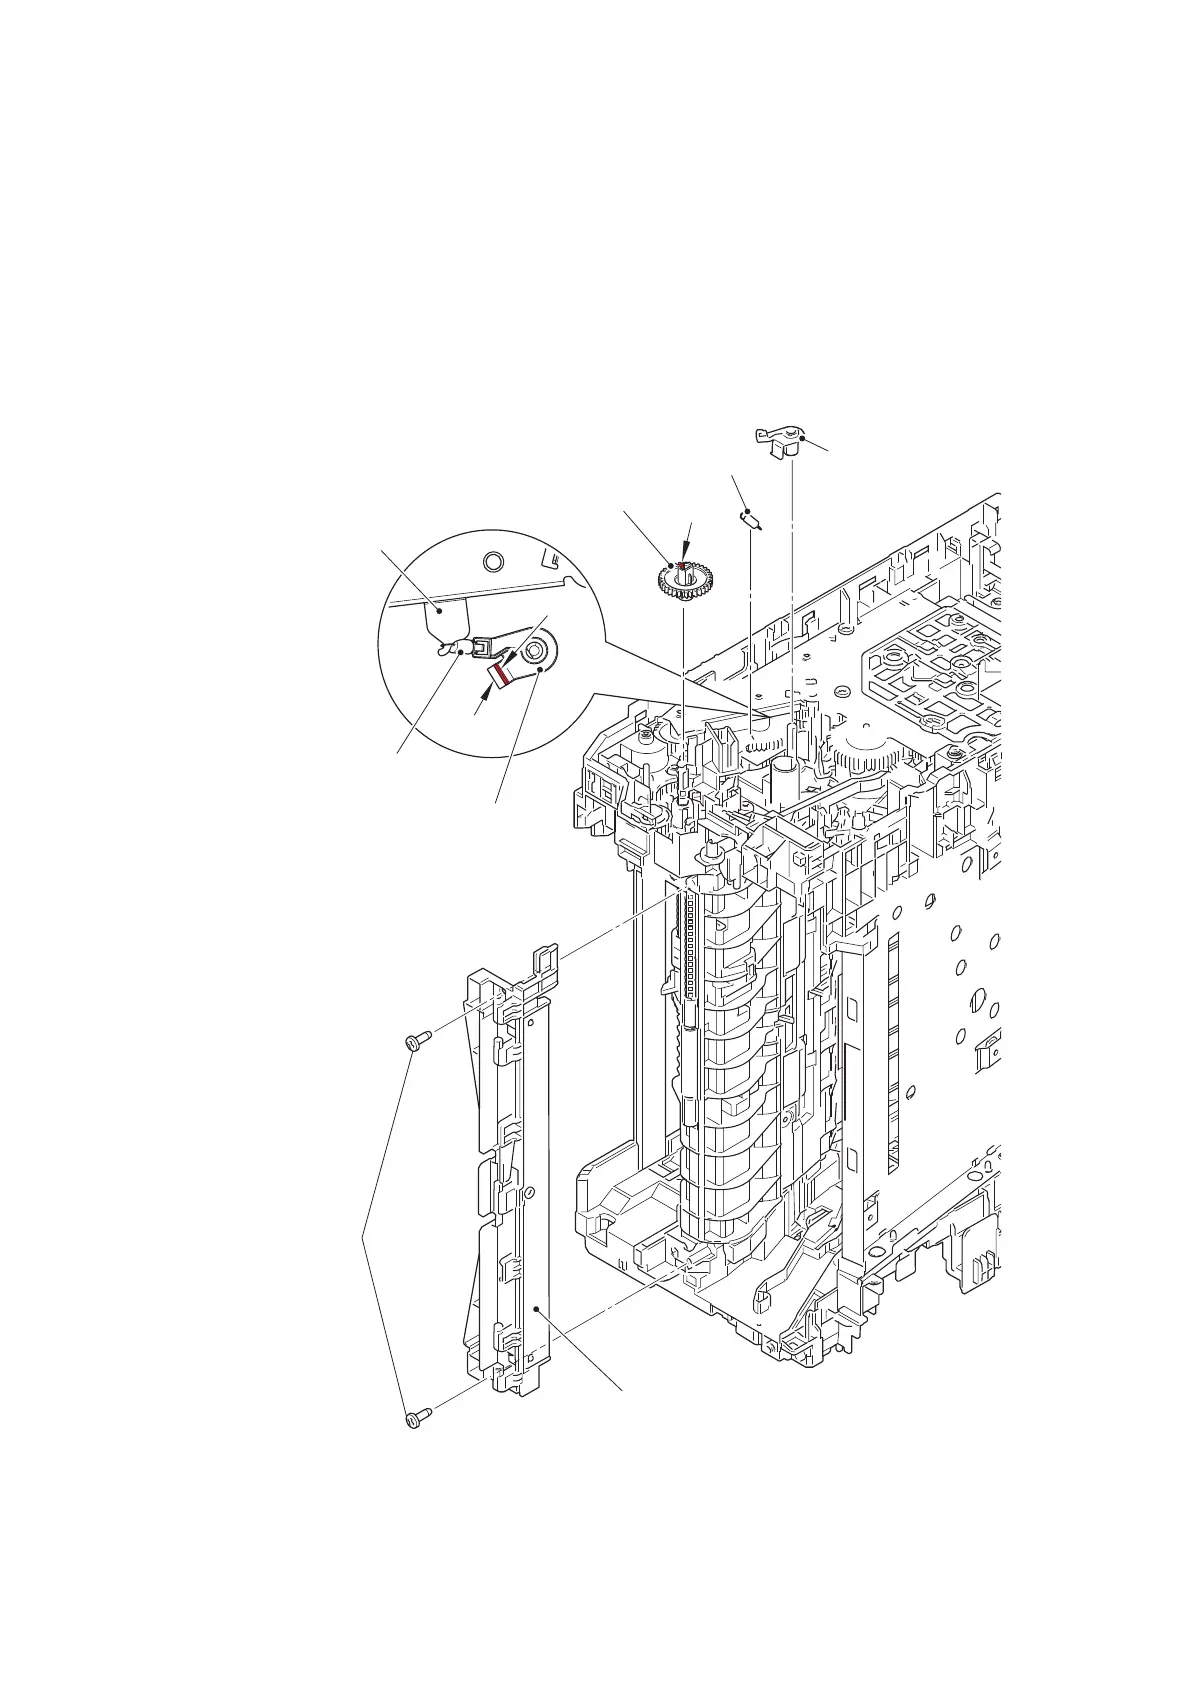
9.21 Main Frame L ASSY
(1) Remove the two taptite bind B M4x12 screws, and remove the front chute ASSY.
(2) Release the LVPS harness from the securing fixtures.
(3) Remove the regist FG spring from the motor drive sub ASSY and the conductive
bushing 5.
(4) Use a flat-blade screwdriver or similar tool to release the hook from the hole, and
remove the conductive bushing 5.
(5) Release the hook, and remove the feeder gear 34.
Fig. 3-41
Harness routing: Refer to “4. Left side of the machine”.
Taptite bind B M4x12
Front chute ASSY
Hook
Regist FG spring
Conductive bushing 5
Conductive bushing 5
Motor drive sub ASSY
Hole
Regist FG spring
Feeder gear 34
<Front side>
<Upper side of frame L>
Hook
 Loading...