3-22
Confidential
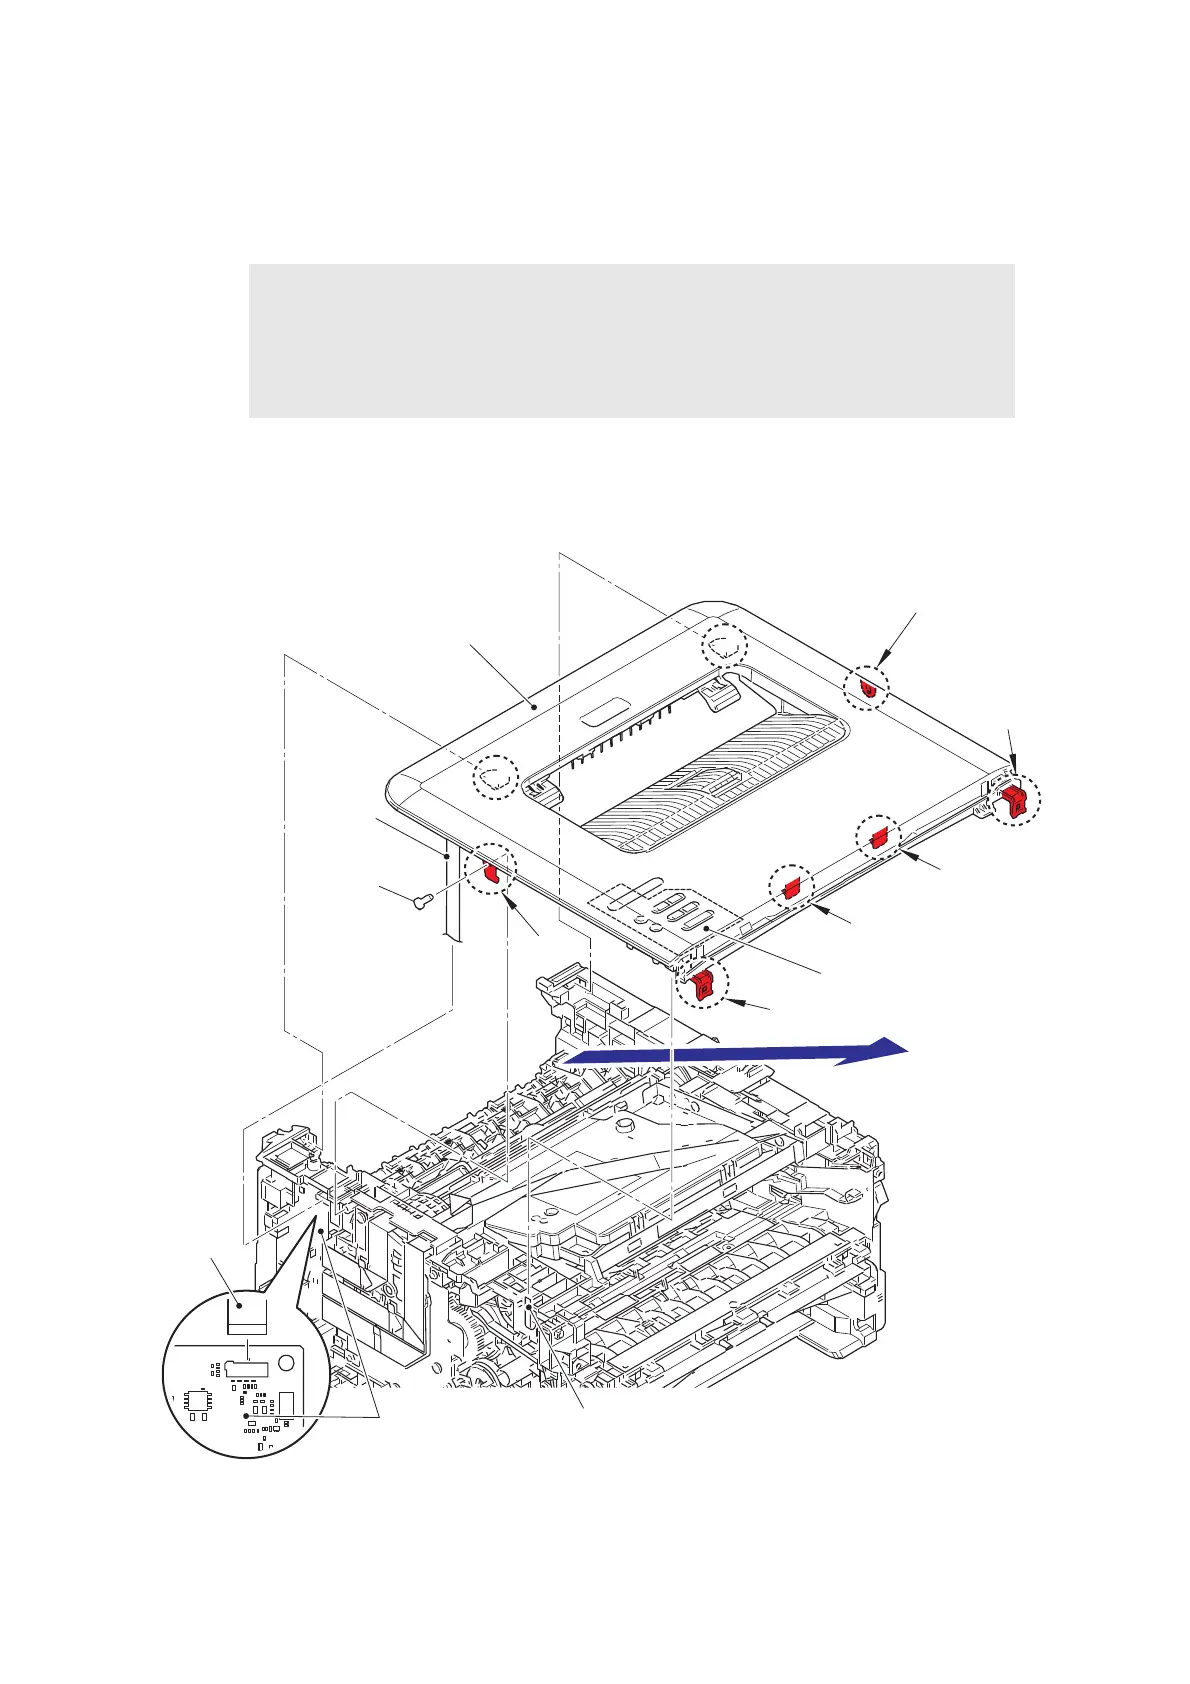
9.9 Top Cover ASSY
(1) Disconnect the panel PCB flat cable from the main PCB ASSY.
(2) Disconnect the new toner sensor PCB flat cable from the panel PCB ASSY.
(3) Remove the taptite bind B M4x12 screw.
(4) Release the hooks on the top cover ASSY in order of the hook A to F, and remove the
top cover ASSY in the direction of the arrow.
Fig. 3-16
Note:
• After disconnecting flat cables, check that each cable is not damaged at its end or
short-circuited.
• When connecting flat cables, do not insert them at an angle. After insertion, check
that the cables are not at an angle.
Hook F
Top cover ASSY
Hook A
Hook E
Taptite bind
B M4x12
Main PCB ASSY
New toner sensor PCB flat cable
Panel PCB ASSY
Hook C
Hook D
Hook B
Panel PCB
flat cable
Panel PCB
flat cable
 Loading...