3-49
Confidential
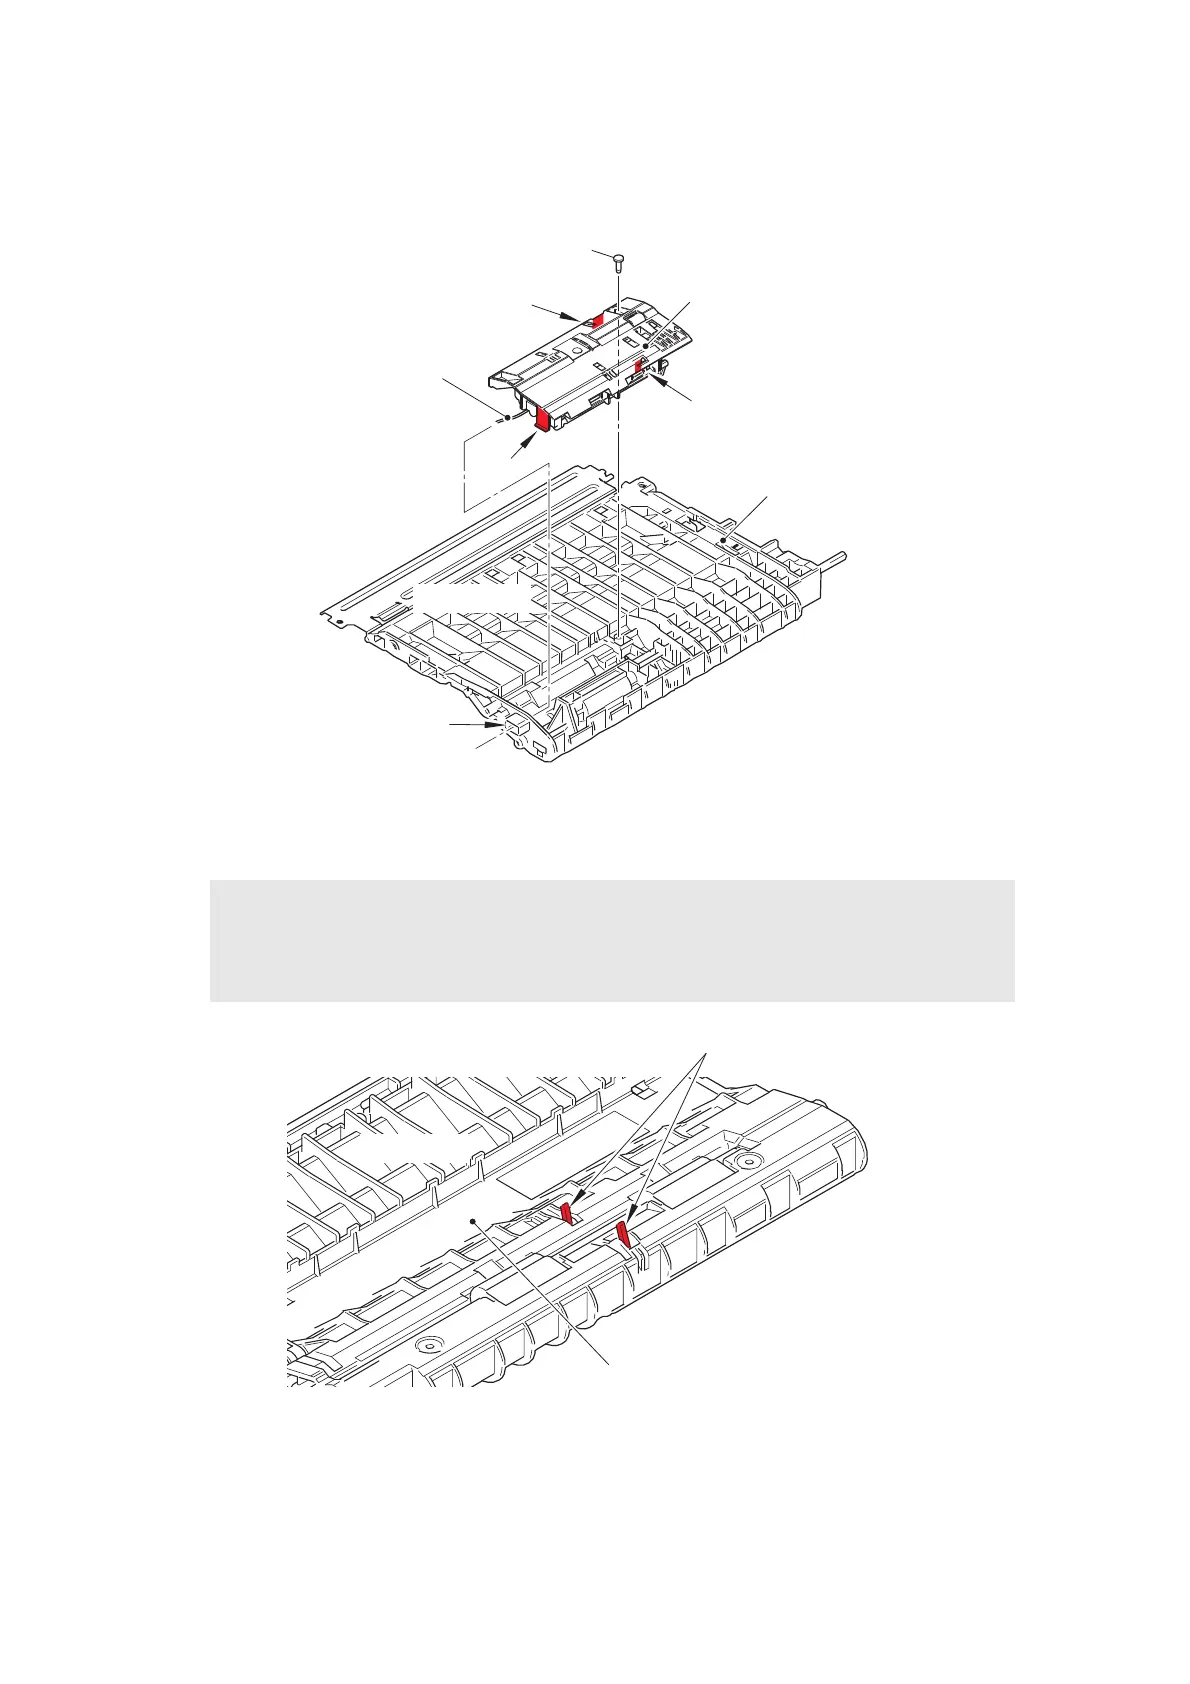
(6) Remove the taptite bind B M3x10 screw. Release the each hook, and remove the
registration front/rear actuator holder ASSY from the registration chute. Pull out the
registration front/rear sensor PCB harness from the hole.
Fig. 3-52
Harness routing: Refer to “2. Top side of the registration chute”.
Fig. 3-53
Assembling Note:
• After assembling the registration front/rear actuator holder ASSY to the registration
chute, push the actuators by fingers and check if it is pushed back by its spring (if the
spring is not caught at assembling).
Registration front/rear
actuator holder ASSY
Taptite bind B M3x10
Hook
Hook
Registration front/rear
sensor PCB harness
Hook
Hole
Registration chute
<Bottom side>
Actuators
Registration chute
<Top side>
 Loading...