3-39
Confidential
8) Set the Head joint rubber on top of the Head/carriage unit and fix the Head joint in
place using the Head joint spring. (Refer to page 3-33)
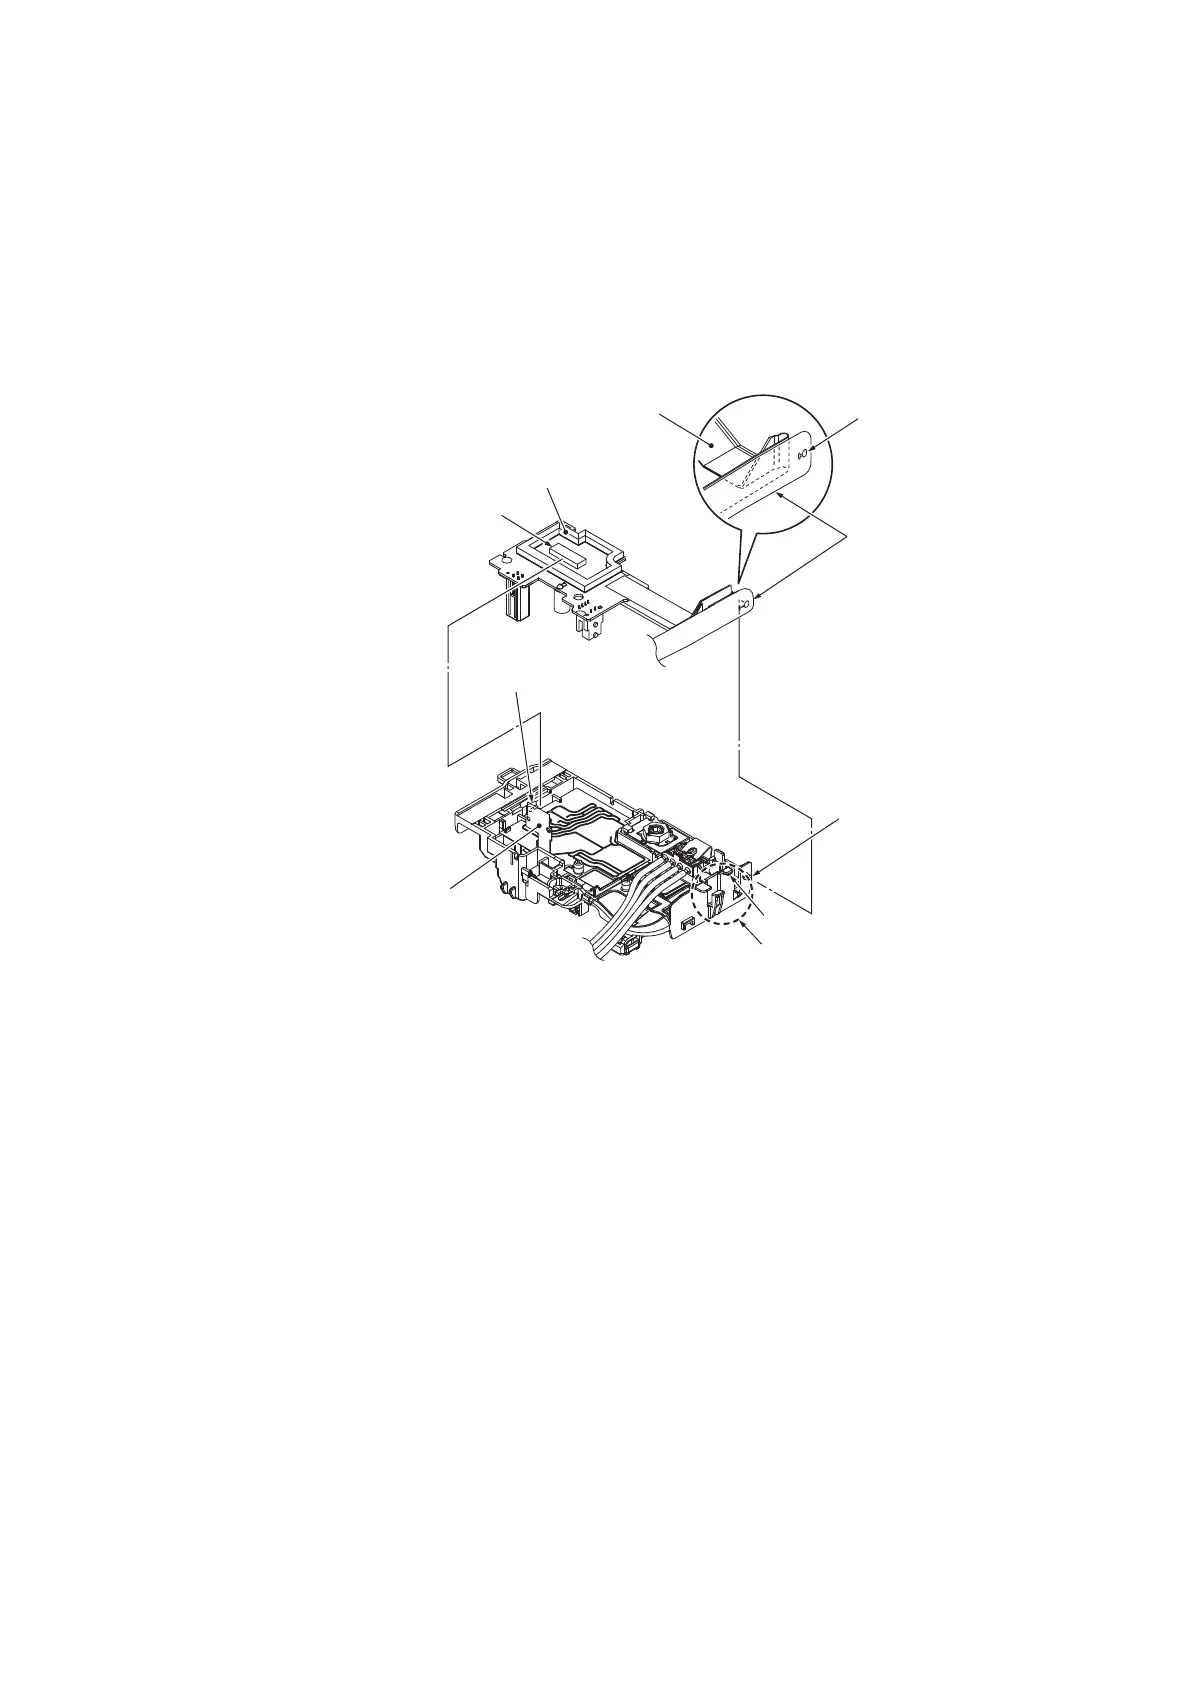
9) Mount the Carriage PCB ASSY on the Head/carriage unit, route the Carriage flat
cables through the Cable guide, fit the opening provided in the film over the boss on
the Head/carriage unit, and insert the film inside the hook as shown below.
10)Fix the Carriage PCB ASSY with the lock spring.
11)Connect the Head flat cable on top of the Carriage PCB and lock the connector.
12)Attach the Head cover.
13)When mounting a new Head/carriage unit, apply lubricant on the sliding surface
(CR guide rail and CR frame) on top of the Engine unit, as specified in Section 5 of
this chapter.
14)Check if the CR encoder strip and PF encoder disk are free of grease and ink. If
they are stained with grease or ink, replace them.
15)Slide the Head/carriage unit by hand to check if it moves smoothly to the right and
left ends of its travel. At the same time, check if the Ink supply tubes and Carriage
flat cables are not twisted.
16)If a new Head/carriage unit is mounted, make adjustments specified in Chapter 4,
Section 2.
Carriage flat cable
Opening
Film
Carriage PCB ASSY
Lock spring
Boss
Cable guide
Head flat cable
Connector
Hook
 Loading...