3-38
Confidential
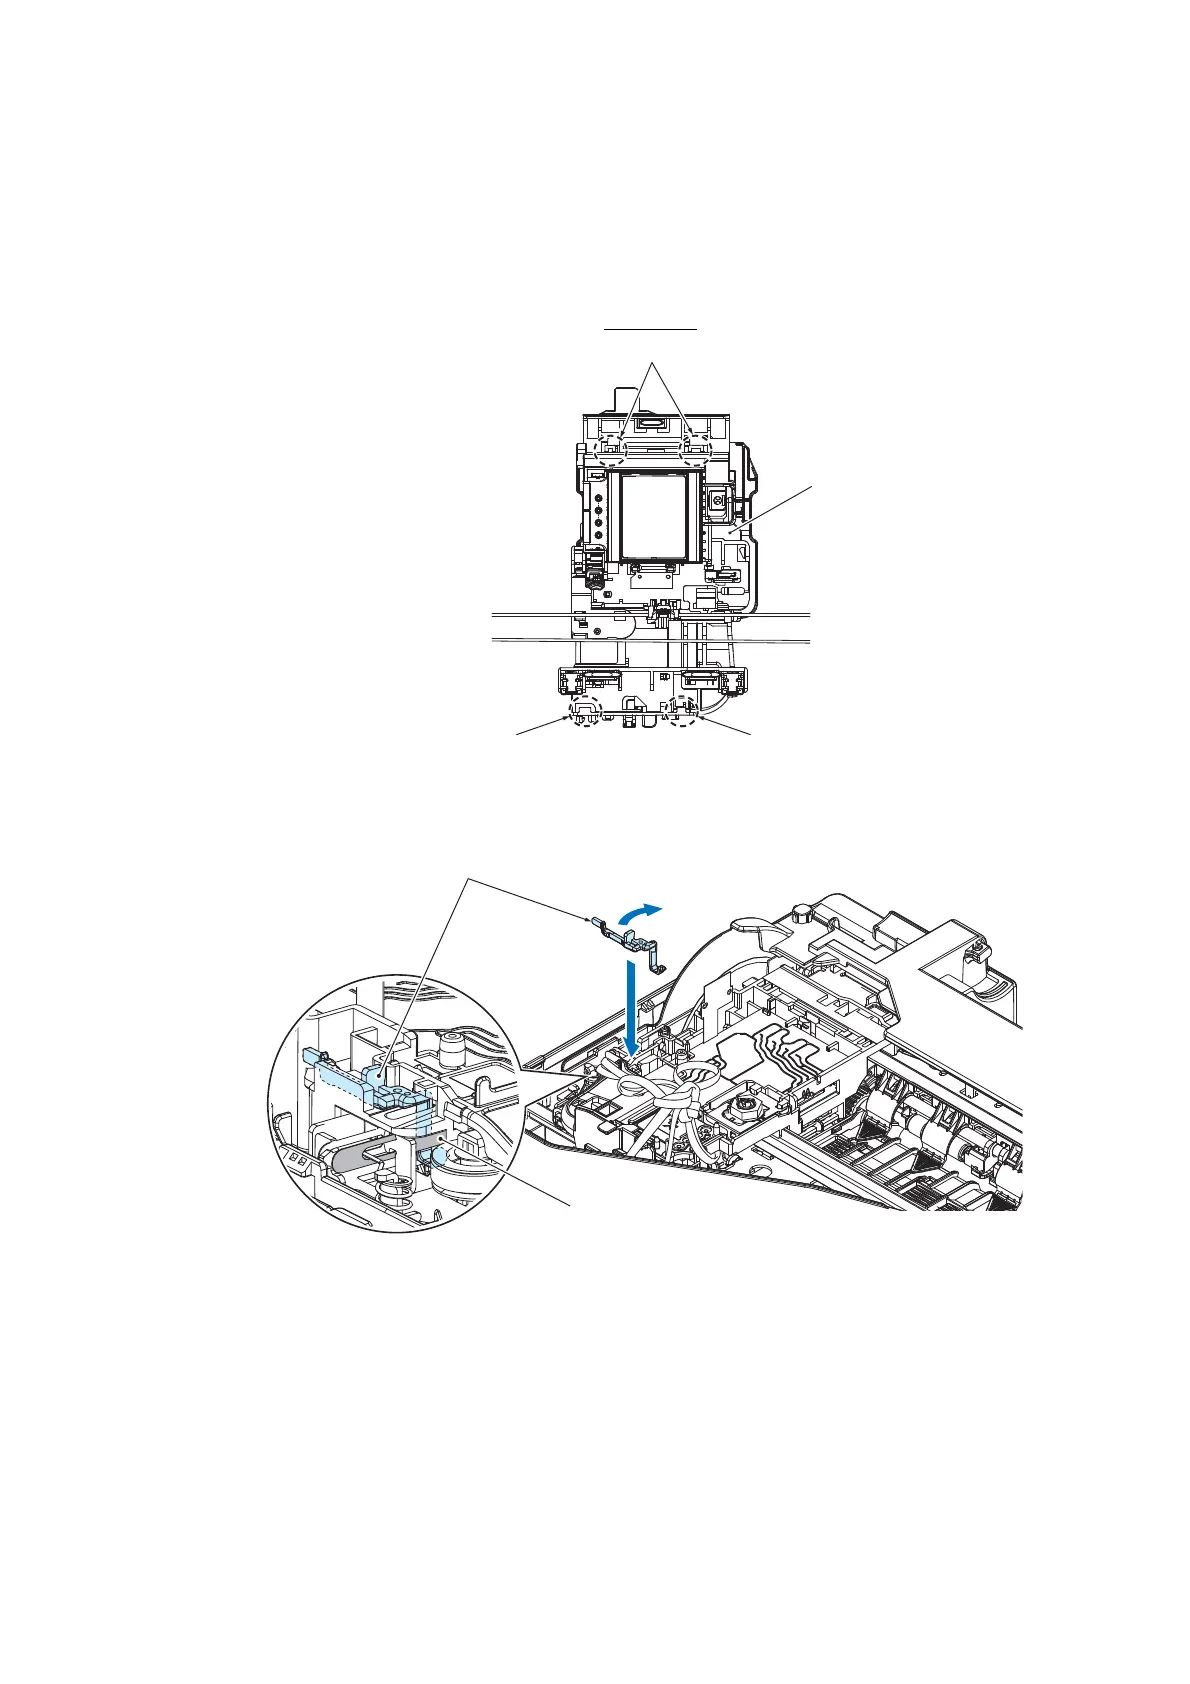
3) First fit the front end of the Head/carriage unit over the CR frame and then set the
rear end onto the CR guide rail.
Make sure that the two points (see figure below) on the front side of the Head/
carriage unit bottom are firmly hooked to the front end of the CR frame and that the
bosses of the bottom rear side are properly fitted into the two notches of the CR
guide rail (refer to page 3-36).
4) Attach the encoder lock. Make sure that the encoder lock latch is under the encoder.
5) Slide the Head/carriage unit by hand to check if it moves smoothly.
6) Release the bound CR timing belt and attach it to the Idle pulley on the left edge
first. Then, while pressing the Idle pulley holder to the right, attach the belt to the
Carriage motor pulley on the right edge. (Refer to page 3-34)
7) Slide the Head/carriage unit by hand to check that it smoothly moves to the right and
left ends of its travel.
Bottom view
Bottom rear side bosses
Hook
Hook
Head/carriage unit
 Loading...