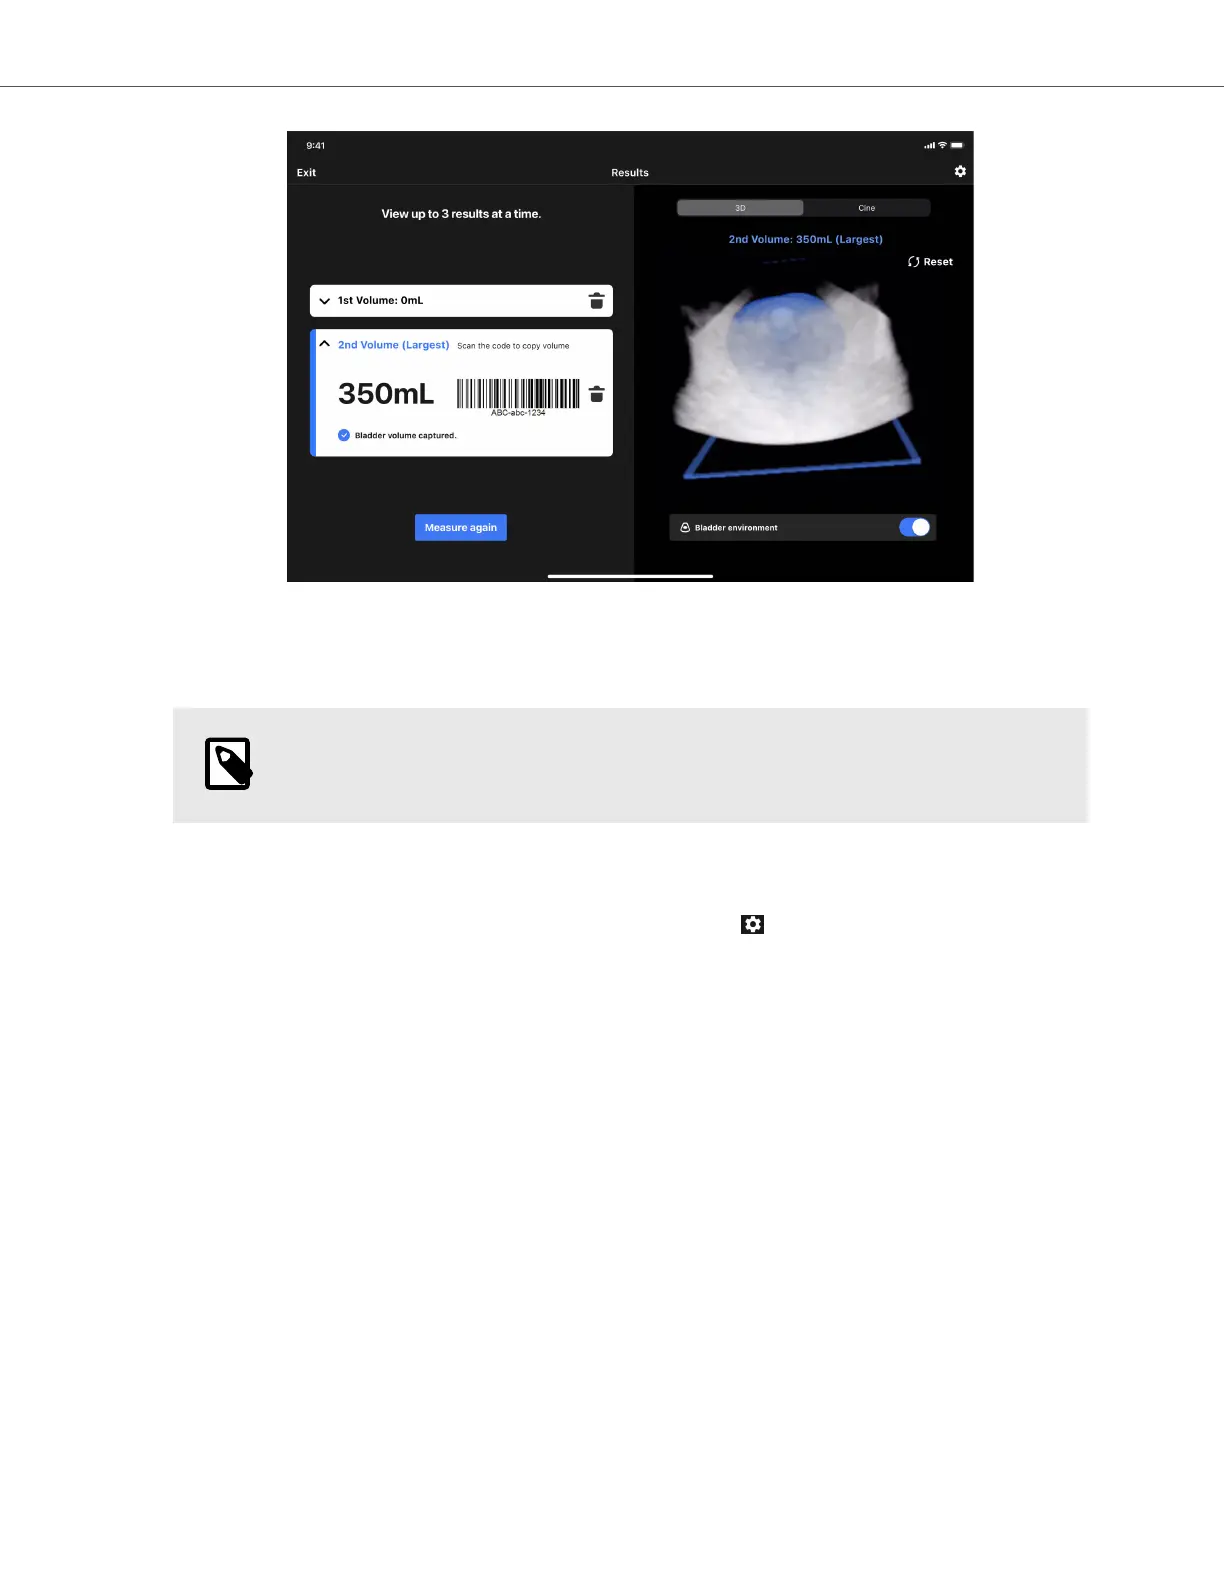
9. From the review screen, you can capture up to 3 measurements and use the maximum measurement, or exit
to the main screen and start a new scan session. Each of the measurements has a barcode associated with it,
which you can scan into an EHR system. The type of code can be configured in the settings menu.
10. Once done, you can exit the scan by tapping on “End Scan” in the top left corner of the screen.
NOTE
Once you end the scan, the images will be deleted permanently.
14.5. Available Settings
To access the settings menu, tap on the top-right corner (the gear symbol ). Under the settings menu, you can
access and adjust the following:
1. My Probe: Access to information about the probe’s serial number, probe’s model, etc.
2. Configure Barcode: Select the type of the barcode which encodes the volume measurement and can be
scanned into an EHR system. From the menu you can Enable or Disable the display of the barcode, as well as
select one of the following styles for the barcode:
a. Code 128
b. Aztec Code
c. Data Matrix
d. QR Code
3. Quick start page: configure if the Quick Start Page is displayed each time or if it is skipped upon start up.
4. Auto-freeze: Enable/disable the auto-freeze functionality, if enabled, when the probe detects that it has not
been scanning for >30 seconds (e.g. probe scanning in air), it freezes the screen to save the probe’s battery.
5. Contact Support: Contact Butterfly Network’s support team.
6. User manual: Access an e-copy of the user manual.
Available Settings
Using Butterfly iQ+ Bladder System 74