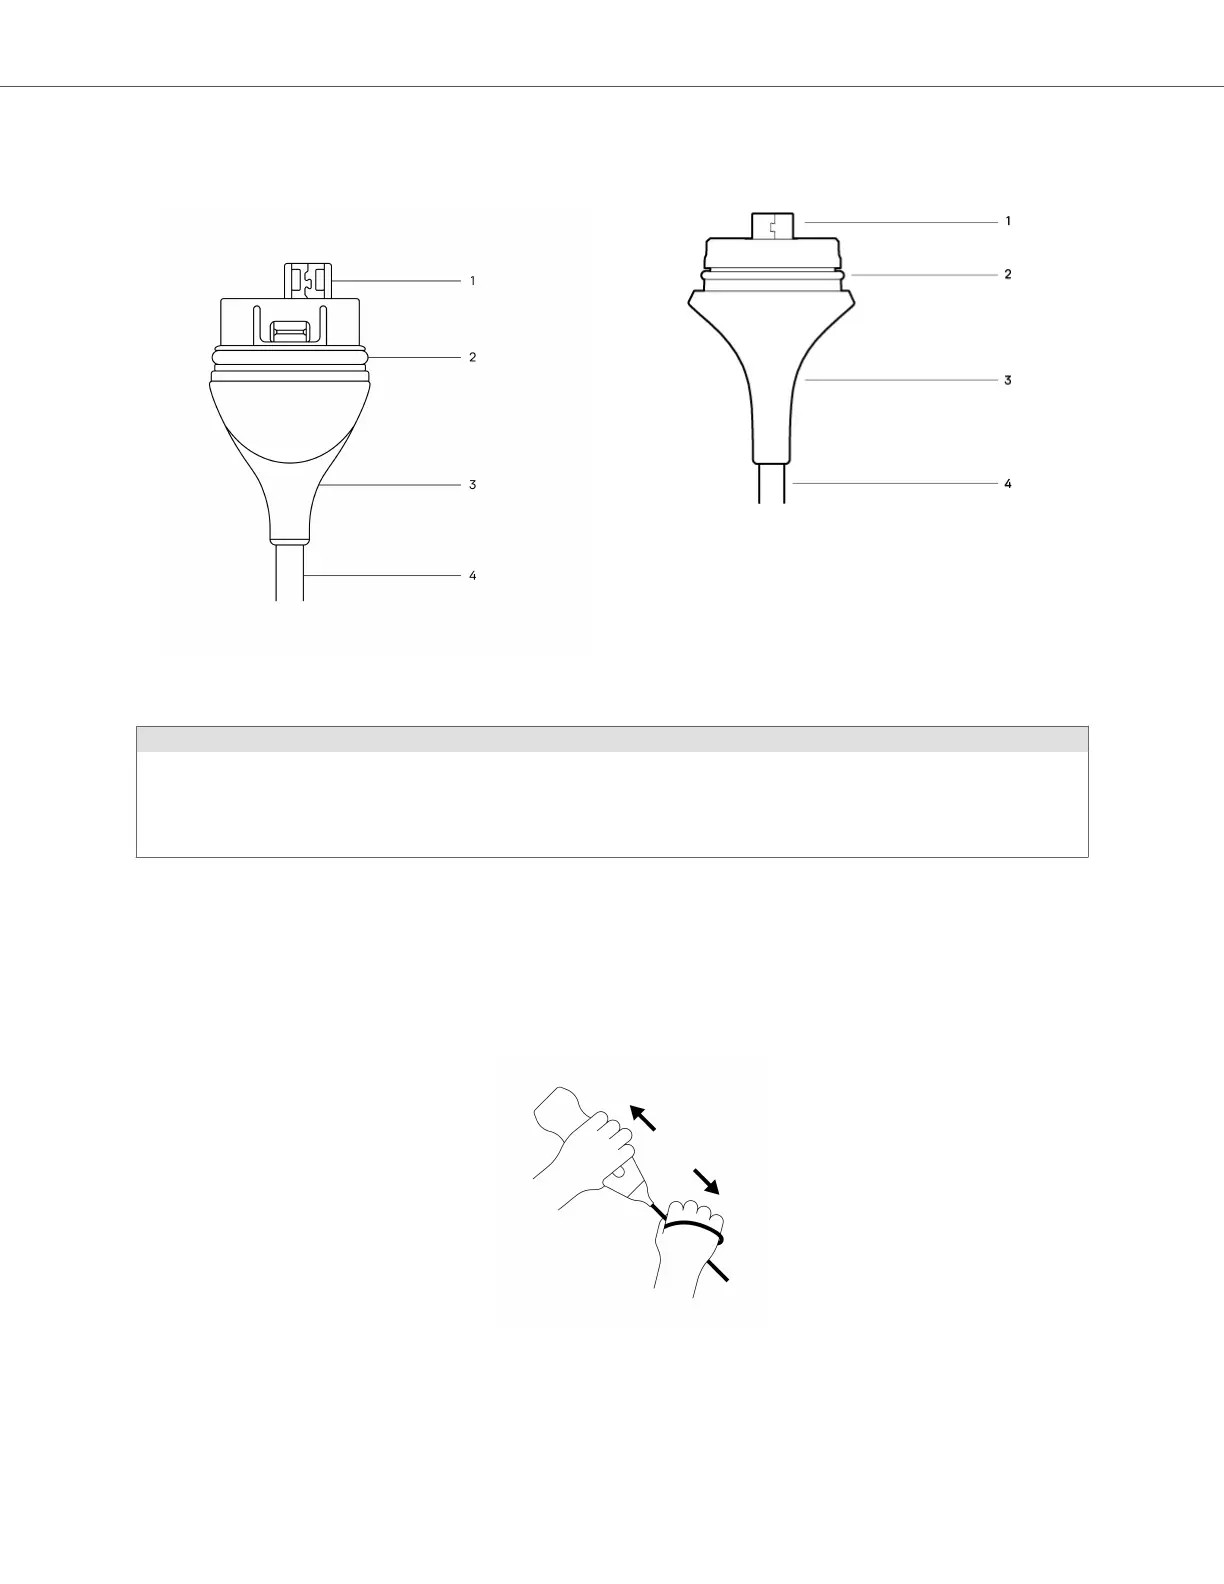
Figure 4. Butterfly iQ+/ iQ3 Cable Components
Butterfly iQ+ cable Butterfly iQ3 cable
Table 12. Cable components
Butterfly iQ+
Butterfly iQ3
1. USB Plug
2. O-Ring
3. Strain Relief
4. Cord
1. USB Plug
2. O-Ring
3. Strain Relief
4. Cord
Replacing the Butterfly iQ+ Cable
1. Remove the existing cable from the Butterfly iQ+ probe. Wrap the probe cable around your wrist while holding
the probe firmly in the other hand. Pull the two apart. Do not use tools to grab the strain relief or the cord, as
doing so might damage the cable.
Figure 5. Removing the Butterfly iQ+ cable
2. Align the connector and the probe, and push the cable firmly into the probe body. When the cable is fully
installed, it should be expected that there will be a small gap between the strain relief and the probe body.
Replacing the Butterfly iQ+/ iQ3 Cable
Maintenance 83