4
1502154 Rev D Housing Instructions 4-19
Housing Closing and Tightening
➤ To close the housing
1. Examine the rubber gasket and mesh seal. Remove all foreign materials that could interfere
with proper sealing. Dry any moist areas.
2. Close the lid until it is flush with the rubber gasket. Thread all six bolts finger tight to hold
the lid in place. Ensure that the lid seats evenly on the rubber gasket.
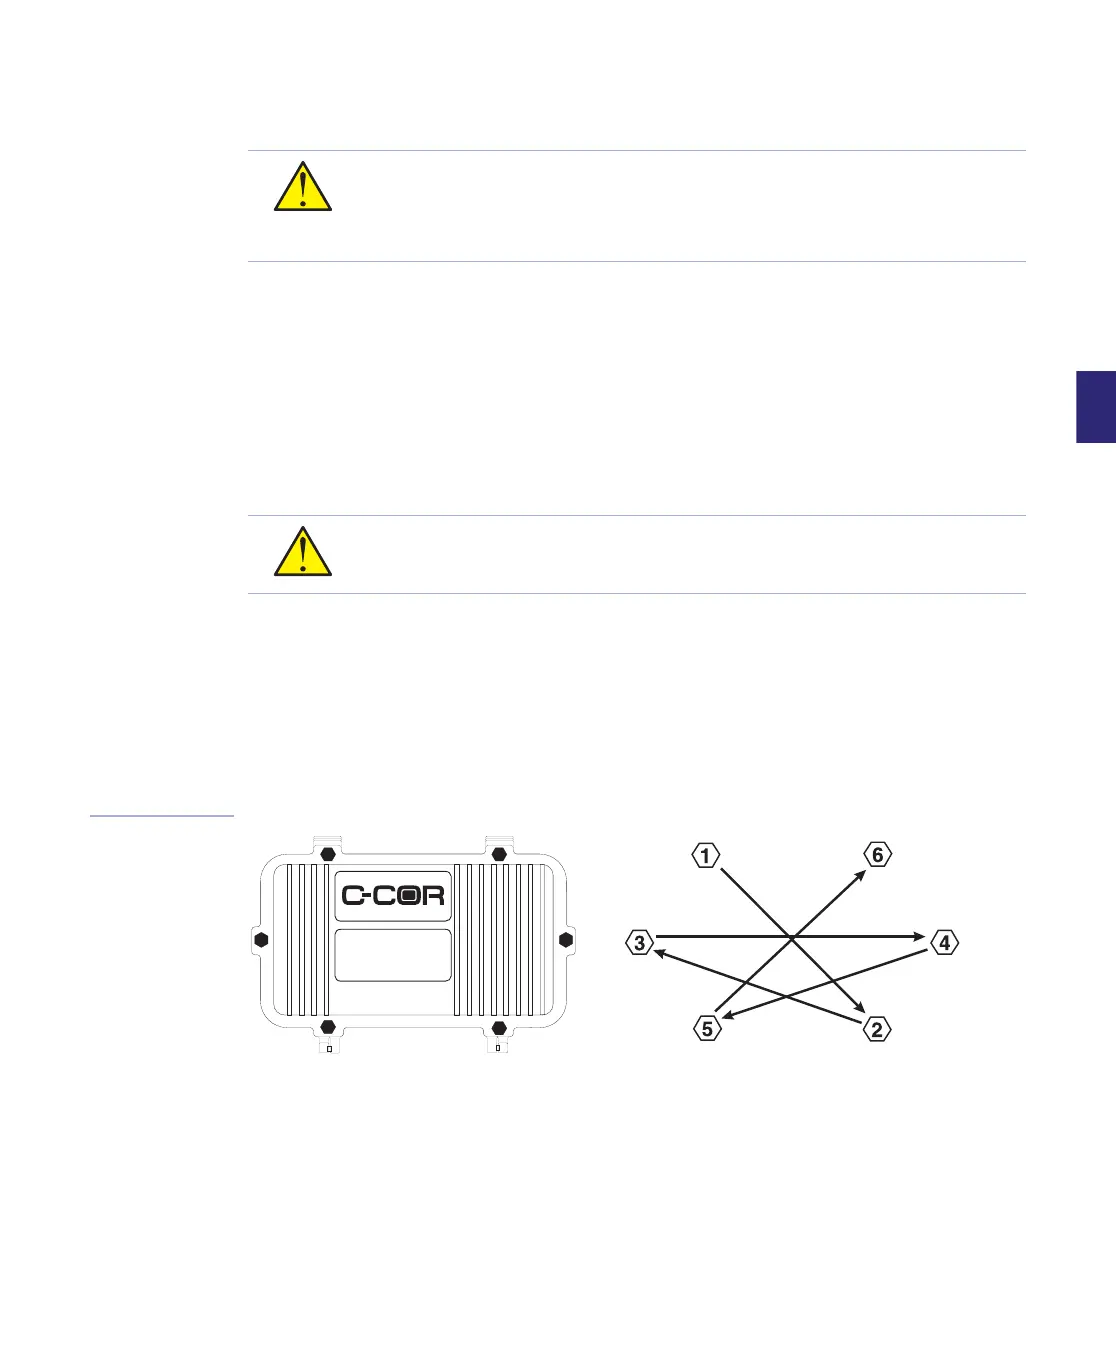
3. Tighten the lid bolts with a 7/16 inch (11mm) nutdriver, following the pattern shown in
Figure 4.12. Observe that the lid seats on the rubber gasket.
4. Continue the tightening sequence, torquing to between 35 and 40 in-lbs (4.0 and 4.5N·m)
with a torque wrench. The lid should now seat evenly and compress the rubber gasket to
create a weatherproof seal.
5. If the housing is equipped with external testpoints, install testpoint caps on all testpoints
and finger tighten. Use a wrench to tighten the caps an additional one quarter to one half
turn.
Figure 4.12
Housing Closing and
Tightening Sequence
CAUTION Ensure that no wire scraps or foreign materials remain within the
housing.
CAUTION Close the housing whenever it is left unattended to keep moisture out of
the unit and protect the network from RF interference.
CAUTION Do not torque the lid bolts more than 40 in-lbs (4.5 N·m).
Overtightening may warp the housing—allowing moisture to enter and damage the
components—or cause the threaded inserts to spin.