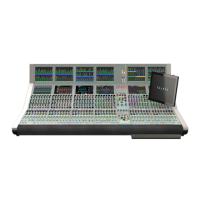
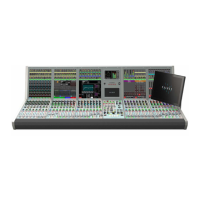
28 APOLLO Digital Broadcast Production Console
Control Surface
Any standard specification modern
PC running Windows 7 or Windows XP
Professional can be used as a backup
or replacement to connect to the
console and run the various Calrec
applications.
Connection by the PC's USB port, via the
supplied USB-Ethernet adaptor into a
spare POE switch P1 – P6 port ensures
the PC's network port is not damaged
by POE power. Note, not all available
USB-Ethernet adaptors have protection
against POE power, please refer to the
manufacturers specification if not using
ones supplied by Calrec.
Starting the Calrec Main Application on a
second PC will disable it on the first PC.
If using a laptop, or a different monitor
screen to the one supplied, a minimum
screen resolution of 1280 x 1024 is
required to display the Calrec software
correctly. Currently, such pixel height is
not widely supported by budget range
laptops. Using an alternative higher
resolution monitor such as 1920 x 1080
will display the Calrec software correctly
but the content will not scale up higher
than the 1280x1024 monitor size it was
designed for.
Calrec can supply pre-configured laptops
and replacement PC's ready to work
out of the box. The setup instructions
on this page can be used to configure
a non-Calrec supplied PC. Minimum
requirements for the PC are listed below.
FIGURE 2 - APOLLO BACKUP PC SETUP FOR WINDOWS
1. Download the latest version of Java Runtime Environment from www.java.com and
install it on the Backup PC.
2. Download the latest version of .net Framework from www.microsoft.com/net and
install it on the Backup PC.
3. Copy folder C:\Calrec from the Console PC onto the C: drive of the Backup PC.
4. Copy the folder Drivers\WINXP\32 BIT from the DUB E-100 Ethernet to USB
adaptor installation CD onto the C: drive of the Backup PC
5. Plug the USB connection of the DUB E-100 USB network adapter into the Backup
PC. Windows will automatically detect and start to install it. When prompted, select
Install from a specific location and browse to the location the drivers were copied
to in the previous step. Follow the on-screen prompts to complete the installation
6. Once the DUB E-100 has been successfully installed, go to
Start>Control Panel>Network Connections, right click on the connection
which uses the DUB E-100 and choose Rename. Rename the connection to
CalrecDeskConnection (case sensitive) and click OK.
7. Right click on CalrecDeskConnection and select Properties, this will open the
Network Properties window. Scroll down the list to find Internet Protocol (TCP/
IP) and double click on it. Select Use the following IP address. In the IP address
field enter xxx.yyy.135.0 (where xxx.yyy match the first two bytes of the console IP
address. If uncertain, open the Calrec program updater application which will list all
the IP's in the system. They all have the same first two bytes). In the Subnet Mask
field enter 255.255.0.0, leave all other fields blank. Click on OK. You will be returned
to the Network Properties window
8. Select the Advanced tab and click on the Windows Firewall Settings button. Turn
the firewall off and click OK to confirm, then OK again to exit Network Properties.
9. Navigate to C:\Calrec\WindowsService on the Backup PC and double click on
install.bat.
10. Go to Start>Control Panel>Administrative Tools>Services. Right click on
CalrecService and click Start.
11. Go to Start>Control Panel>System and open the Computer Name tab and make
a note of the full computer name. Go to Start>Run and type cmd then press
<enter>. This will open a DOS command prompt. At the prompt type c: and press
<enter>, then type Calrec\Utils\setcacls then press <enter>. When prompted
enter the full computer name and press <enter>.
12. Connect the DUB E-100 to the console using a spare panel port (P1-P6) on one of
the POE switches.
13. Navigate to C:\Calrec\ConsolePC on the Backup PC and double click on run.bat.
This will open the Main Application. Note that the Main Application and Program
Updater should not be running on the Console PC whilst the Backup PC is in use.
BACKUP PC
FIGURE 1 - MINIMUM PC SPEC