• If the message "BUSY" does not
disappear, disconnect the
USB
cable
and
restore the connection after a short
while.
Print
Orders
To
cancel the print order, set
(.T)
the
number
of
copies
to
O.
4 Repeat steps 1-3 to mark
additional images with print orders
or press [FUNC.] twice to close the
menu.
(CD
22)
• Depending
on
the connected printer,
you
can
change some print settings before
step 3
(CD
61).
•
Cancel
Printing/Printing
Errors
(OJ
63).
•
Restarting
Printing:
Open the print settings
menu
as
explained
in
step 2.
In
the print
settings
menu,
select
[RESUME]""
and
CD
NOTES
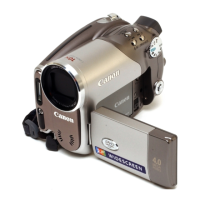
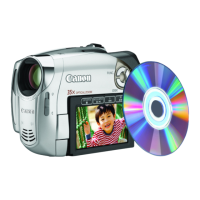
1 Connect the camcorder to the
printer using the supplied USB
cable.
Refer
to
PC Connection Diagram
(OJ
68).
2 Open the print settings menu.
[FUNC.] 0
[m
MENU] 0
[
..
~
PRINT]
The print settings menu appears.
The error message "SET
~
PRINT
ORDER" appears if you connect a
printer with direct print function and
select [
..
~
PRINT] without having set
any print orders beforehand.
3 Select (..... , ...
~)
[PRINn
and
press
~.
Printing starts. The print settings
menu disappears when the printing
is
completed.
FUNC.
(
CD
24)
Printing
the
Still
Images
Marked
with
Print
Orders
FUNC.
OJ
FONC.
(
CD
23)
Selecting
Still
Images
for
Printing
(Print
Order)
POINTS
TO
CHECK
Set the print orders before connecting
the USB cable
to
the camcorder.
[FUNC.] 0
[~
PRINT ORDER] 0 Press
00
;!Ii[QJ:
The image selection screen
appears.
You
can mark
in
advance the still images
you want
to
print and set the desired
number
of
copies as a print order. Later,
you can easily print out the print orders
by connecting the camcorder
to
a
PictBridge-compatible printer
(OJ
61).
You
can set print orders for up
to
998
still images.
~
FROM
THE
IMAGE
SELECTION
SCREEN
,.
1 Select (...~ ) the still image
you
want to mark with a print order.
2 Press
00
to set the print order.
The number of copies appears
in
orange
in
the box next
to
the print
order symbol
~.
3 Set
(.T)
the number of copies
desired and press
00.
64
•
Photos