..
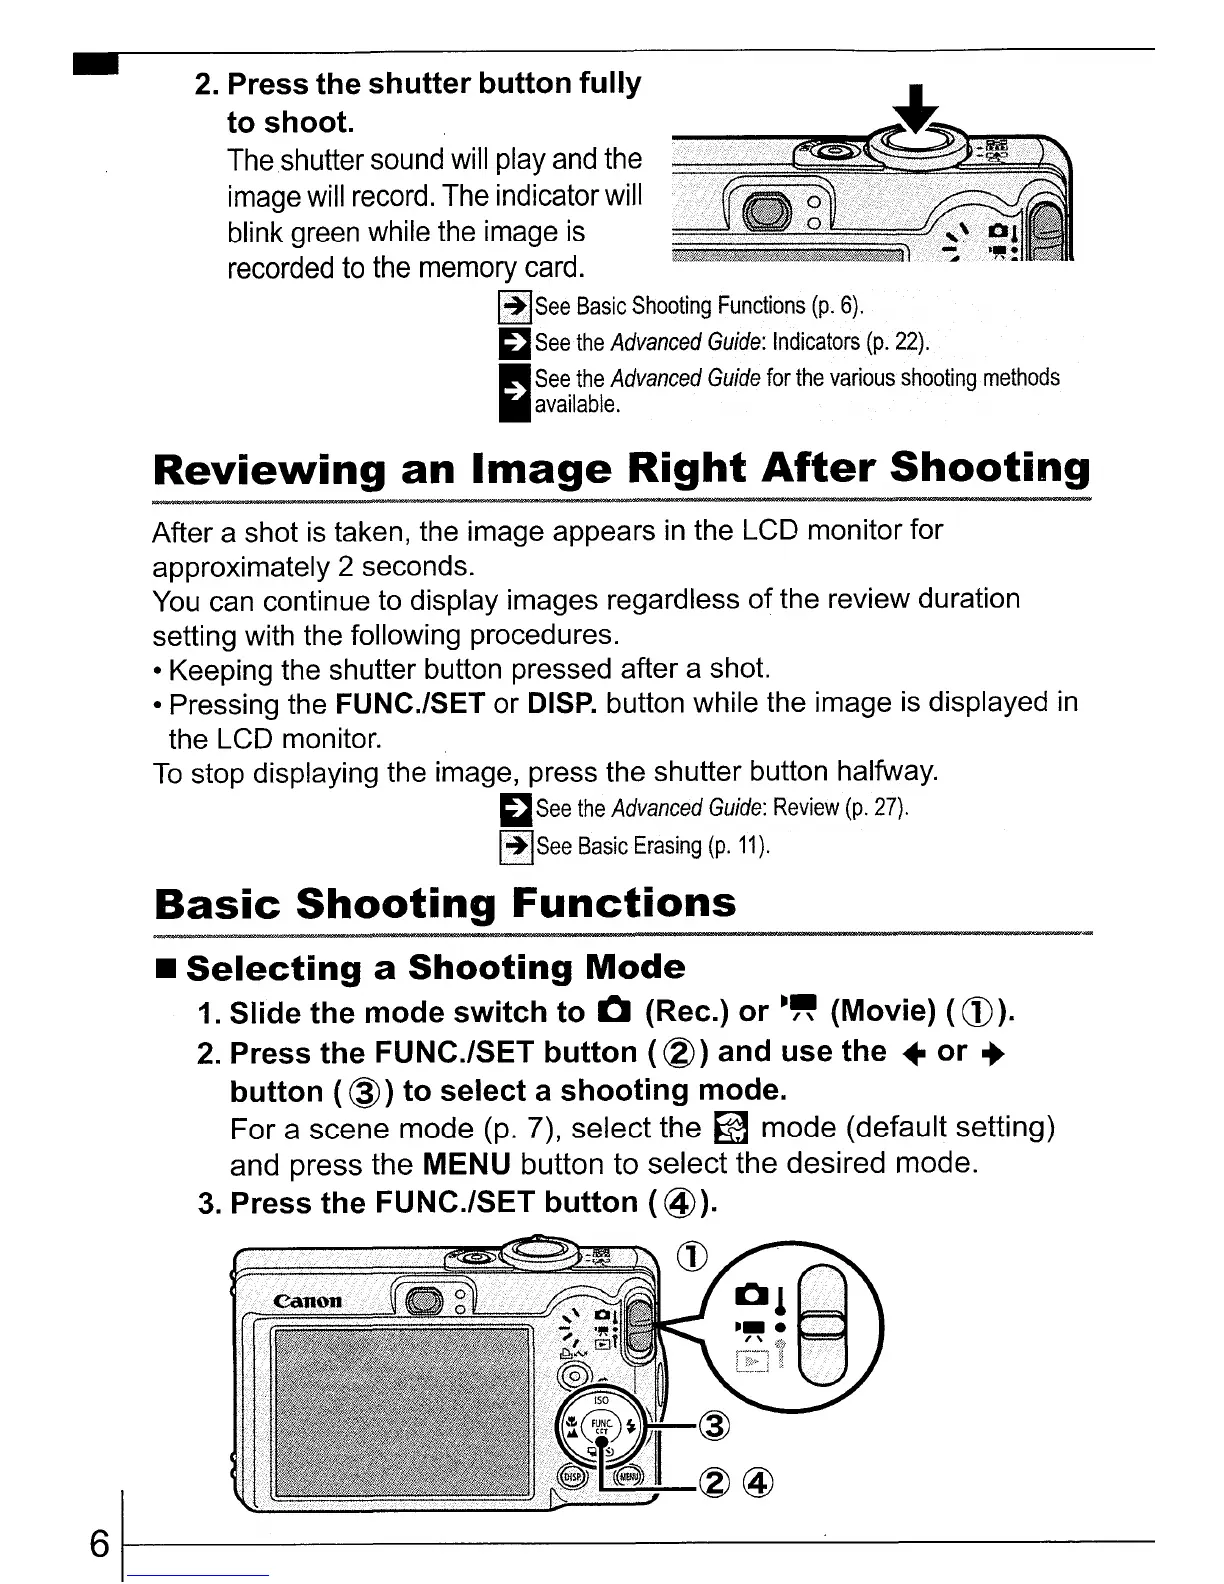
2.
Press
the
shutter
button
fully
to
shoot.
Theshutter sound will
play
and the
image will record. The indicator will
blink green while the image
is
recorded to the memory card.
~See
Basic
Shooting
Functions
(p.
6).
~See
the
Advanced
Guide:
Indicators
(p.
22)
.
..
See
the
Advanced
Guide
for
the
various
shooting
methods
II
available.
Reviewing
an
Image
Right
After
Shooting
After a shot is taken, the image appears
in
the LCD monitor for
approximately 2 seconds.
You can continue to display images regardless
of
the review duration
setting with the following procedures.
• Keeping the shutter button pressed after a shot.
• Pressing the FUNC./SET or DISP. button while the image is displayed
in
the LCD monitor.
To
stop displaying the image, press the shutter button halfway.
~
See
the
Advanced
Guide:
Review
(p.
27).
[!ISee
Basic
Erasing
(p.
11).
Basic
Shooting
Functions
•
Selecting
a
Shooting
Mode
1. Slide
the
mode
switch
to
&:I
(Rec.)
or
-"
(Movie) (
CD).
2.
Press
the
FUNC./SET
button
(
®)
and
use
the
•
or
..
button
(
@)
to
select
a
shooting
mode.
For a scene mode
(p.
7), select the
~
mode (default setting)
and press the MENU button to select the desired mode.
3.
Press
the
FUNC./SET
button
(@).
~~~~~~~CD
61----------------------------