1 x Door Wall Window Panel FSC 1-1/4 x 36 x 54-1/8”
Wood Parts
061
Hardware
8 x #12 x 3/4” Pan Screw
S8
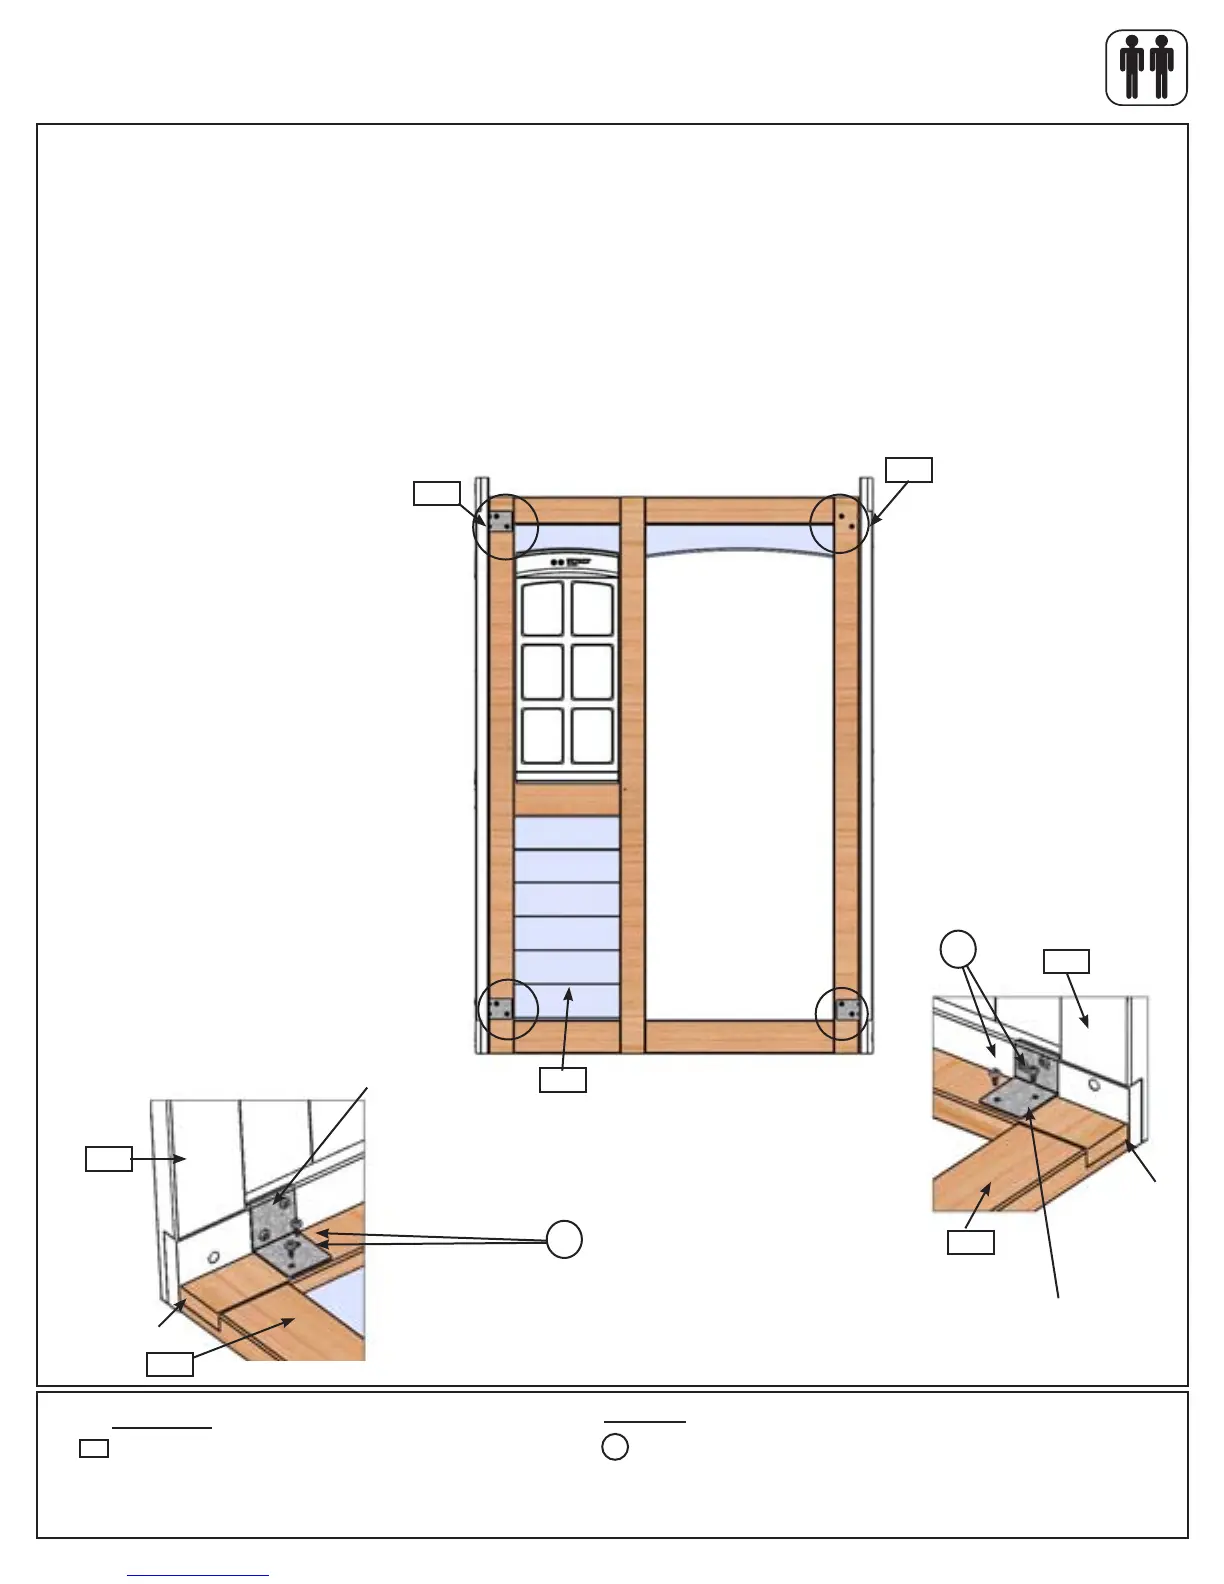
Step 6: Door Wall Assembly
Part 3
E: Lay (061) Door Wall Window Panel on the ground, then with a helper hold (042) Chalkwall Panel up against
the right side edge of (061) Door Wall Window Panel so the bottom edges are ush. (g. 6.5)
F: Attach both Corner Panel Brackets to (061) Door Wall Window Panel with 2 (S8) #12 x 3/4” Pan Screws per
bracket. (g. 6.5 and 6.7)
G: With a helper hold (060) Narrow Half Window Panel up against the left side edge of (061) Door Wall Window
Panel so the bottom edges are ush. Attach both Corner Panel Brackets to (061) Door Wall Window Panel with
2 (S8) #12 x 3/4” Pan Screws per bracket. (g. 6.5 and 6.6)
Fig. 6.5
061
Corner Panel Bracket
Fig. 6.6
S8
042
060
060
Inside View
Fig. 6.7
Corner Panel Bracket
S8
Flush
061
042
061
Flush
39 support@cedarsummitplay.com