Overview of Screens Chore-Tronics® 2 Control
48
MT1843B
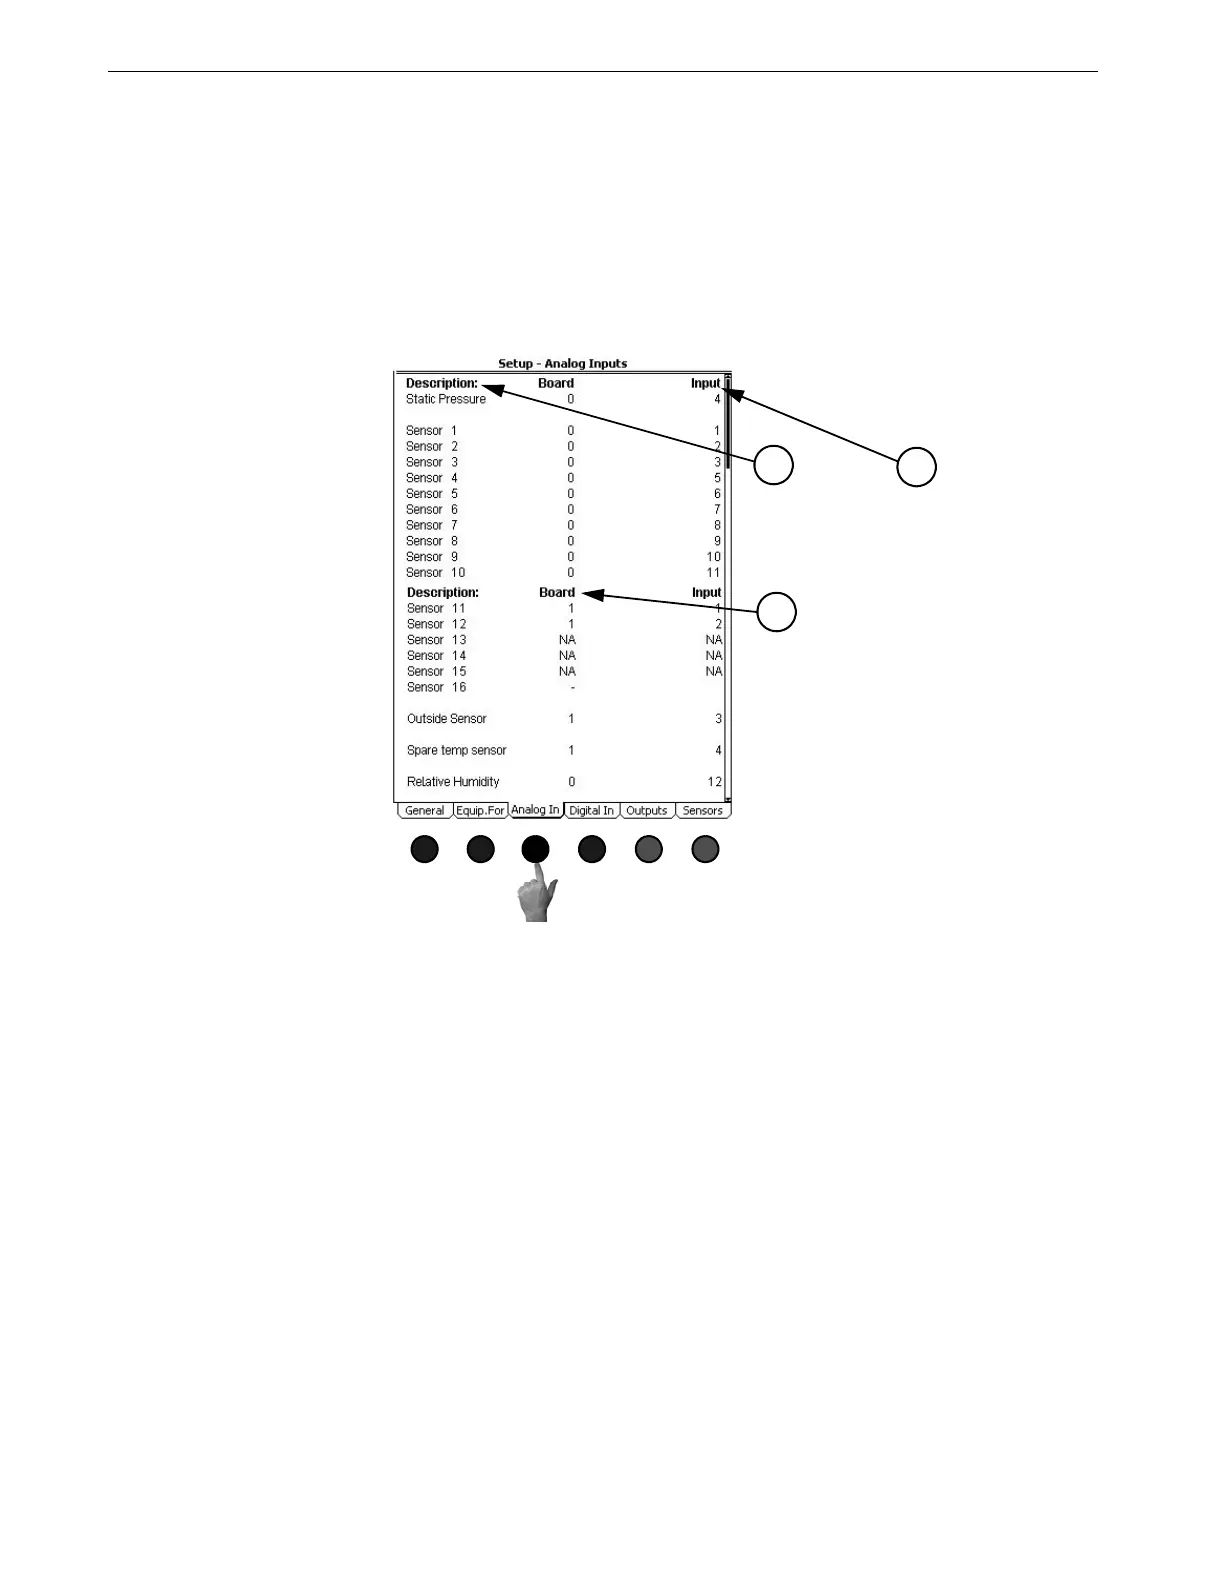
(Setup-General Screen) Analog Inputs Tab
To access the Setup-General Analog Inputs Screen, press the Tab Key under "Analog
In". In this screen the Control is told what analog Inputs (temperature sensors,
relative humidity sensor, and potentiometers) are connected to the Control and where
those Inputs are connected to the Control. The static pressure sensor and sensors 1-3
come from the factory pre-assigned to the IO Board Analog Inputs 1-4. All other
Inputs that are connected to the Control must be assigned. It is highly recommended
that the Input decal Located inside the main box of the Control be completed before
entering information in this screen.
1. Description- The description is the name of the input. When a sensor is assigned
to a board and an input on that board, then the next sensor number will appear in
the list. For example, when sensor 4 is assigned to the IO board Analog Input
#5, then sensor 5 will appear in the list as the next available sensor. If it is
desired to skip a sensor and move to the next sensor in the list, enter NA (not
assigned) on the sensor that needs to be skipped and the next sensor will appear
in the list.
2. Board- This is the number of the board where the sensor is connected. Board
number 0 is the IO Board. If the sensor is connected to an additional analog
input board, then the board number matches the address of the add on board (see
the installation section of this manual).
3. Input- This is the input number that the sensor is connected to on the board. For
the IO Board the input number will be 1 thru 12. If the sensor is connected to an
additional analog input board then the input number will be 1-4.
MT1842-040 10/04
1
2
3
Figure 61. Setup-General: Analog In Tab