Chore-Tronics® 2 Control Overview of Screens
MT1843B
51
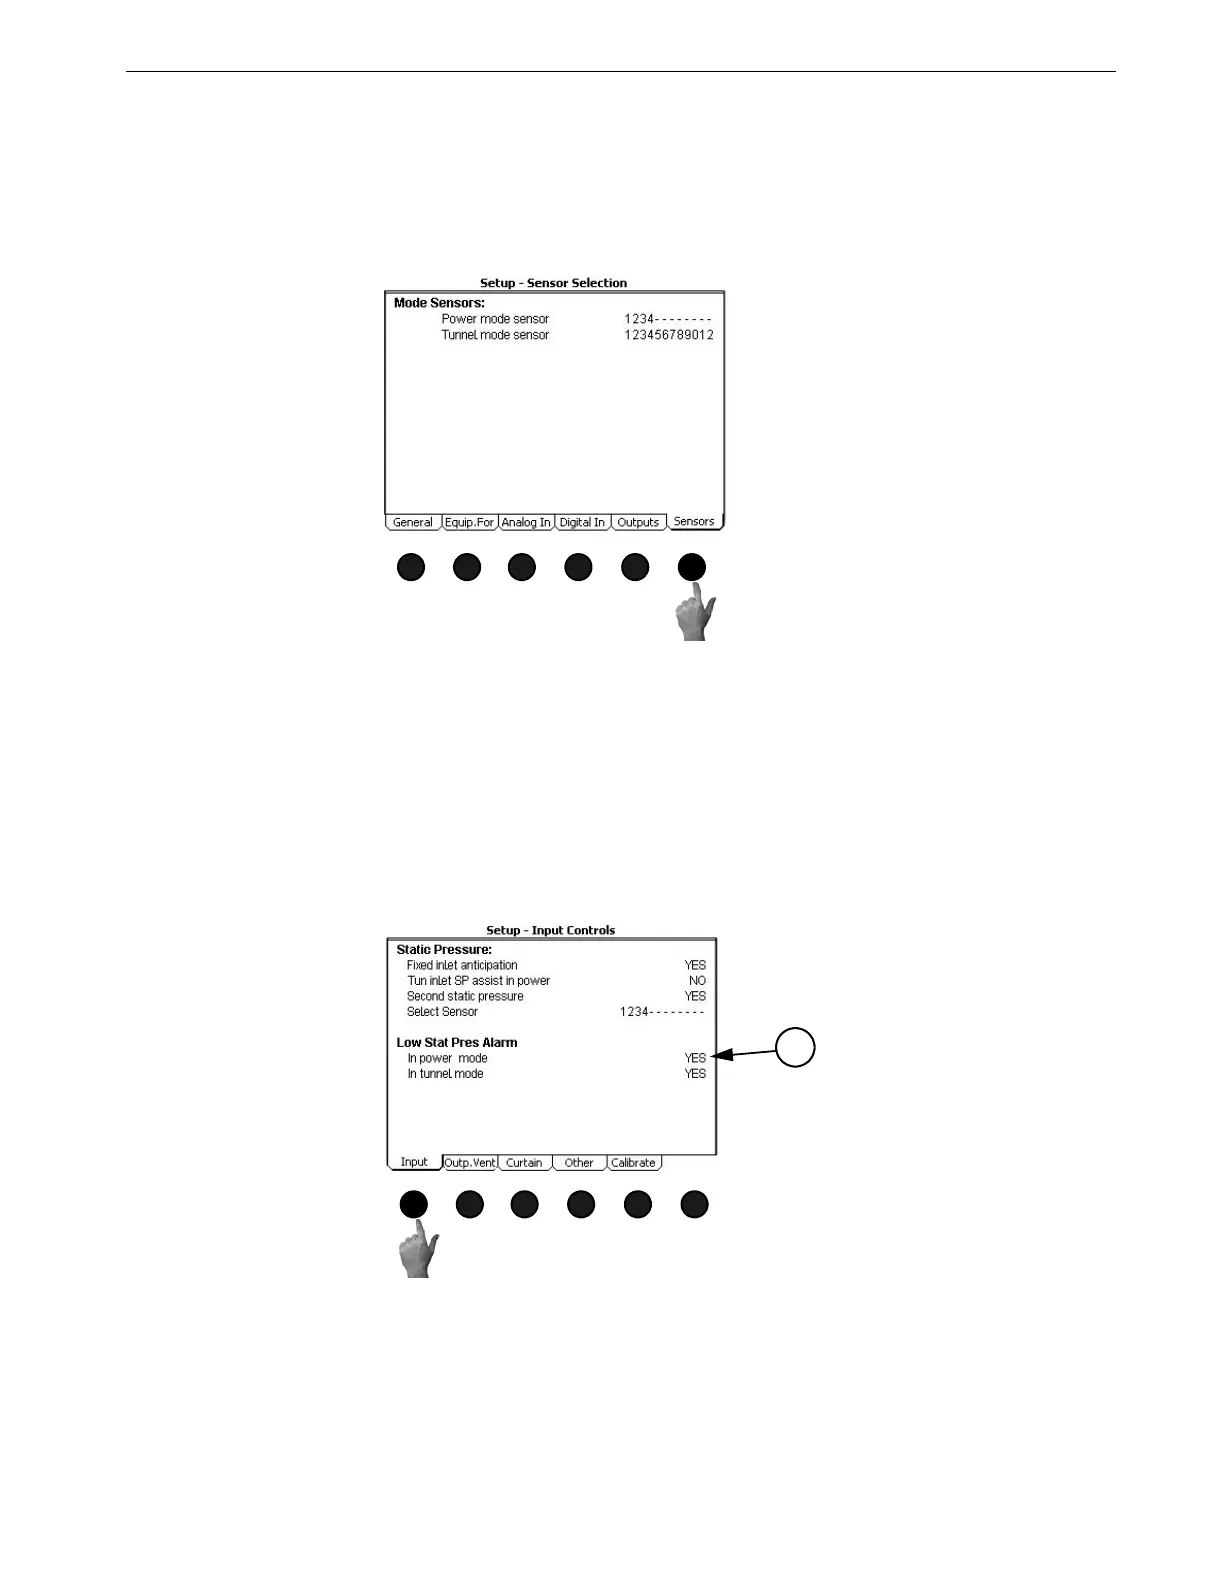
(Setup-General Screen) Sensors Tab
To access the Setup-General "Sensors" Screen, press the Tab Key under "Sensors".
The Sensor Selection screen is where the power, natural (if used), and tunnel (if used)
Mode Sensors are assigned. If Natural ventilation is used, the Temperature Sensors
that control the Main Curtains and Tunnel Curtain in Natural mode are assigned here.
Screen 14: Setup-Control
(Setup-Control Screen) Input Tab
Once all information has been entered in screen 13, Open screen 14 and press the Tab
Key under "Input". In this screen, the user chooses what static pressure options to use.
Answer YES for every option that is desired. For details on the functionality of the
different static pressure options see the Screen 11 "Static Pressure" section of this
manual.
1. Low Static Pressure Alarm: Here it is possible to disable the low static pressure
alarms in the Power mode, the Tunnel mode, or both. Answer YES for every
mode that the low static pressure needs to be disabled.
MT1842-043 10/04
Figure 64. Setup-General Screen: Sensors Tab
MT1842-049 10/04
1
Figure 65. Setup-Control Screen: Input Tab