Chore-Tronics® 2 Control Control Installation
MT1843B
85
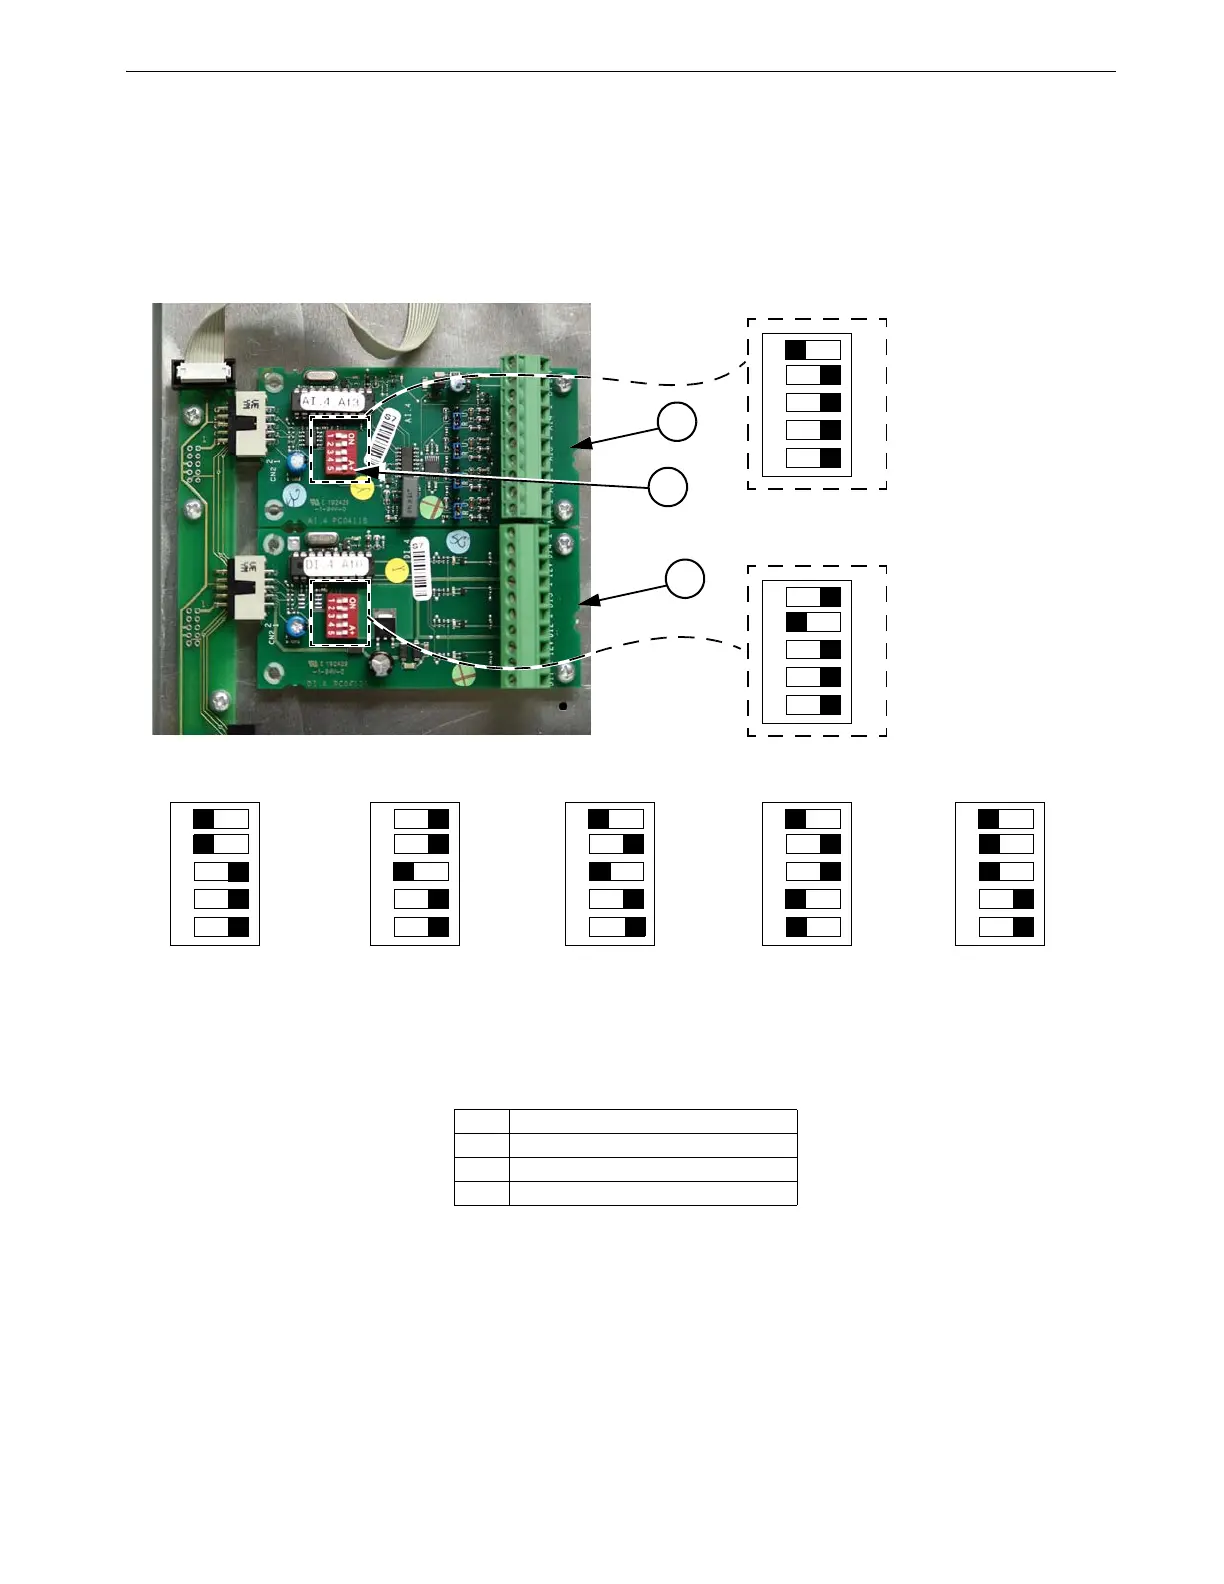
Expansion Board Dip Switch Setting- Each Expansion Board installed must have
the DIP switches set properly. These DIP switches are used to assign a number to
each Expansion Board so the Control can identify each Board. To assign the first
Expansion Board installed to #1, set the DIP switches for Expansion Board 1 so that
the number one switch is in the "OFF" position and the rest of the switches are in the
"ON" position. See Figure 99 below for Dip Switch settings for all seven Expansion
Boards. Note: Only the first two Expansion Boards are shown.
ON
12 3 4 52
1
2
ON
123 4 52
Expansion Board #1
Expansion Board #2
Item Description
1 Expansion Board #1
2 Expansion Board #2
3 Expansion Board Dip Switch
ON
123 4 52
ON
123 4 52
ON
123 4 52
ON
123 4 52
ON
123 4 52
Expansion
Expansion Expansion Expansion
Expansion
3
Board #3
Board #4
Figure 99. Expansion Board Dip Switch Settings
Board #5 Board #6
Board #7