5-43
Cisco 7600 Series Router Installation Guide
OL-4503-26
Chapter 5 Removal and Replacement Procedures
Removing and Replacing the Power Supply
• Installing a PWR-1900-DC Power Supply in a Cisco 7606 Router, page 5-51
• Installing a PWR-2700-DC Power Supply in a Cisco 7606 Router, page 5-53
• Installing a PWR-2700-DC Power Supply in a Cisco 7606-S Router, page 5-57
• Installing a WS-CDC-2500W Power Supply in a Cisco 7609 Router, page 5-65
• Installing a WS-CDC-2500W Power Supply in a Cisco 7613 Router, page 5-67
• Installing a PWR-4000-DC Power Supply in a Cisco 7609 Router or a Cisco 7609-S Router, page
5-70
• Installing a PWR-6000-DC Power Supply in a Cisco 7609 or a Cisco 7609-S Router, page 5-80
• Installing a PWR-4000-DC Power Supply in a Cisco 7613 Router, page 5-91
• Installing a PWR-6000-DC Power Supply in a Cisco 7613 Router, page 5-99
• For information on installing a 4500W DC for 7606-S, see Appendix E, “Cisco 7606-S DC Power
Supply Configurations.”
Note The DC return is to remain isolated from the system frame and chassis (DC-I).
Installing a PWR-950-DC Power Supply in a Cisco 7603 Router
Warning
Before performing any of the following procedures, ensure that power is removed from the DC circuit.
Follow these steps to install a DC-input power supply:
Step 1 Ensure that the system (earth) ground connection has been made. For ground connection installation
instructions, see the
“System Ground Connection” section on page 3-19.
Step 2 Verify that power is off to the DC circuit connected to the DC PEM for the power supply you are
installing.
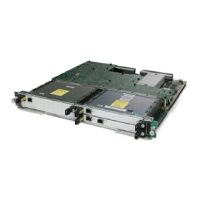
Step 3 Grasp the power supply handle with one hand. Place your other hand underneath the power supply, as
shown in
Figure 5-48. Slide the power supply into the power supply bay. Make sure that the power
supply is fully seated in the bay.