An audible click confirms that the AP is securely locked to the mounting bracket.
The AP should be mounted with the status LED on the base facing downwards.
Note
Step 6 Tighten the mounting plate security screw.
Step 7 Proceed with installing antennas, connecting the data cables, grounding the AP, powering, and configuring
the AP.
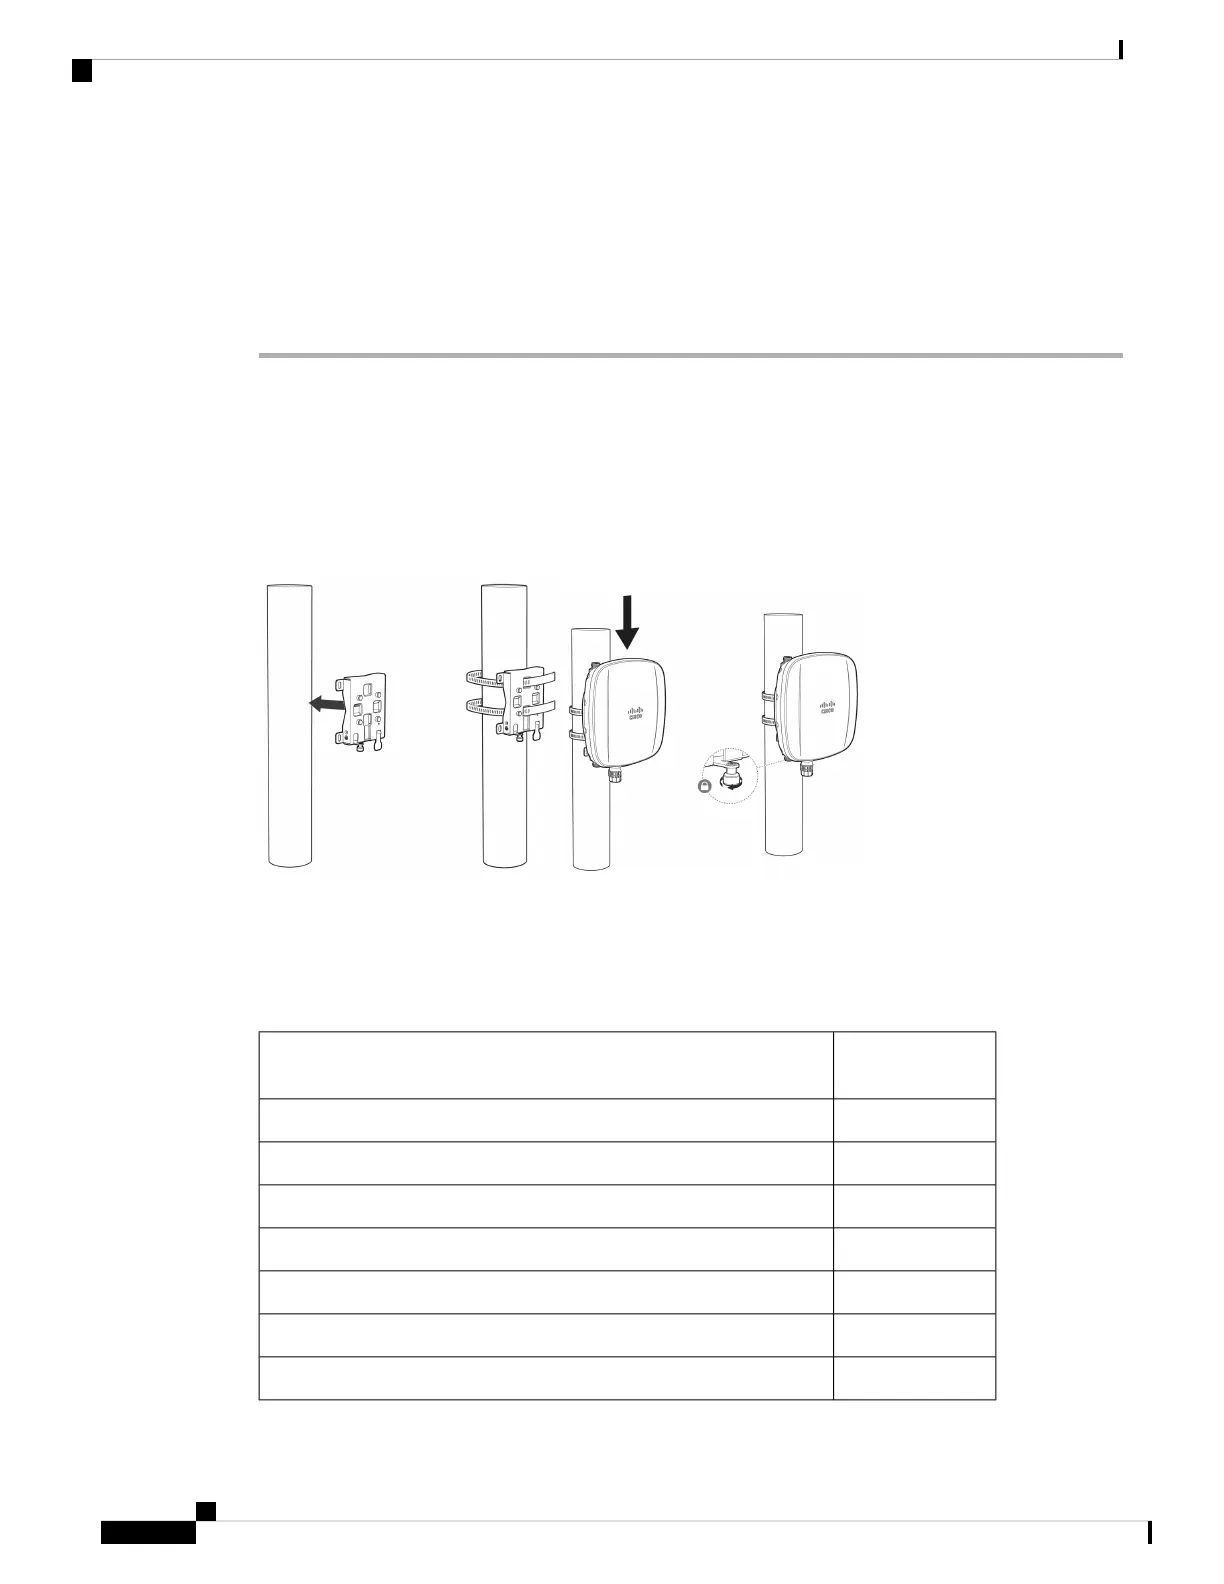
Pole Mounting the AP using the Meraki Kit
The MA-MNT-MR-16 mounting kit contains a mounting bracket used for wall mounting and pole mounting.
This kit can be used to install the AP on a pole or mast. It supports metal, wood, or fiberglass poles of 2 to
3.9 inch (51 to 99.06 mm) in diameter.
Figure 8: AP Mounted on a Pole
Before you begin
Ensure that you have the following materials before beginning to mount the AP to a pole:
Table 6: Materials Needed to Mount the AP on a Vertical Pole using MA-MNT-MR-16 Kit
Supplied in the
Kit?
Materials Required
YesOne wall mount bracket
YesTwo stainless steel band clamps (adjustable 2 to 5 inch (51 to 127 mm)
No10–mm box-end wrench
NoA flathead screwdriver
NoOutdoor-rated shielded Ethernet cable
YesGround lug (provided with the access point)
NoGround block and rod
Cisco Catalyst Wireless 9163E Access Point Hardware Installation and Deployment Guide
22
Installing the Access Point
Pole Mounting the AP using the Meraki Kit