3-3
Installation Guide for Cisco Secure ACS Solution Engine 4.1
OL-9969-03
Chapter 3 Installing and Configuring Cisco Secure ACS Solution Engine 4.1
Installing the Cisco 1113 in a Rack
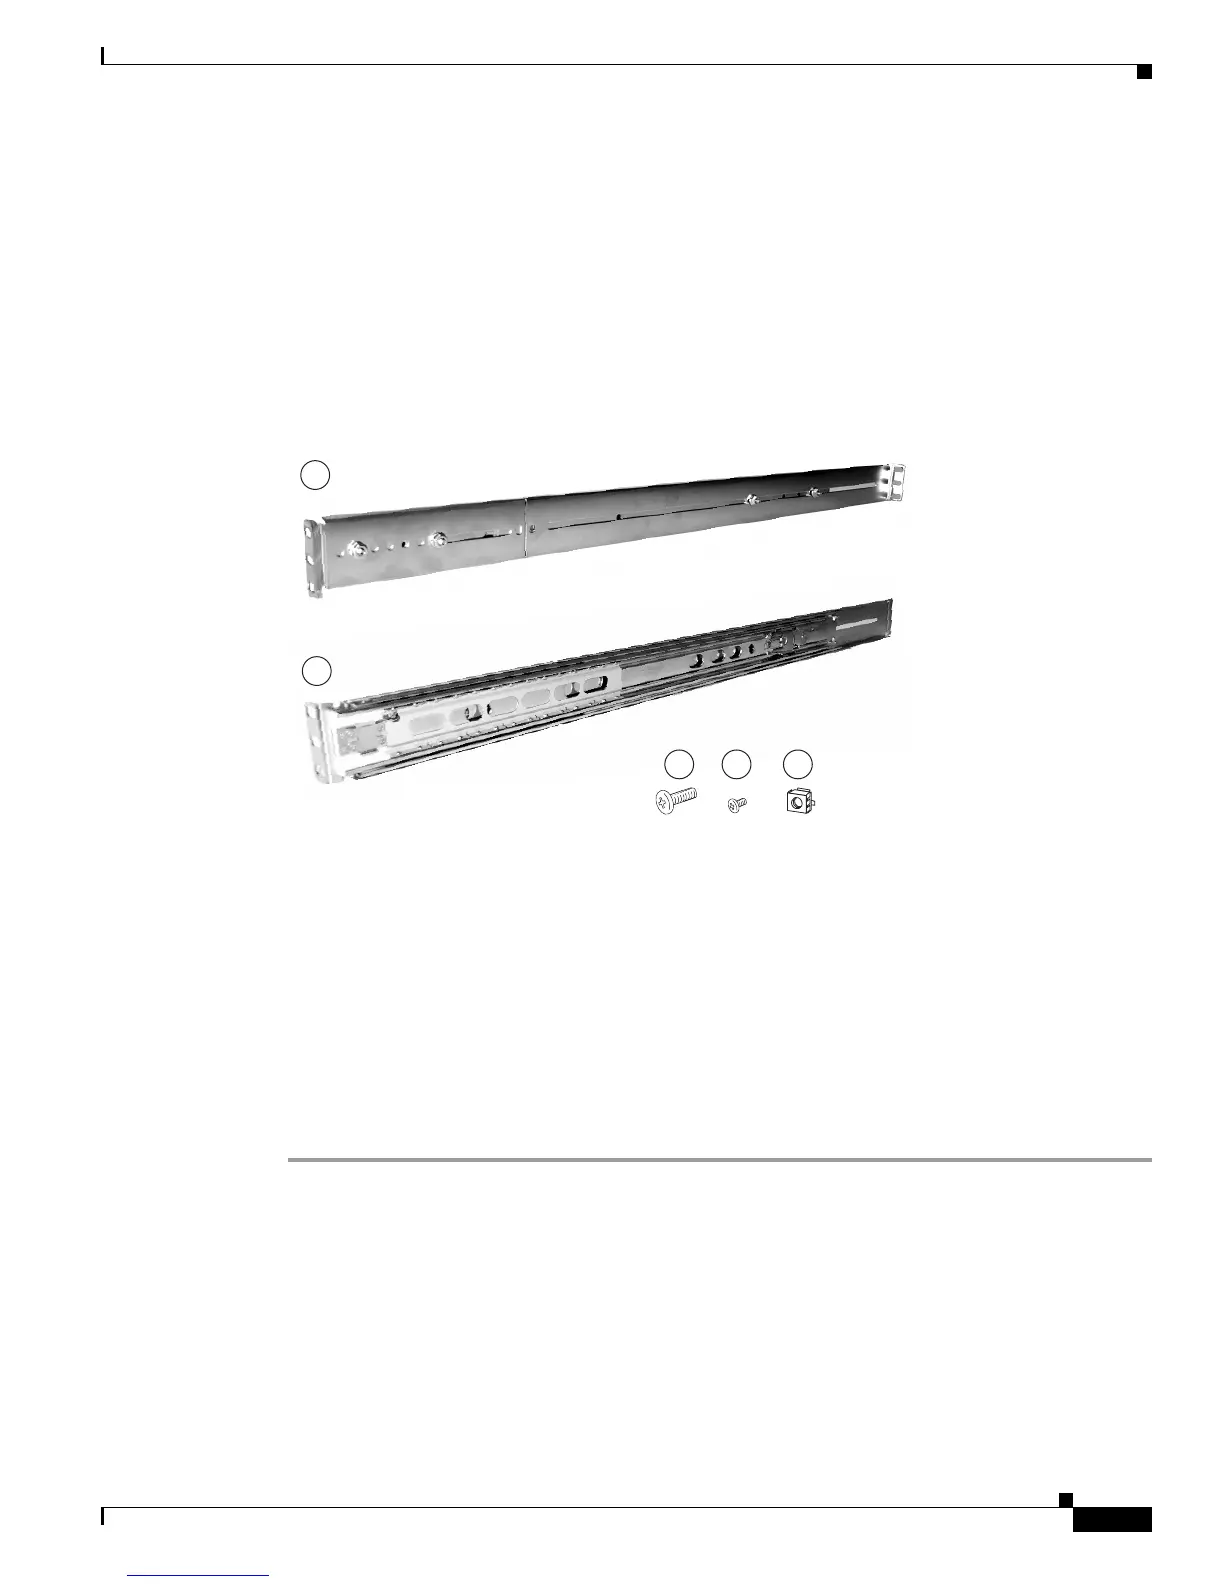
The server can be installed in a system 1U rack. The rack rail components are as follows (numbers in
parentheses refer to
Figure 3-1):
• 2 telescopic rails (1, 2)
• Bag containing:
–
8 Round head screws with washer (3)
–
2 Round head screws (4)
–
10 Cage nuts (5)
Figure 3-1 Rack Rail Components
To install the Cisco 1113 in a rack:
1. Attach the chassis rail mount to the chassis (see Attaching the Chassis Rail Mount, page 3-3).
2. Attach the server rail to the rack assembly (see Attaching the Server Rail, page 3-6).
3. Slide the chassis on to the rack assembly (see Sliding Chassis On the Rack, page 3-8).
Attaching the Chassis Rail Mount
You must first remove the chassis rail mount section from the server rail and attach it to the chassis.
To attach the chassis rail mount:
Step 1 See Figure 3-2. Extend the server rail as far as it will go. When fully extended, the server rail locks into
the extended position.