CHAPTER7
INSPEC110N AND :MAINTENANCE
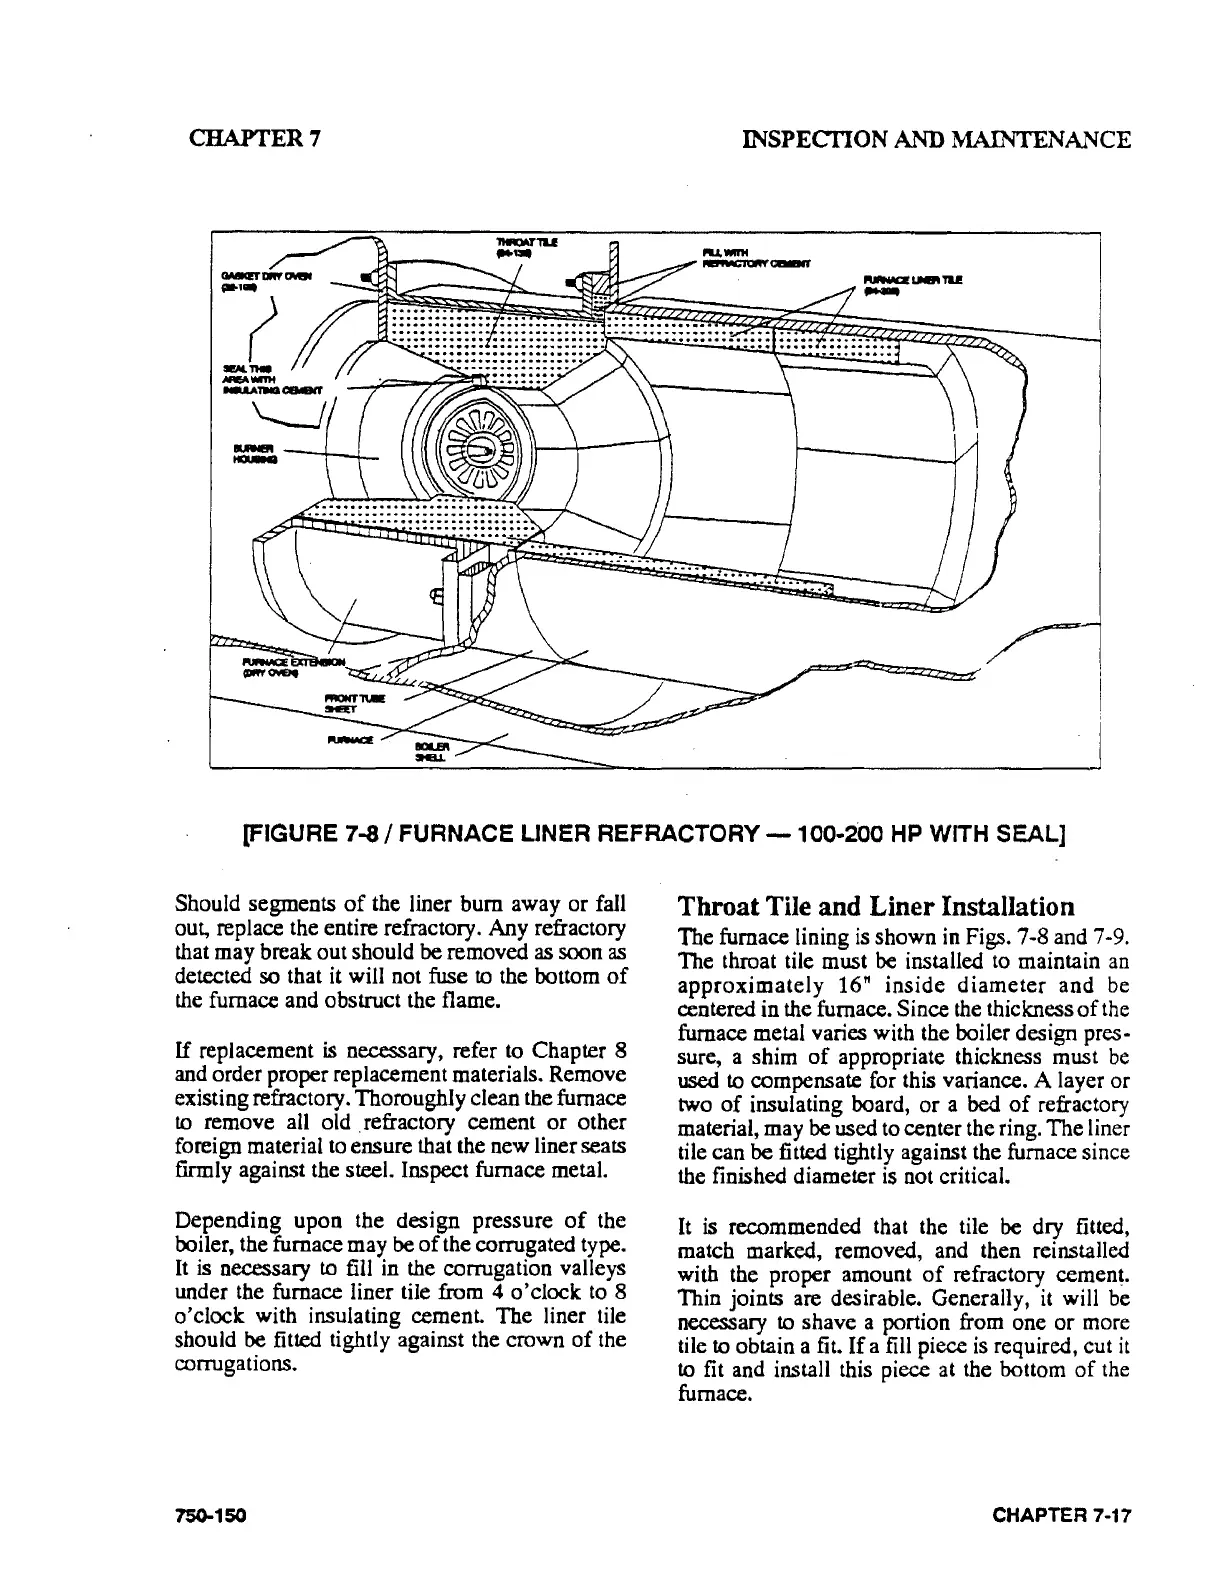
(FIGURE 7-8 I FURNACE
LJNER
REFRACTORY-
100-200
HP
WITH SEAL]
Should segments
of
the liner bum away or
fall
out, replace the entire refractory. Any refractory
that may break out should
be removed
as
soon
as
detected so that
it
will not fuse to the bottom
of
the
furnace and obstruct the flame.
If
replacement
is
necessary, refer
to
Chapter 8
and
order proper replacement materials. Remove
existing refractory. Thoroughly clean the furnace
to remove all old . refractory cement or other
foreign material
to
ensure that the new liner seats
firmly against the steel. Inspect furnace metal.
Depending upon the design pressure
of
the
ooiler, the furnace may be
of
the corrugated type.
It
is
necessary to fill in
the
corrugation valleys
under the furnace liner tile from 4 o'clock
to
8
o'clock with insulating cement. The liner tile
should
be fitted tightly against the crown
of
the
corrugations.
750-150
Throat Tile and Liner Installation
The furnace lining
is
shown
in
Figs. 7-8 and 7-9.
The throat tile must
be
installed
to
maintain
an
approximately 16" inside diameter and
be
centered in
the
furnace. Since
the
thickness
of
the
furnace metal varies with the boiler design pres·
sure, a shim
of
appropriate thickness must
be
used to compensate
for
this variance. A layer or
two
of
insulating board, or a bed
of
refractory
material, may
be
used
to
center the ring. The liner
tile can
be
fitted tightly against the furnace since
the
finished diameter
is
not critical.
It
is
recommended that
the
tile
be
dry fitted,
match marked, removed, and then reinstalled
with the proper amount
of
refractory
ce~en~.
Thin joints are desirable. Generally,
it
will
be
necessary to shave a portion from one or more
tile
to obtain a
fit.
If a
fill
piece
is
required, cut
it
to fit
and
install this piece
at
the bottom
of
the
furnace.
CHAPTER 7 ·17