Chapter 4: Using the web interface
98-129217-D Setting up the interfaces 88
Connecting and configuring IP handsets
If you want to view or change the settings for the new IP handset, do as follows:
1. Connect the IP handset to one of the LAN ports of the terminal.
If it is a Thrane IP Handset, the handset starts up and is automatically registered and
assigned the first available number.
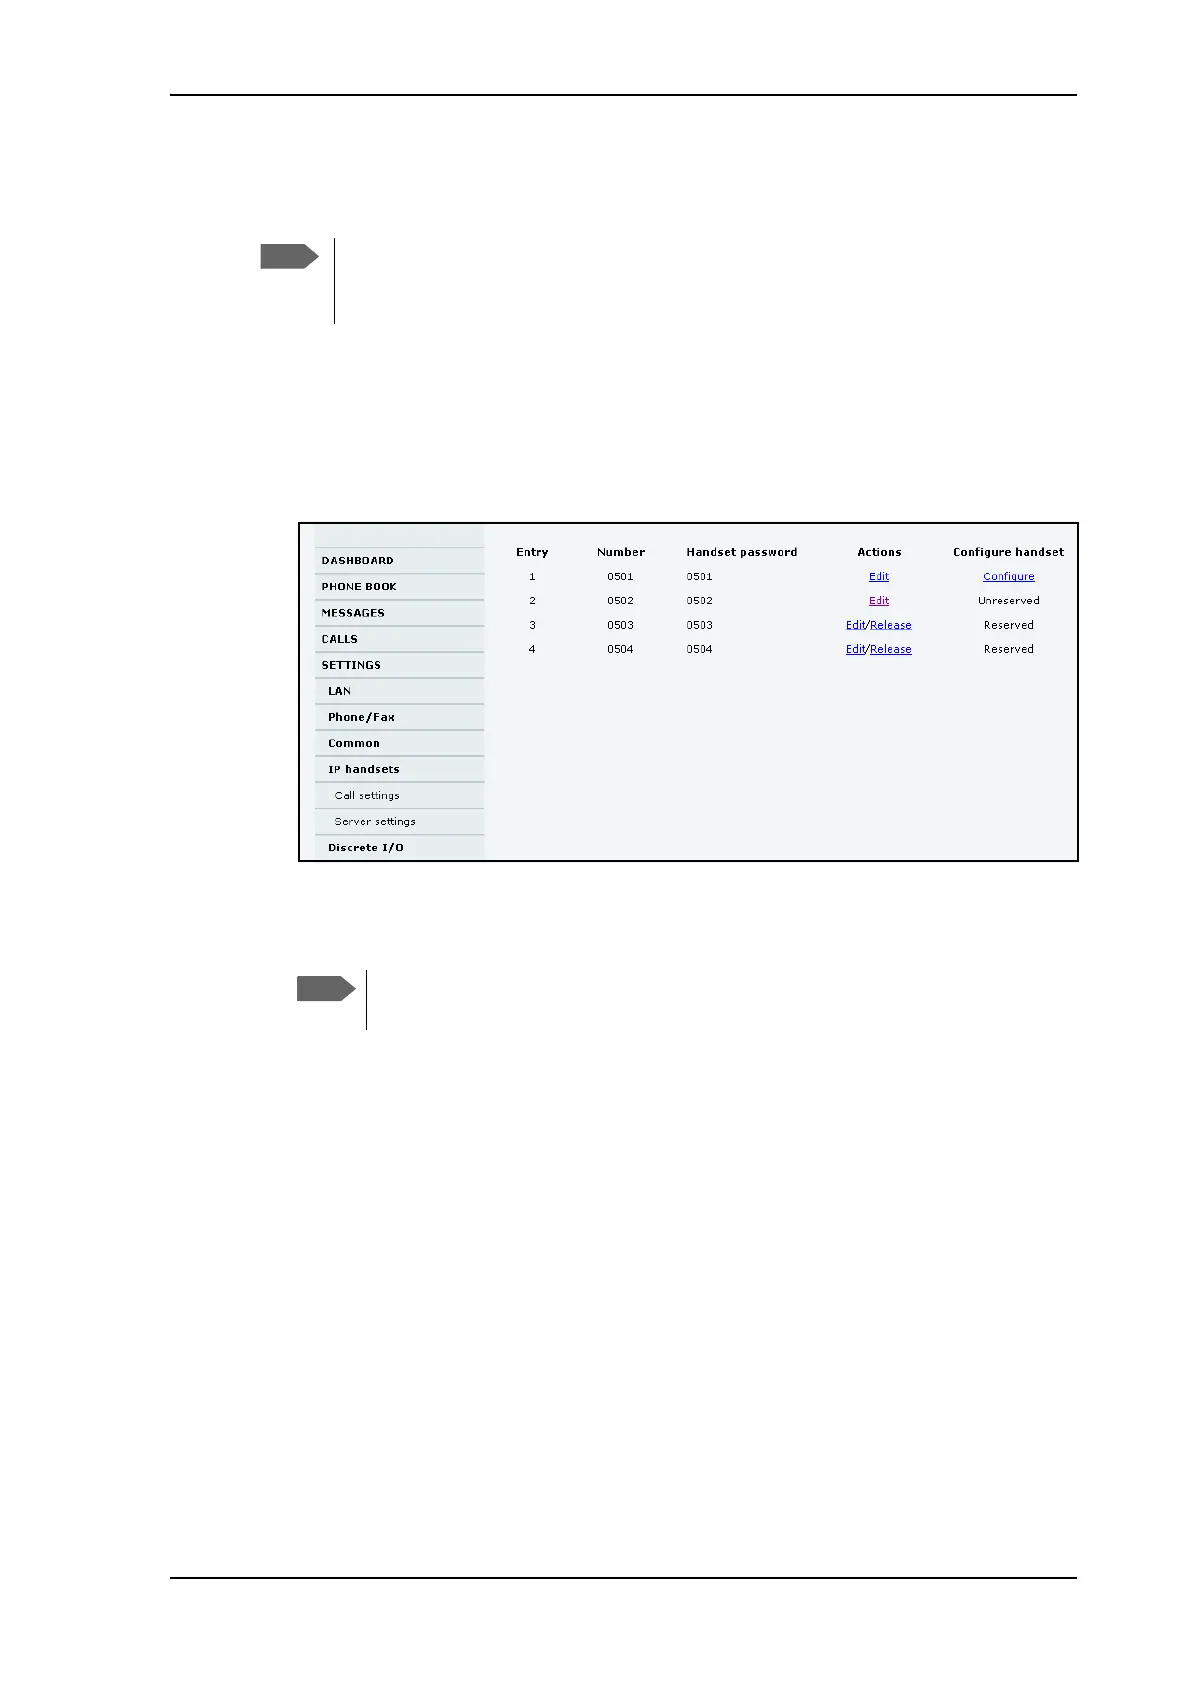
2. In the web interface, select SETTINGS > IP handsets.
3. If you want to change the password, click Edit next to the number you want to use.
4. Enter the password you want for your IP handset.
5. In the IP handset, enter the local number and the password you just entered in the web
interface. For the Thrane IP Handset. do as follows:
a. In the Thrane IP Handset, enter the menu system (select Menu) and select SIP to get
the list of profiles.
b. Select the BGAN profile and select Options (left softkey).
c. Select Edit/View and change the user name and password.
Note that the user name is also the local number for the handset.
If you have another IP handset, refer to the manufacturer documentation.
6. For Thrane IP Handsets: When the terminal and the handset have recognized each other, a
Configure link appears next to the handset in the list.
7. Select Configure next to a Thrane IP Handset to access the built-in web interface of the
Thrane IP Handset.
The web interface of the Thrane IP Handset opens. It is very similar to the web interface of
the terminal, but has a handset icon in the top left corner.
A Thrane IP Handset that is connected to the LAN interface on the terminal is by
default automatically registered in the terminal and assigned the first available local
number and a password which is the same number.
The Thrane IP Handset only supports numbers (no
letters) in the password.