42 Installing the PowerConnect 3524/P and PowerConnect 3548/P
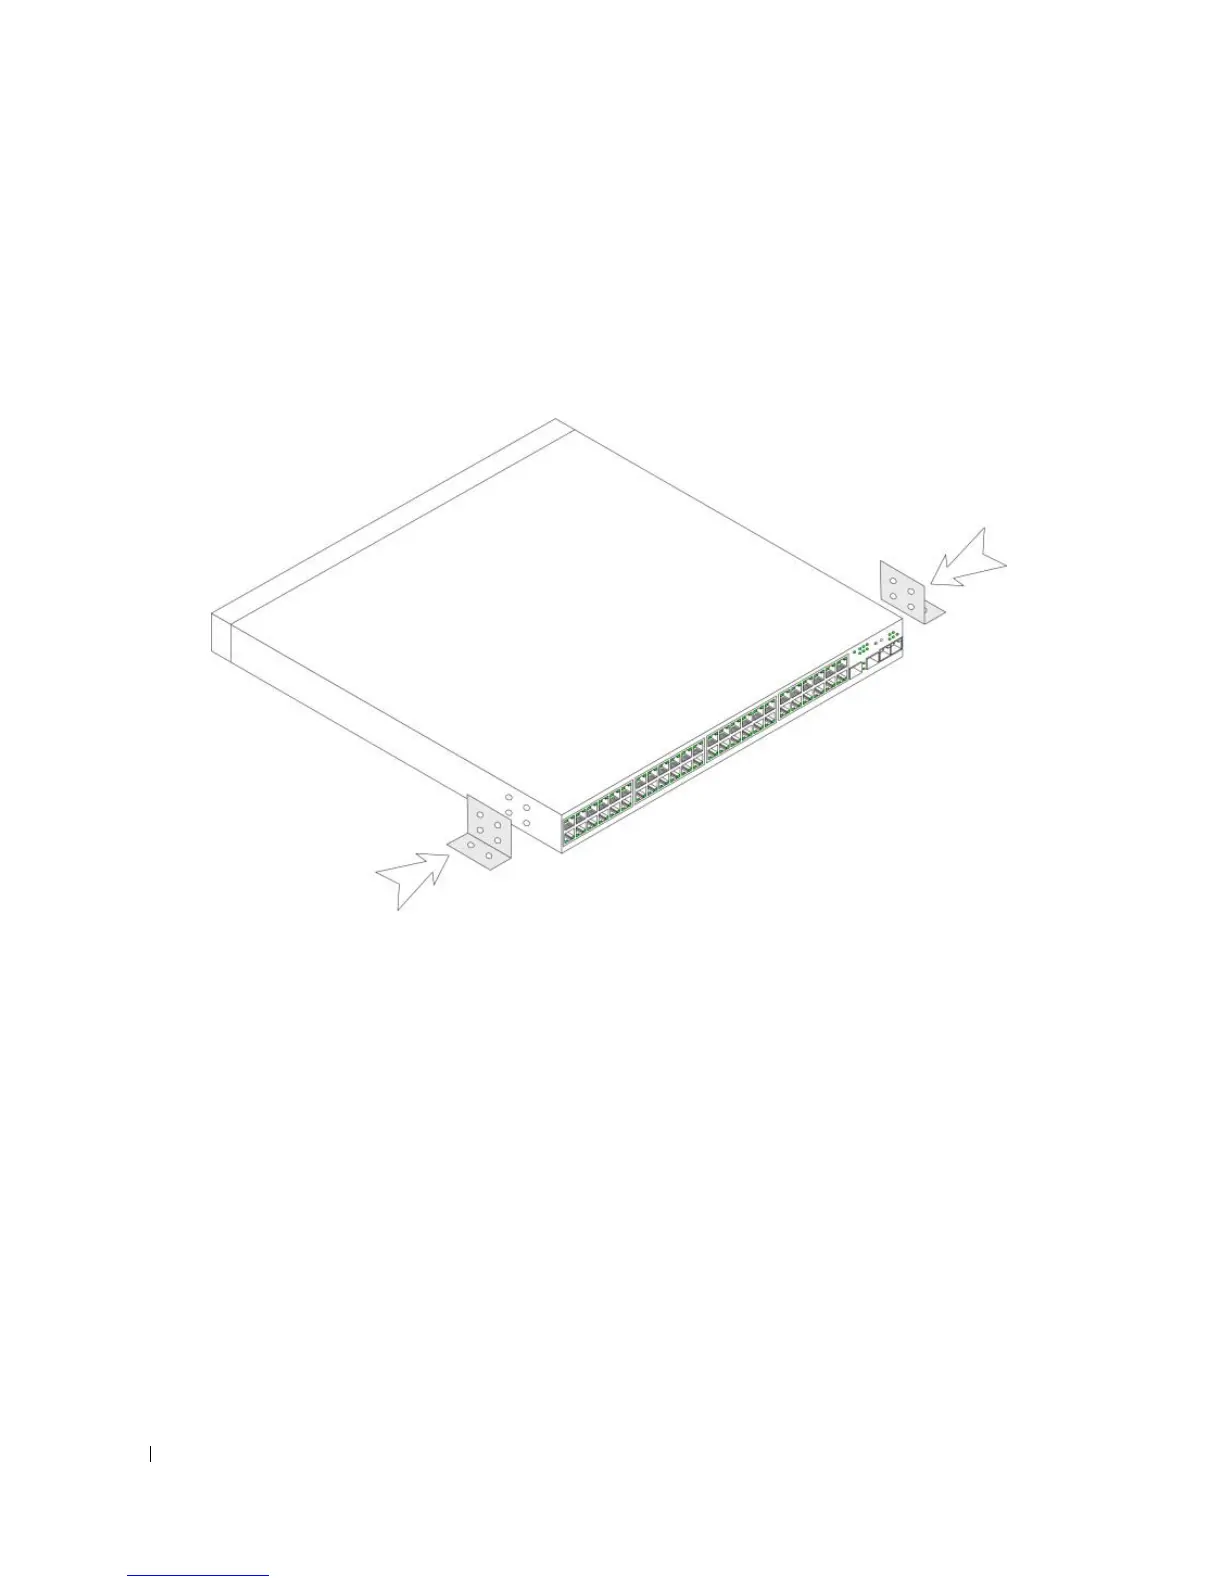
Installing the Device on a Wall
1
Place the supplied wall-mounting bracket on one side of the device, ensuring that the mounting holes
on the device line up to the mounting holes on the rack-mounting bracket. The following figure
illustrates where to mount the brackets.
Figure 3-2. Bracket Installation for Mounting on a Wall
2
Insert the supplied screws into the rack-mounting holes and tighten with a screwdriver.
3
Repeat the process for the wall-mounting bracket on the other side of the device.
4
Place the device on the wall in the location where the device is being installed.
5
On the wall mark the locations where the screws to hold the device must be prepared.
6
Drill holes and place all plugs (not provided) in the holes, in the marked location.
7
Secure the unit to the wall with screws (not provided). Ensure that the ventilation holes are not
obstructed.
 Loading...