9
Navigating Options and Readings
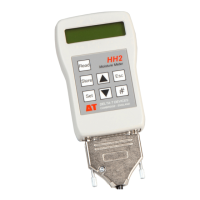
Press Esc to wake the HH2 and examine the Navigation Map overleaf. There are
two main routes - round the Read Cycle, and down (and up) the Options Menus.
Individual options or values are set at the bottom level of each menu path.
See also the Options Summary at the back of each sensor chapter.
Not all options are available with all devices. A table of permitted options, ranges
and default values are shown in each sensor chapter.
To display the main Options menu press the Set key when the readings are visible
on the display, or when the start-up screen is visible.
Press Set to select an option - this may be another, lower menu.
Press Esc to reject an option and backtrack up to the previous menu.
When the and symbols are displayed, press the up and down keys to
scroll through the options in any given menu.
To save Readings - press Store.
To save Options - press Set.
Press Read and Store to take and save readings.
Options Menu
The symbol indicates that other options are available.
Data: Add label for Plot ID, Sample, Device ID, Root Depth, Sensor Depth or delete
all data.
Device: Select the sensor e.g. PR1 for a Profile Probe.
Soil Type: Choose one for each sensor if you want results in engineering units. The
default is Mineral.
Soil Set-Up: Define parameters associated with each soil type.
Units: Select which engineering units are used - e.g. %vol or m
3
.m
-3
.
Display: Select readings to be taken and displayed - e.g. mV and %Vol.
Date and Time: The clock can be set via the keypad or from the PC
Status: Displays: % memory used, % battery life remaining & number of readings in
memory. Also version numbers of firmware and any installed tables.
Remote: Select this when connecting to a PC.