14
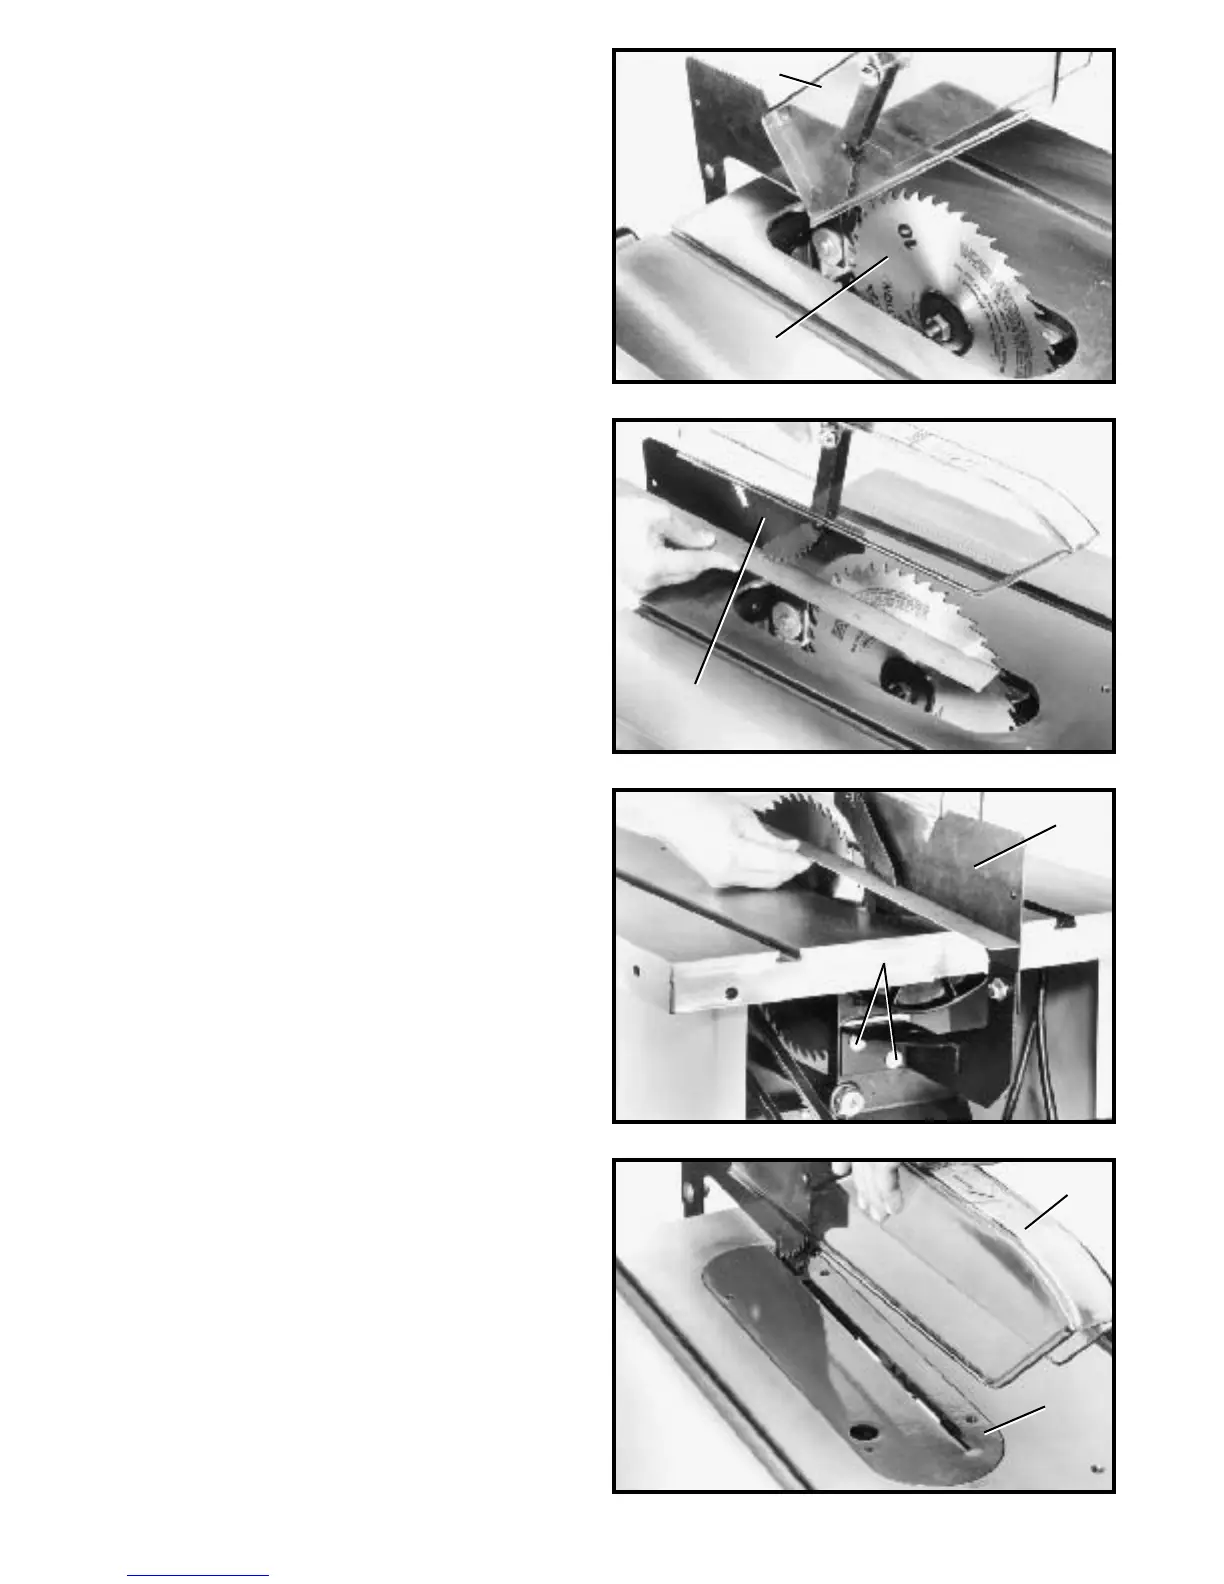
Fig. 32
Fig. 33
Fig. 34
Fig. 35
9. W ith the blade guard (L) Fig. 32, in the raised posi -
tion, assemble the saw blade (K) on the saw arbor with
two arbor wrenches supplied.
10. Using a straight edge, check to see if the saw blade
is aligned with the rear of the splitter (G), as shown in
Figs. 33 and 34. If alignment is necessary, loosen the
screws (A) Fig. 34, align splitter (G) with the saw blade,
and tighten two screws (A).
11. Lower saw blade and install t able insert (P) Fig. 35,
in the saw t able as shown. IMPORTANT:When installing
the t able insert, always make cert ain to hold on to the
blade guard (L). The insert will automatically release the
holding action on the splitter and lower the blade guard
when it is inst alled in the t able opening.
L
K
G
G
A
L
P
 Loading...