OPERATOR’S MANUAL
Control Point
®
11001-1489-201702 Rev B
KEYBOARD PROGRAMMING / 37
10. Move the cursor on the calibration screen to the Open setting.
11. Set the Gate to the Full Open height.
12. Measure the height at the Full open position and enter the Gate Height
for the Open setting.
13. Press “C” to capture the current Gate Height voltage at the Open
setting.
14. Press Esc when complete.
OPERATOR NOTES:
If the sensor voltage is outside the range between the Closed and Open
position values, the display will state Gate Low or Gate High. If Gate Low
displays, the signal from the sensor is exceeding the open voltage. In either
case, an alarm will activate. The Gate Height should be checked and set at
the granular calibration it was ran for on that granular channel.
If the Gate Height is enabled and has been calibrated, all of the desired
granular materials that are enabled must be re-calibrated through a material
drop test. Refer to Calibrating Granular Materials section. If enabled
materials are not calibrated, the Control Point
®
will alarm.
ROAD TEMPERATURE SENSOR
Select F12 to return to the Misc Menu and select the MORE MENU screen
pressing the 2 key.
The Road Temperature Sensor monitors road temperature changes. Three
temperature alarm settings can be programmed.
The Road Temperature sensor connects to the Temperature Sensor
Adapter (466492000S1) or Adapter (46649210051) which is connected to
the main harness lead labeled Temperature.
For earlier versions of Control Point
®
harnesses, the adapter connects to
the mating connector in the adapter harness (466492040S1).
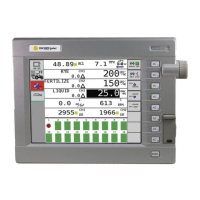
When enabled, the road temperature displays in the lower left side of the
Operate screen.
CONFIGURATION
Road Temperature default is set for no temperature sensors. To change
configurations, press Y (Yes) or N (No).