OPERATOR’S MANUAL
Control Point
®
11001-1489-201702 Rev B
84 / SYSTEM CALIBRATION
LIQUID CALIBRATION FINE TUNING
If, after using a flowmeter or nozzle constant over a period of time, small but
consistent application rate errors are observed, its value can be manually
changed to fine-tune application accuracy. See Appendix A to calculate the
modified flowmeter constant, which is then keyboard entered on the LIQUID
CONFIGURATION (F5) screen. Alternatively, the LIQUID CALIBRATION
routine can be repeated to correct this type of APR error.
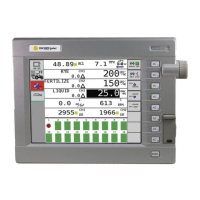
CALIBRATING SPINNER WIDTH (F6)
The spinner width calibration determines the spread width as indicated by
the spinner knob position for area based units (i.e. MILE-FEET, SQ FEET,
SQ YARD, KILOMETER-METER, and SQ METER). Area based units are
selected in the Miscellaneous menu (F12) under SYSTEM UNITS (Item 3).
Since vehicles vary, a multi-point calibration is necessary to assure
accurate spreading throughout the spinner knob range. Also, material
densities vary requiring separate calibrations.
1. Load the vehicle with material.
2. Press Function key F6 to access the CALIBRATION MENU. Press the
3 key to select SPINNER WIDTH.
3. Select a material for calibration (Items 1 through 4). The words
ENABLED and DISABLED after the selected product has no
significance to the calibration. Figure 50 illustrates SALT
CALIBRATION; other selections are equivalent.
4. Place the Spinner Knob at 0 and press R. The spinner mechanism
actives after pressing R. Placing the knob at 0 shuts the spinner off.
This verifies the valve OFFSET value is correct.
5. Rotate the Spread Width knob to 20. Measure and record the width
material is spread. Repeat at 40, 60, 80, and 100. The arrow on the
left side of the screen automatically follows the Spread Width knob
setting. The arrow position allows measured widths to be entered into
the proper location.
6. Press S to stop the routine when finished.