SD12 - Getting Started
1-20
1.5.8 Rack Sharing...........................................................................
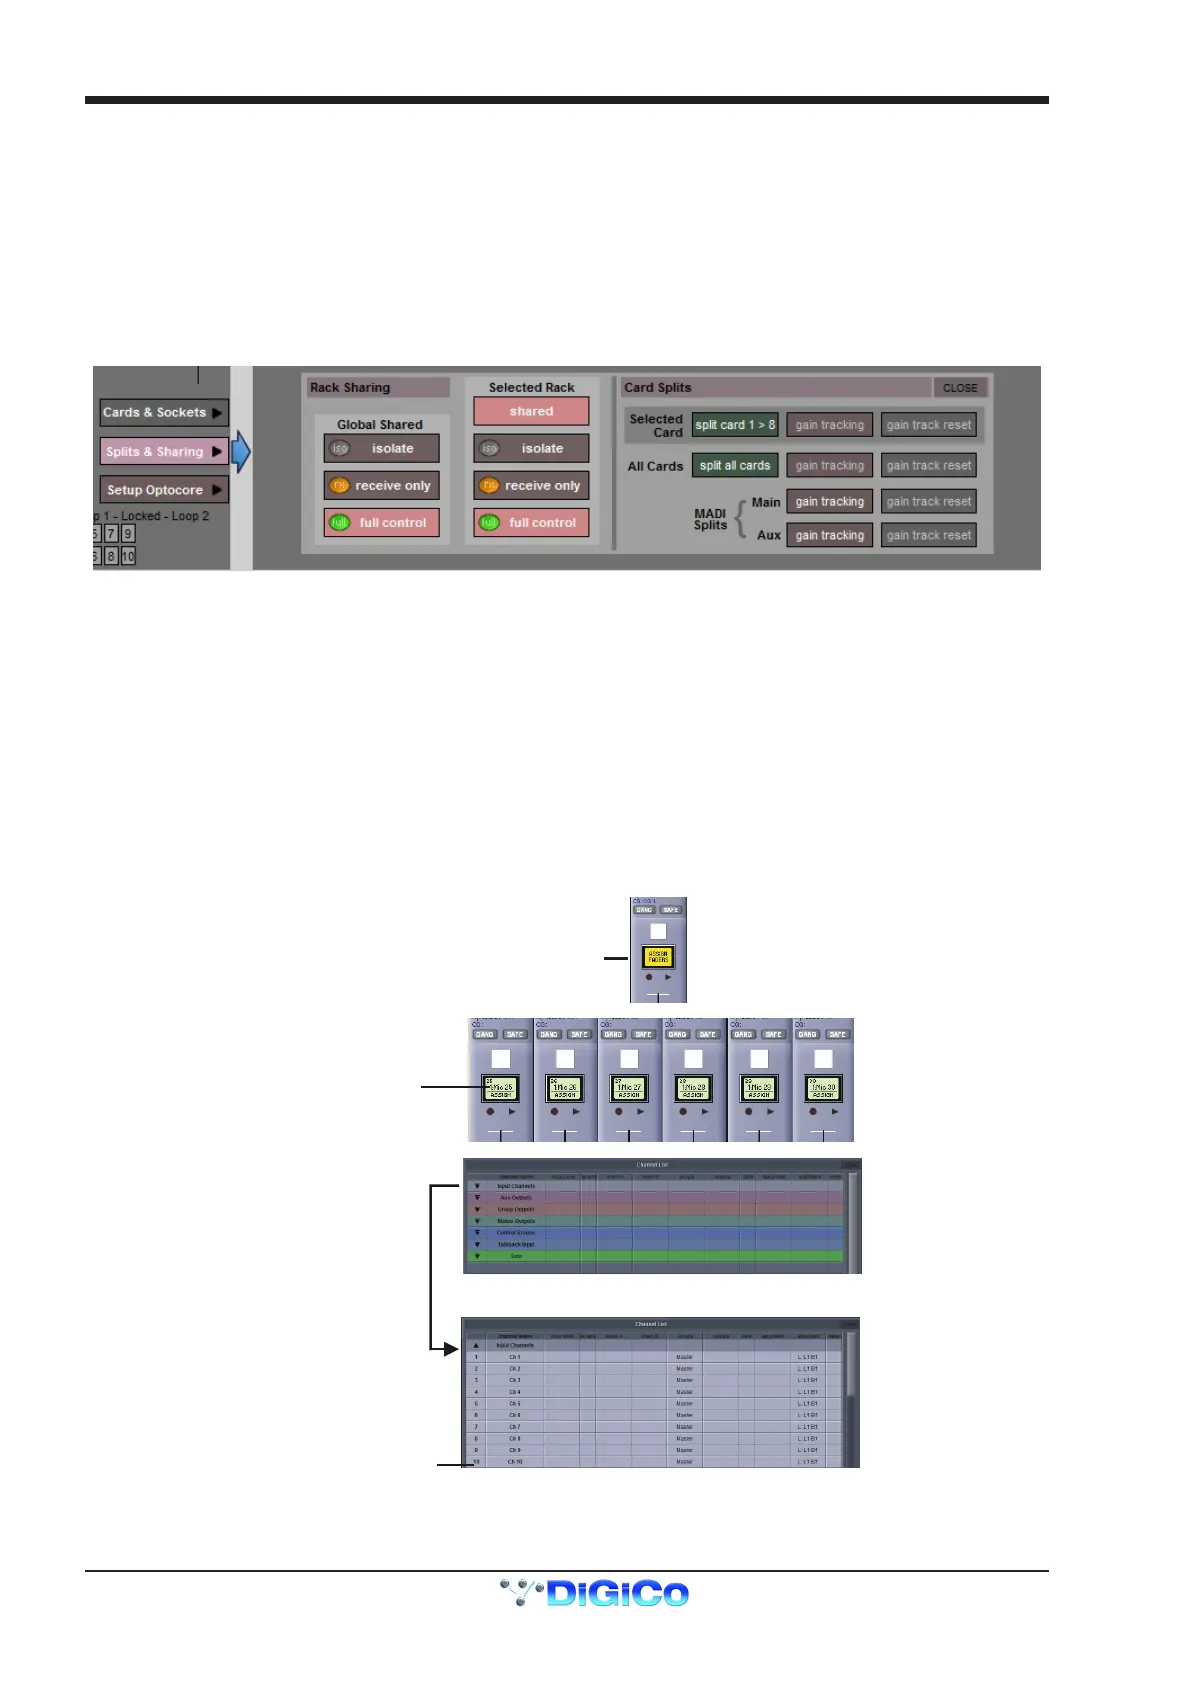
In a multi-console system where Racks are connected with MADI and shared between two DiGiCo Consoles, only one of the consoles
can take control of the rack, with respect to Gain, Phantom Power and Pads. To overcome this, it is possible to place the SD12 into one
of 3 states of operation:
Isolate : The SD12 will not communicate with the rack and therefore any adjustment of input gain or +48V switch will have no effect on
the rack settings
Receive Only : The SD12 will receive the rack’s existing settings but will not be able to control the gain etc on the racks.
Full Control : The SD12 will send its settings to the racks and change them accordingly.
Sharing is congured in the Rack Sharing area, found in bottom right-hand corner of the window when the Splits & Sharing button is
selected:
These three states can be set on a per-rack basis (right column), or globally for all shared racks (left column).
1.5.9 Assigning Faders to the Worksurface ..................................
If, after a Session Restructure, you nd that newly created channels do not appear on the worksurface, open the Layout/Channel List
panel on the Master screen and you will see a full list of all input and output channels that are present in the session.
To assign channels to the worksurface, select a bank and press the LCD Function button.
Then press the LCD button labelled Assign Faders to enter that mode and press each of the LCD buttons for the channels that you
wish to assign.
Now press the rst channel that you wish to assign on the Layout>Channel List on the Master screen.
Consecutive channels will be assigned to the worksurface for each LCD button that is in Assign mode.
Now press the LCD Function button again and return to the standard mode by pressing the LCD button labelled Solo
Note that column widths can be adjusted by dragging their borders within the title row. To return all columns to their
default widths, press RESET WIDTHS, in the top left-hand corner of the window.
Touch first channel
to assign
Press LCD Function button
then Assign Faders
Press LCD button(s)
for Assignment
Open
Layout/Channel Faders
Click down arrow
to expand list