SD12 - Getting Started
1-22
1.7 Audio Sync
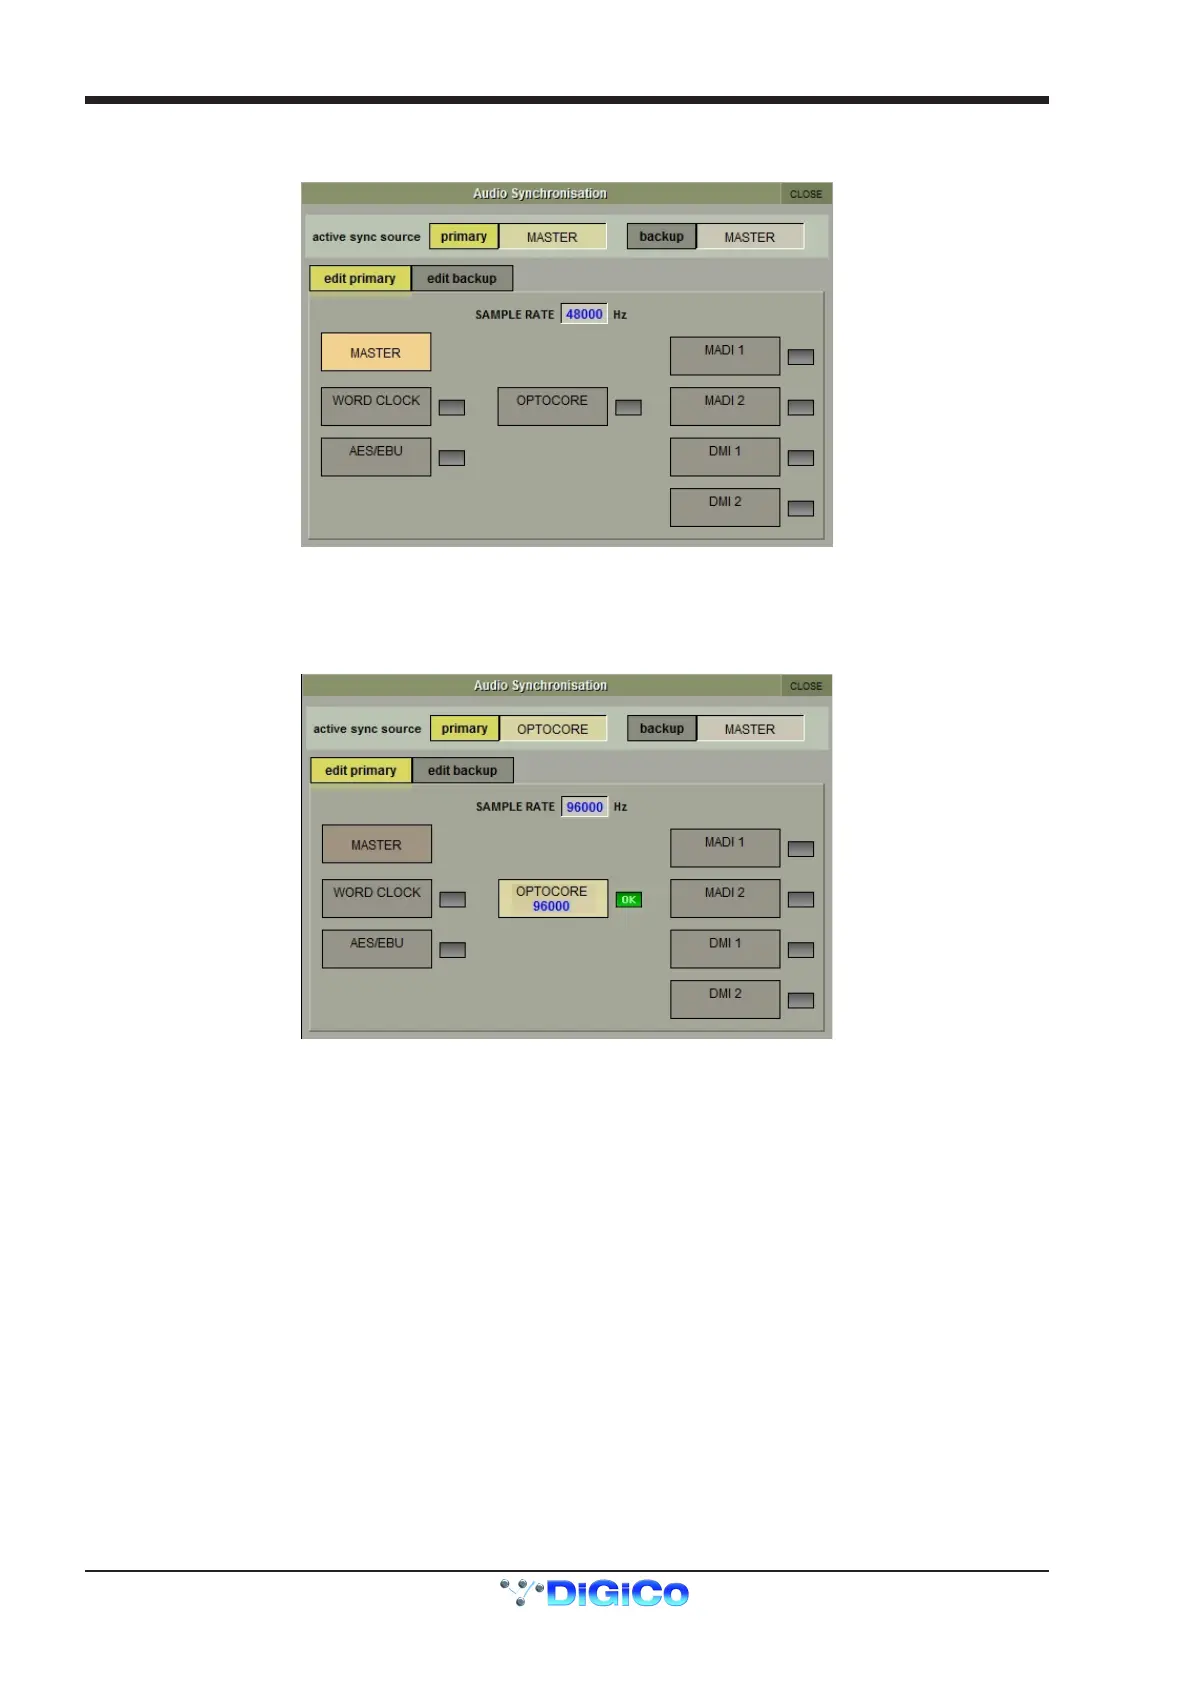
To access the Audio Sync Panel, touch the Setup Menu button, followed by Audio Sync. The following window will open…
The SD12 will operate at Sample Rates of either 48000Hz (48kHz) or 96000Hz (96kHz), as congured in the Session Structure panel.
By default, it is set to clock internally but, if Optocore is tted, the standard Audio Sync method is Optocore when the entire system uses
the device with the lowest Optocore ID (usually ID1) as its sync source.
This setting is saved within the session le so if any console(s) are connected to racks with optical bre then all console engines should
be set to Optocore as their sync source
Example Clocking from Optocore@ 96kHz
There are also times when the SD12 needs to be clocked externally. The Audio Sync panel allows you to control external synchronisa-
tion.
The SD12 will clock from the following sources : Word Clock, AES/EBU, MADI, Optocore and relevant DMI cards
In this situation one Optocore device should be set to clock to the external source and all other Optocore devices should be set to sync
to Optocore.
Note : When a valid clock is detected on an external sync input, the corresponding Green OK box will light, even if that
input is not selected as the clock source for the SD12.