page 6
Digital Projection M-Vision Laser 18K Series
Installation and Quick-Start Guide
PROJECTOR OVERVIEW
Rev D October 2019
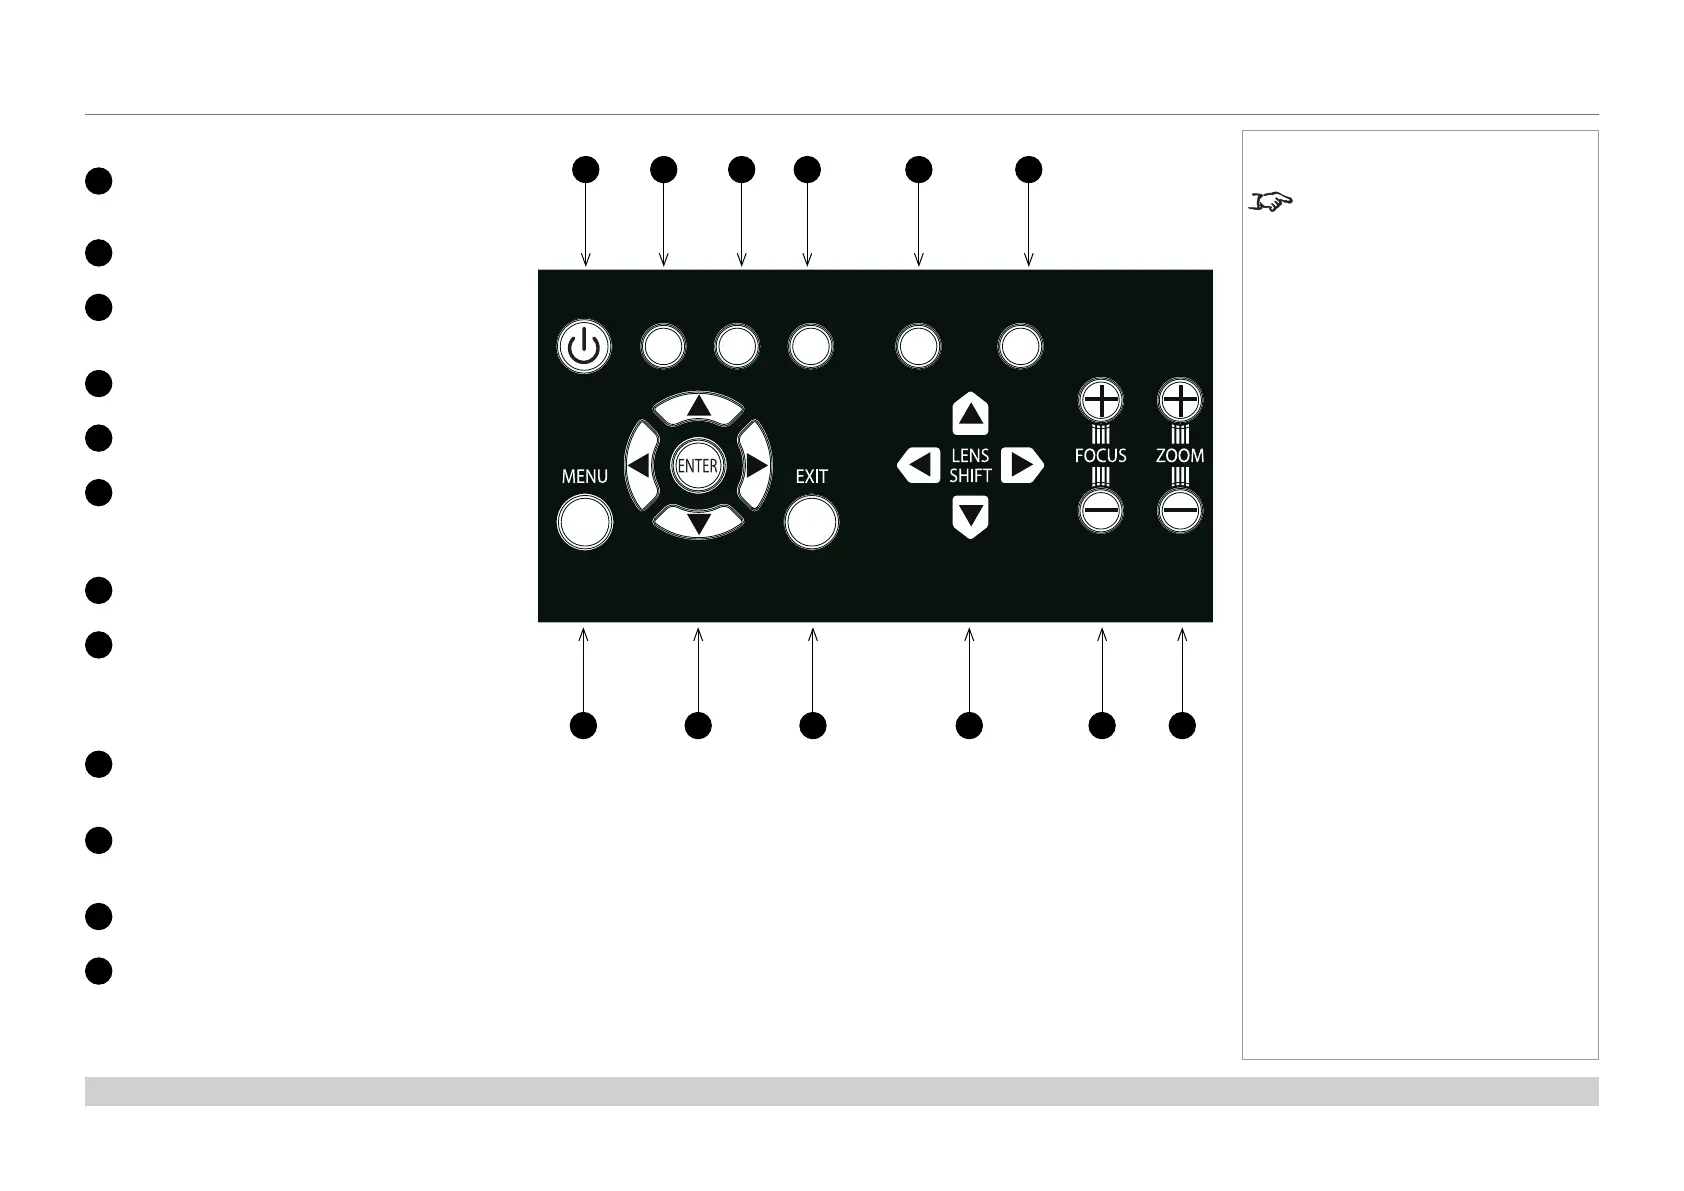
Control panel
1
POWER
Switches the projector on and off
(STANDBY).
2
INPUT
Switches to the next input source.
3
AUTO SYNC
Re-synchronises with the current input
signal.
4
ASPECT
Changes the aspect ratio.
5
CENTER LENS
Centers the lens.
6
PIC MUTE
Shows and hides the projected image.
When OFF, the light source is completely
switched off and the screen is black.
7
MENU
Displays and exits the OSD.
8
Arrow buttons & ENTER
Navigation buttons used to highlight menu
entries in the OSD.
Press
ENTER to open or execute the
highlighted menu entry.
9
EXIT
Exits the current OSD page and enters the
level above.
10
LENS SHIFT arrow buttons
Each of these buttons moves the lens in the
specifi ed direction.
11
FOCUS plus and minus buttons
Used to move the focus in and out.
12
ZOOM plus and minus buttons
Used to zoom in and out.
POWER
INPUT
AUTO
SYNC
ASPECT
CENTER
LENS
PIC MUTE
1 2 3 4 5 6
7 8 9 10 11 12
Notes
AUTO SYNC and ASPECT do not
work when the projector uses HDMI
3 or 4.
 Loading...


