page 29
Digital Projection M-Vision Laser 18K Series
Connection Guide
CONTROL CONNECTIONS
Rev D October 2019
Control Connections
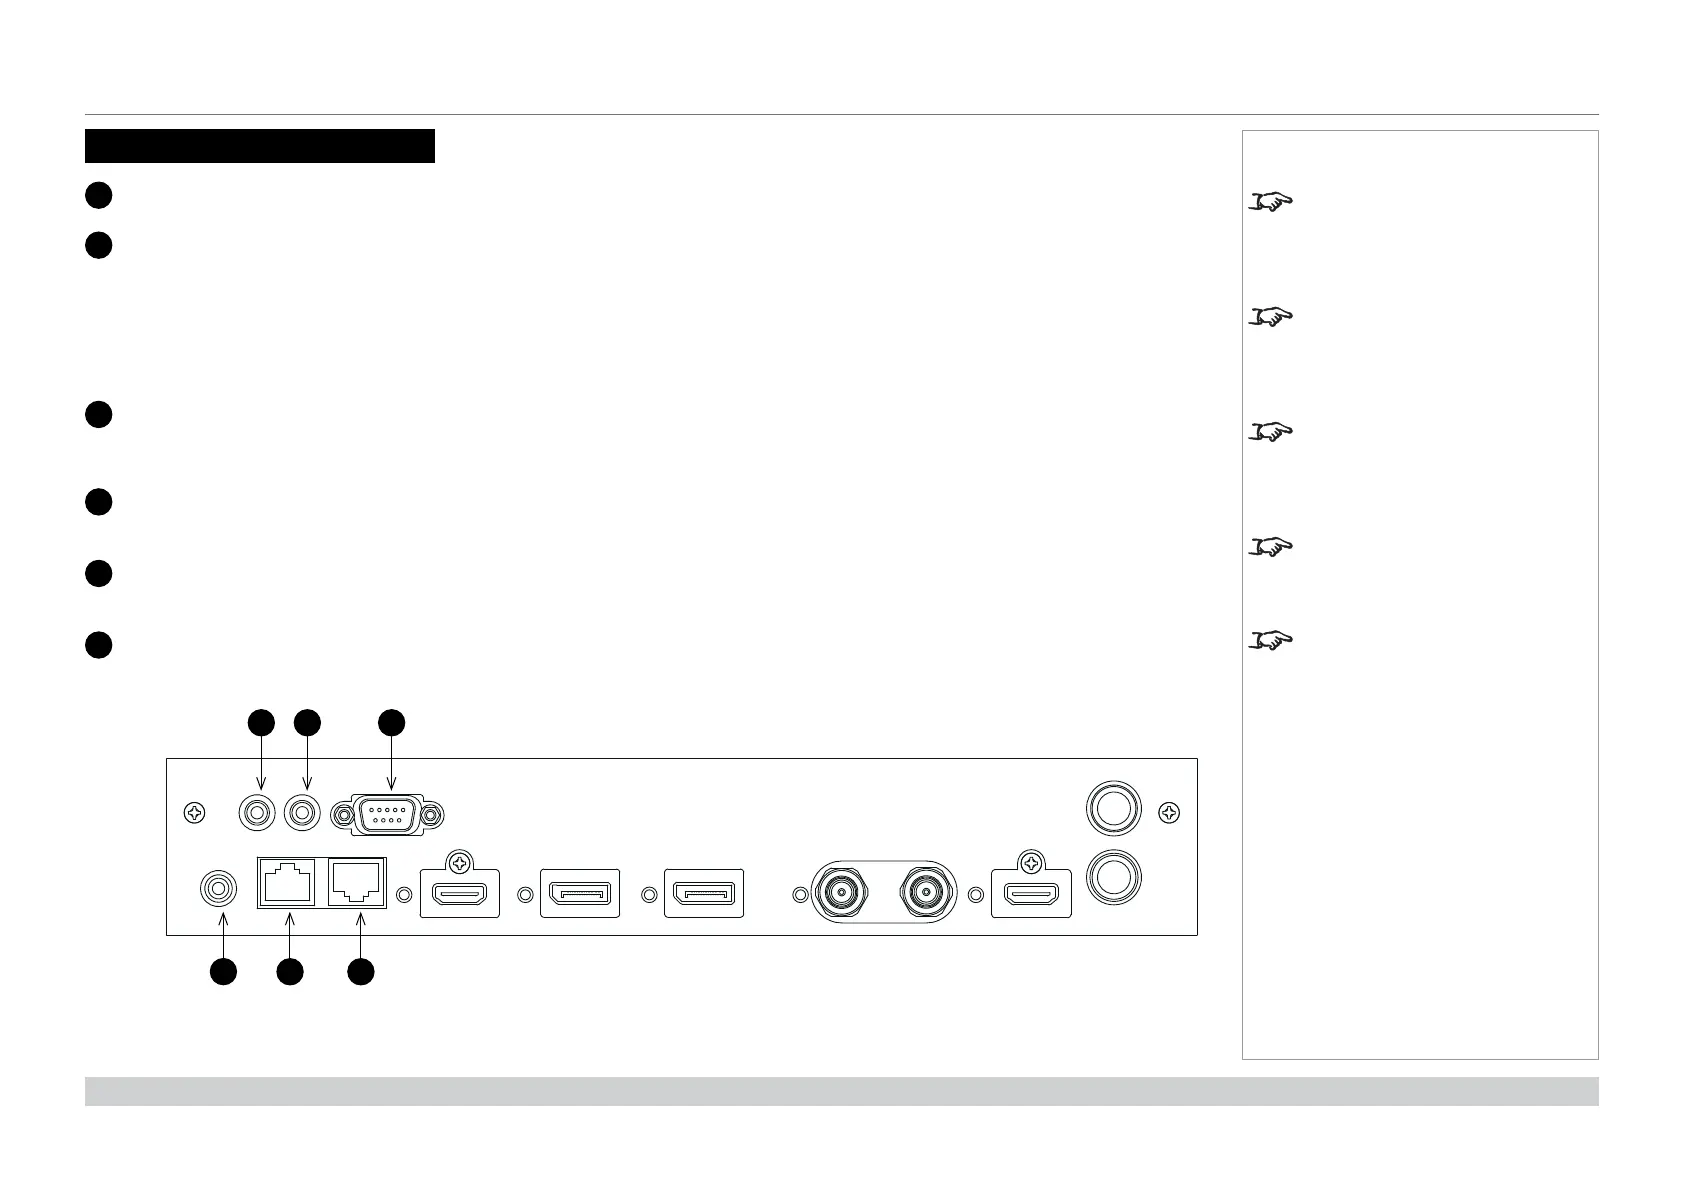
1
Trigger 1
2
Trigger 2
The Trigger outputs are activated by one of the three following conditions, as set in the Setup menu:
• Screen trigger: can be connected to an electrically operated screen, automatically deploying the screen when the projector
starts up, and retracting the screen when the projector shuts down.
• Aspect ratio trigger: can be used to control screen shuttering for diff erent aspect ratios.
• RS232 trigger: can be used to control the screen or screen shuttering on receipt of an RS232 command
3
RS232
• All of the projector’s features can be controlled via a serial connection, using commands described in the Protocol Guide.
• Use a straight-through cable to connect directly to a computer.
4
Wired Remote
The remote control can be connected using a standard 3.5 mm mini jack cable (tip-ring-sleeve, or TRS).
5
LAN
This dedicated LAN connection can be used if HDBaseT/LAN is already being used for HDBaseT signal input.
6
HDBaseT/LAN
The projector’s features can be controlled via a LAN connection, using Digital Projection’s Projector Controller application or a
terminal-emulation program.
Notes
For a list of all commands used to
control the projector via LAN, see
the Protocol Guide.
Only one remote connection (RS232
or LAN) should be used at any one
time.
With a LAN connection the projector
can serve a web page off ering basic
projector controls.
Trigger 1 and Trigger 2 are not
available with HDMI 3 and 4 inputs.
Projector Controller is available for
download, free of charge, from the
Digital Projection website.
3D SYNC - OUT
RS-23212TRIGGER
1 2 3
4
5 6
 Loading...


