5•Service
Doc. 065207-02 9/08 73
5.4 Removing the Right-Side Panel
Several parts that the user can service are located behind the panel on the right
side of the ASE 150.
Removing the Right-Side Panel
1. Make sure the ASE 150 power is turned on and the gas supply is on. (This
ensures that the AutoSeal mechanism is lowered.)
2. Toggle the needle switch to the
UP position. If a collection vessel is installed,
remove the vessel from the holder and set it aside.
3. Turn off the gas supply. Disconnect the gas source at the ASE 150 rear panel
and let the system vent.
4. Turn off the ASE 150 main power switch.
5. Unscrew the waste bottle and remove the bottle from the compartment.
6. Close the waste bottle and collection vessel compartment doors.
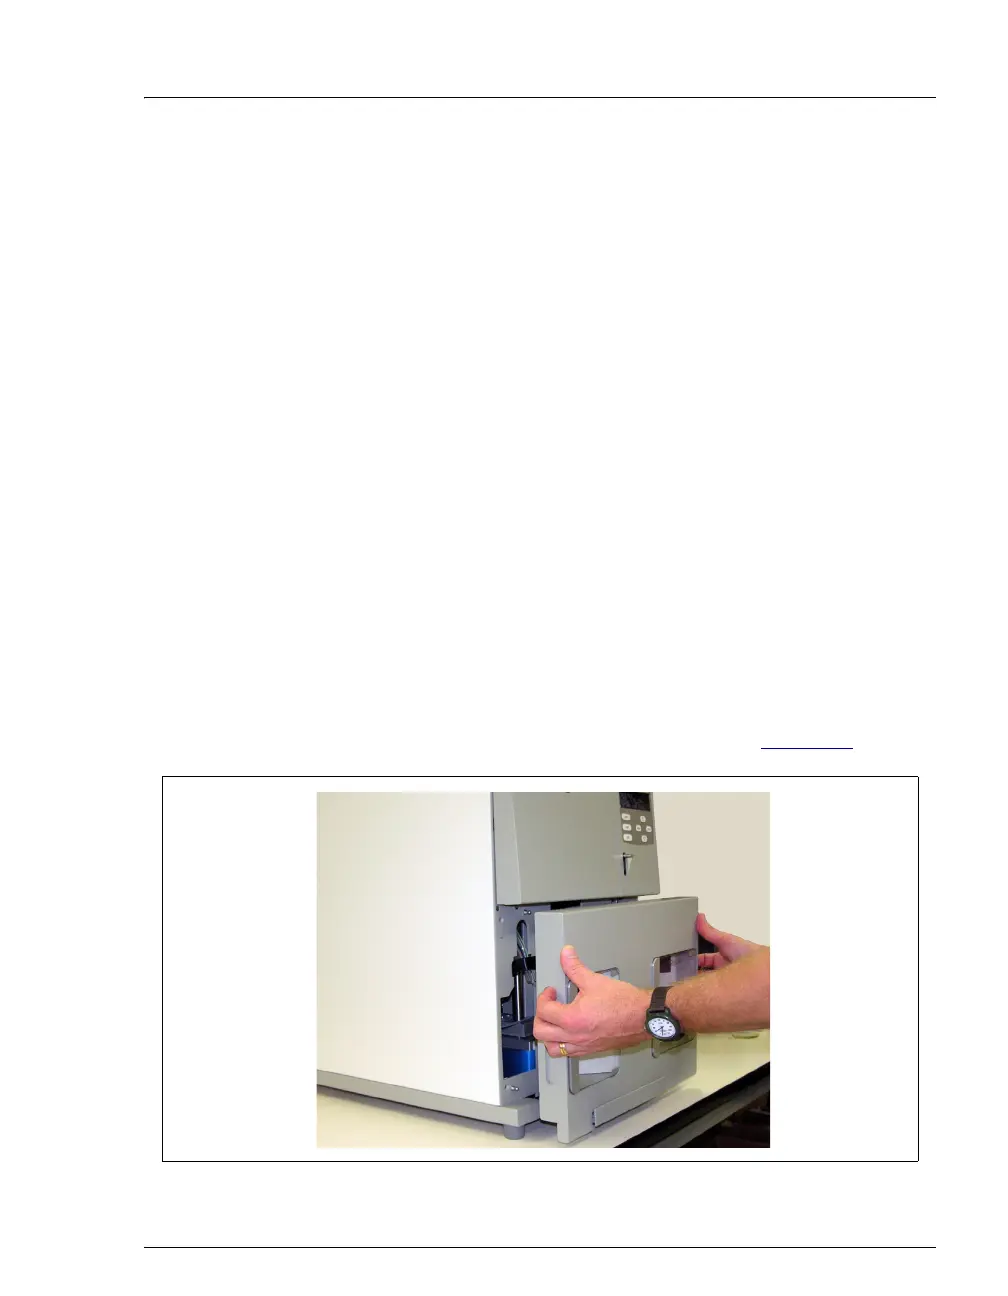
7. Remove the lower front trim panel of the ASE 150:
a. Slide the drip tray out about halfway.
b. Place your fingers in the indentations on both sides of the lower front trim
panel and pull the panel toward you to remove it (see Figure 5-5
).
Figure 5-5. Removing the Lower Front Trim Panel
 Loading...