5•Service
Doc. 065207-02 9/08 75
5.5 Replacing Pump Check Valve Cartridges
5.5.1 Before Beginning
Disconnect the solvent reservoir and remove it from the top of the ASE
150. Run a rinse cycle (see Section 3.5
). This prevents siphoning of
solvent when the inlet tubing is disconnected.
5.5.2 Removing the Pump
1. Follow the instructions in Section 5.4 to disconnect the gas source
and remove the right-side panel. The ASE 150 pump is behind the
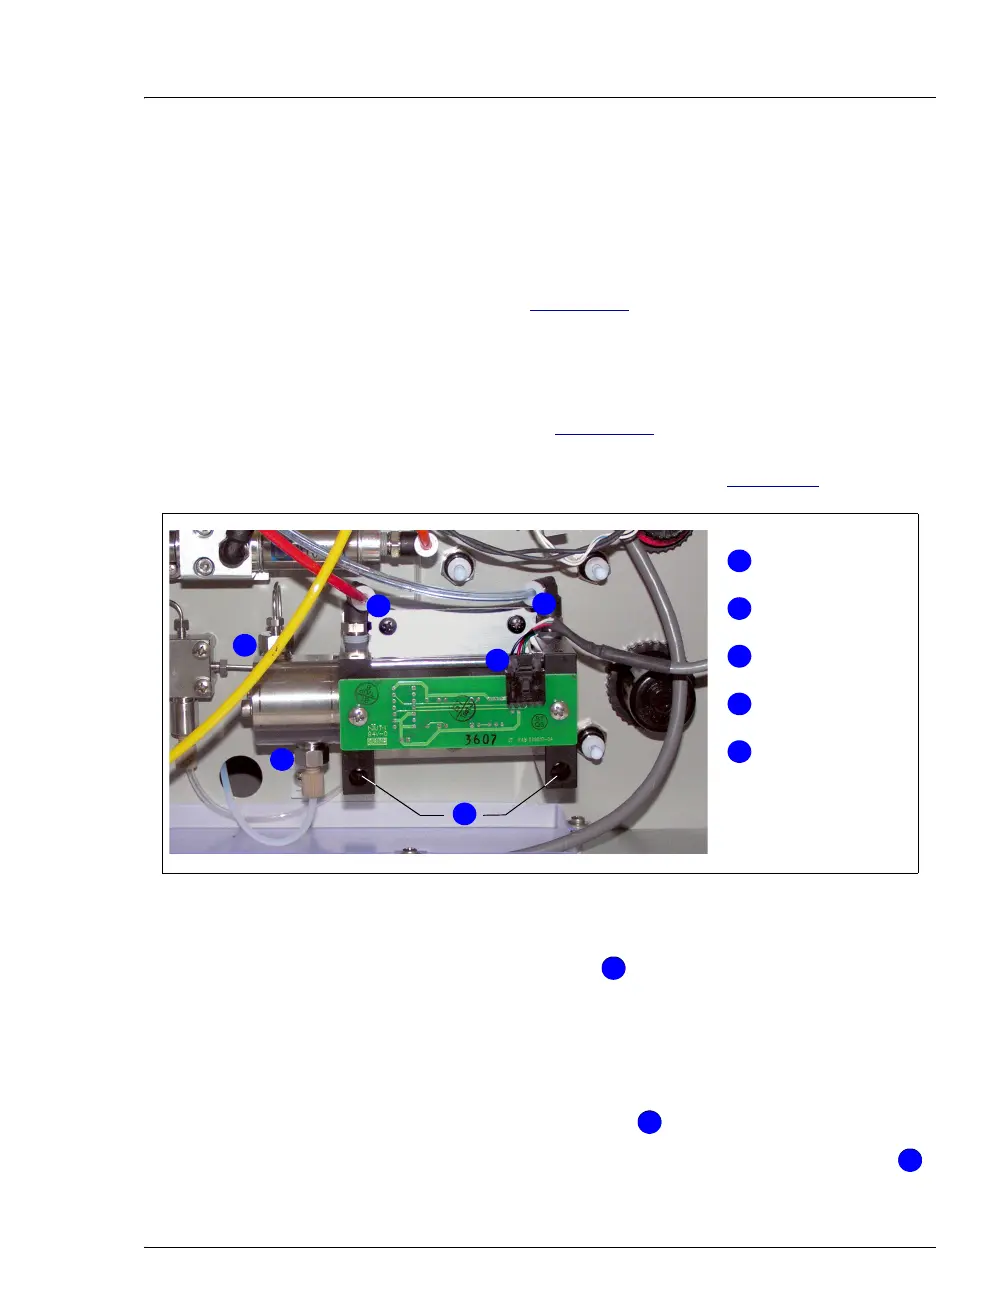
right-side panel in the lower right corner (see Figure 5-7
).
2. Disconnect the red tubing and the transparent blue tubing from the
two black elbow press fittings ( ) on top of the pump.
To disconnect a press fitting, use your fingers (or a small open-end
wrench) to press the ring on the fitting in, while at the same time
pulling the tubing out.
3. Use a 1/4-inch open-end wrench to disconnect the stainless steel
fitting from the outlet check valve ( ).
4. By hand, disconnect the PEEK fitting from the inlet check valve ( ).
Figure 5-7. ASE 150 Pump (Behind Right-Side Panel)
Press Fittings
Pump PC
Board Cable
2
Mounting Screws
4
5
3
1
Inlet Check
Valve
Outlet Check
Valve
1
1
2
3
4
5
1
1
2
2
3
3