F. PRE-MEET SET
1. Recommended Order of Set Up
It is recommend that you allow at least one hour for system set-up. Although set up can take
less time, one hour or more allows for troubleshooting unforeseen issues.
Establishing a live-image (between the camera and computer) should be your first priority.
This assures the system is working properly.
1. ➔ POSITION camera on the finish line.
2. ➔ LAYOUT the long (300 foot) data cable from the camera to the timing computer.
3. ➔ ESTABLISH a live video image within Eagle Eye Pro software.
4. ➔ MOVE the timing computer to the finish line and re-establish a live-image on the
computer, using the smaller length practice cable.
5. ➔ OPEN the Finish Line tab and select the calibration tool. While viewing the computer
screen, adjust the camera/clamp so that the calibration line is on the leading edge of the
finish line.
6. ➔ RECONNECT the timing computer to the main (300‘) data cable.
7. ➔ CONNECT the wireless trigger and re-establish a live image. Be sure to verify detection
within the Trigger tab. Be sure to properly connect the USB audio plug before opening the
Pro software.
8. ➔ TEST the wireless trigger system (while standing at the location furthest from receiver/
computer) via one of the following methods: 1) firing the Starter’s pistol, 2) a strong finger
tap to the front face of the receiver unit while holding the unit above your head. A sharp
blow directly into the transmitter’s sensor port may be used, however be sure your hand or
body does not block the receiver’s line of sight.
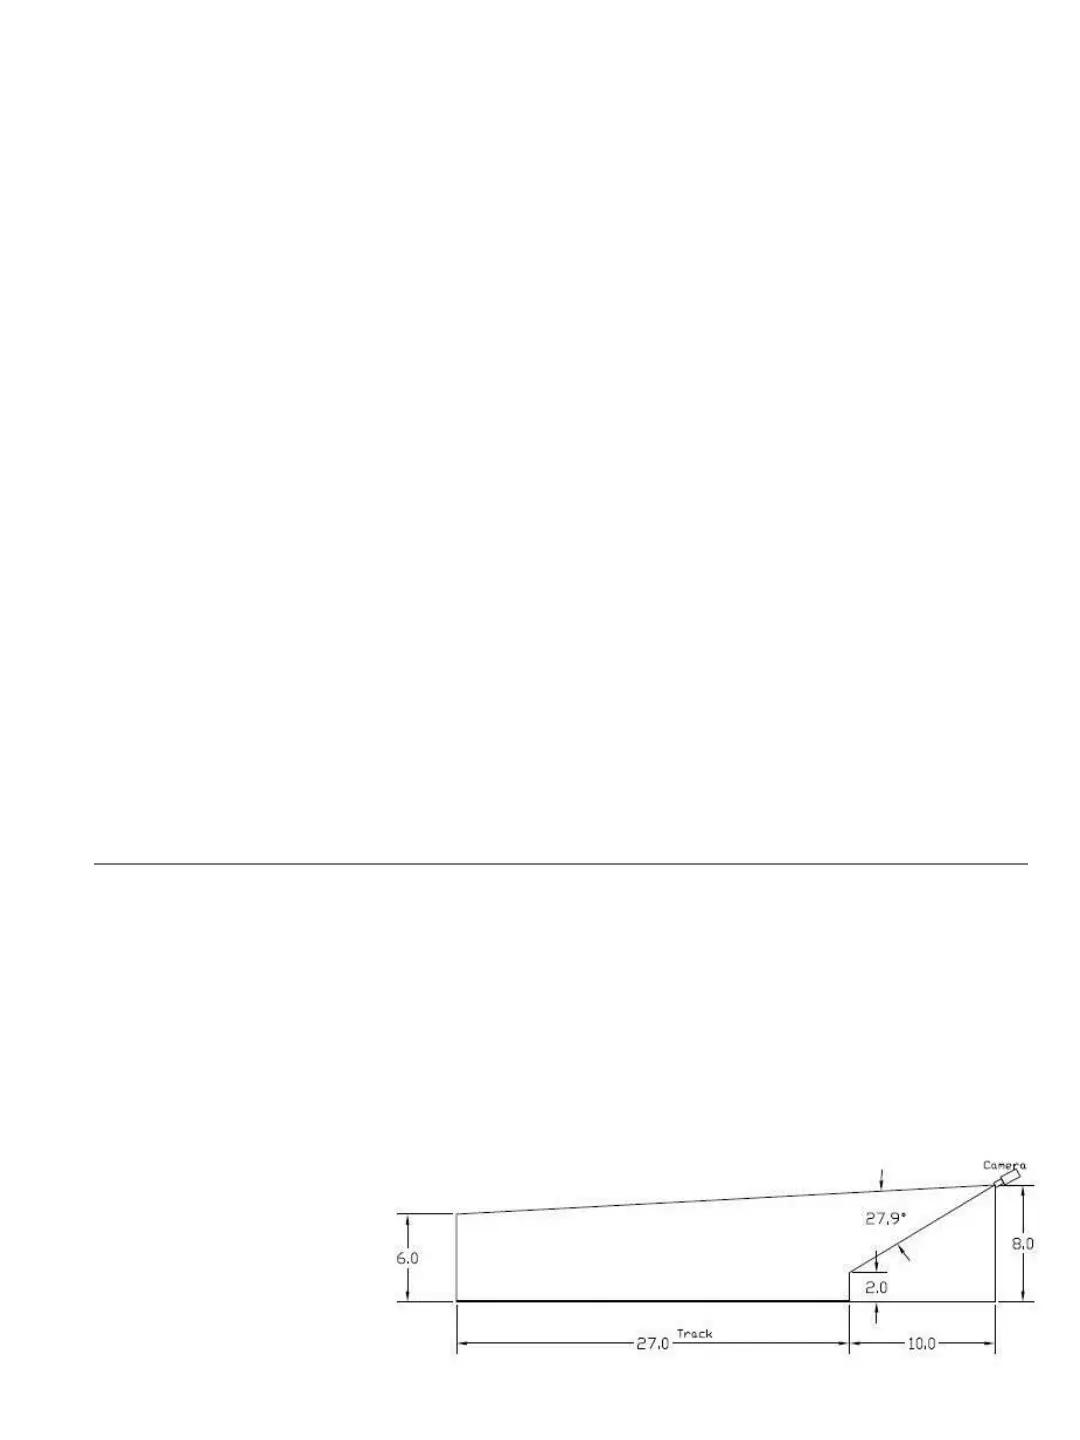
2. Camera Placement
Position the camera so that athletes in lane one (closest to camera) are visible from the knees
up. This will allow identification of hip numbers in lane one while keeping athletes in the
outside lanes as close to the camera as possible. It’s best to have a live image on the computer
and have a helper stand in lanes 1 and 8 (during the set up process) with the camera set and
angled accordingly.
1. ➔ MOUNT the camera 7-10 feet in the air via a tripod, pole, standard, etc.
2. ➔ POSITION the camera 8-15 feet back from the finish-line.
3. ➔ PLUG the camera into the computer and position so that you can move the
camera/stand while viewing the live finish-line image.
4. ➔ MOVE the camera
stand as needed so
that the finish line on
the track is centered
within the image on
the computer with the
calibration tool.
15