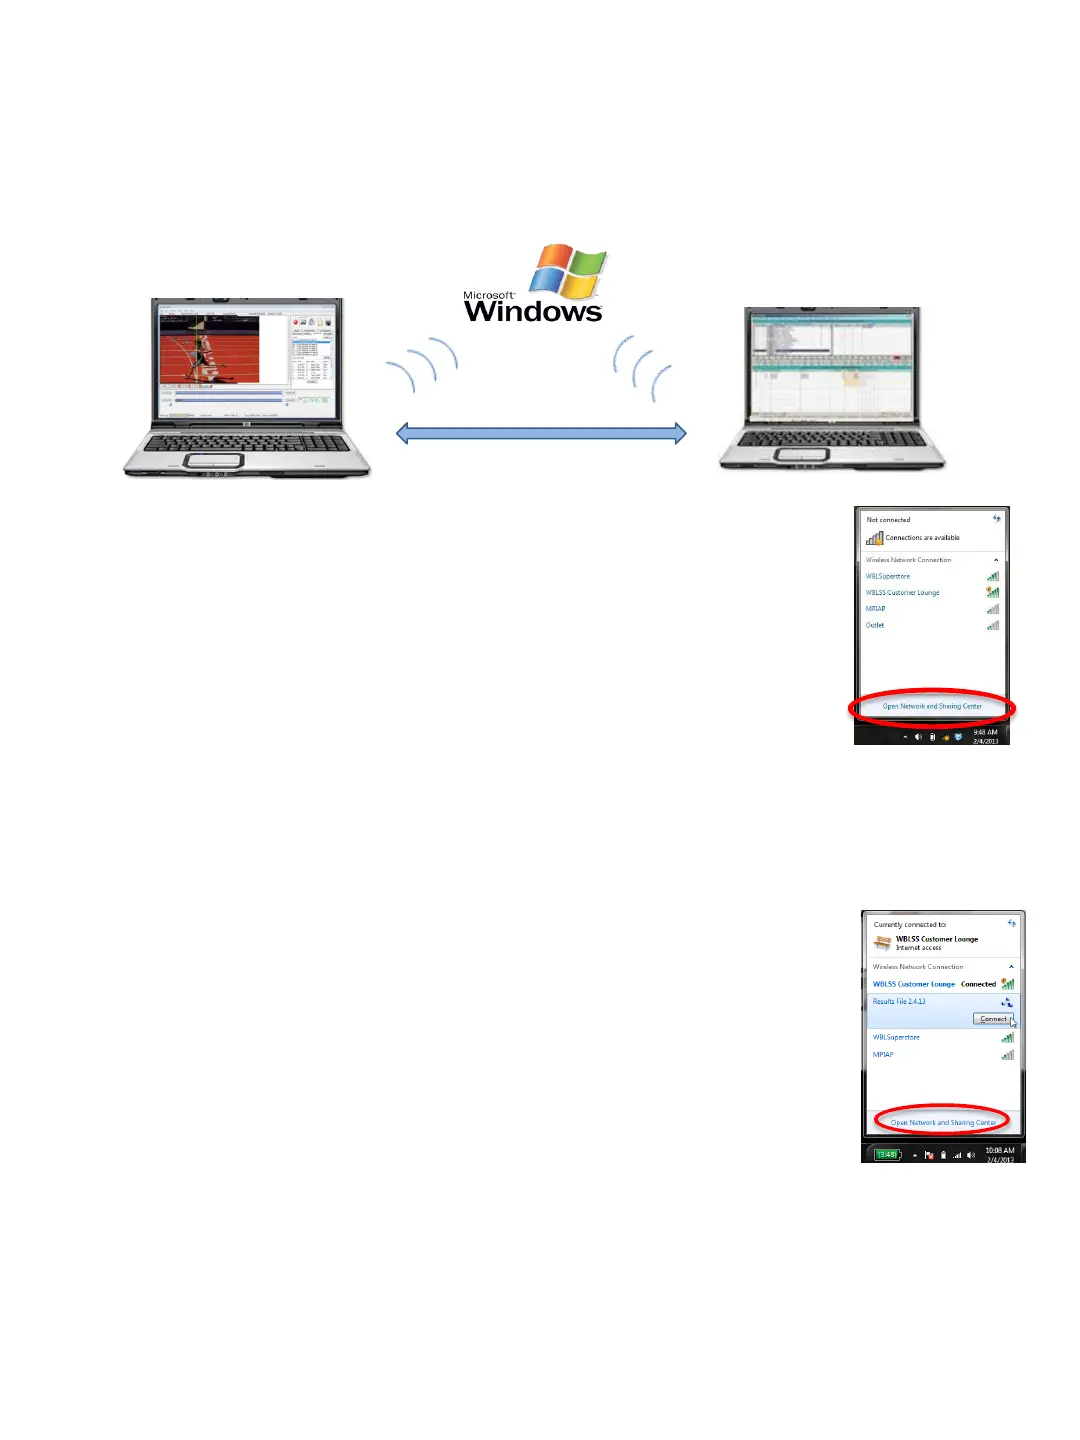
2. Windows Ad Hoc Wireless Network
Windows supports a wireless PC to PC file transfer process known as an Ad Hoc Network.
This is an ideal method for transferring files wirelessly when no wireless internet is available.
Eagle Eye Computer
Timing
Hy-Tek, etc. Computer
Results
On Computer 1
1. ➔ SELECT the Internet Access icon in your system tray (bottom right) and OPEN
Network and Sharing Center.
2. ➔ SELECT Set UP a New Connection or Network.
3. ➔ SELECT Set Up a wireless ad hoc network and CHOOSE Next
4. ➔ CHOOSE Next again.
5. ➔ ENTER a name for this Network and a password to give to those you want to
connect. Be sure to write the password down. SELECT Next again.
6. ➔ SELECT the Network and Sharing Center.
7. ➔ CONFIRM that 1) Turn on Network Discovery, 2) Turn on File and Printing and
Turn on Sharing so Anyone with a Network Access can Read and 3) Write files in the Public
Folders are selected.
8. ➔ TURN OFF password protected sharing is selected. CLICK Save changes
On Computer 2
1. ➔ SELECT the Internet Access icon in your system tray (bottom right) and SELECT the Network you
created and CLICK OK
2. ➔ ENTER the Security Key (password) you created on computer 1.
3. ➔ SELECT Open Network and Sharing Center.
4. ➔ While the computers are negotiating with each other, you will see Identifying
under View Your Active Networks. Once connected you will see Public Network.
5. ➔ CLICK the MY Computer icon on your desktop and CLICK Network to expand the
list of available networks.
6. ➔ CLICK the Users (Share) folder
7. ➔ CLICK on the Public folder
8. ➔ CLICK the results folder you have directed your meet management software to retrieve its information.
Once you have created the network connection as described above, the results file (created by the
Eagle Eye timing computer) can be saved by selecting Save Times within the Race Results tab. The
meet management computer will then retrieve the results file from this same location (for example,
when using the GET TIMES button within Hy-Tek’s Meet Manager Run mode).
31