B. OPERATION INSTRUCTIONS
1. Import Athletes
1. ➔ Create an Event File (.evt) or Excel (.xls) template
Described on pages 11 and 12.
2. ➔ Import & Pre-Name the Race Video
SELECT the Results tab and CLICK Import and navigate to the
created .evt or .xls file. Once loaded within the Race Tab, SELECT
(highlight) the race from the list that is about to be run. This
will automatically name the video sequence (.seq file) by
the event name upon recording.
2. Time a Race
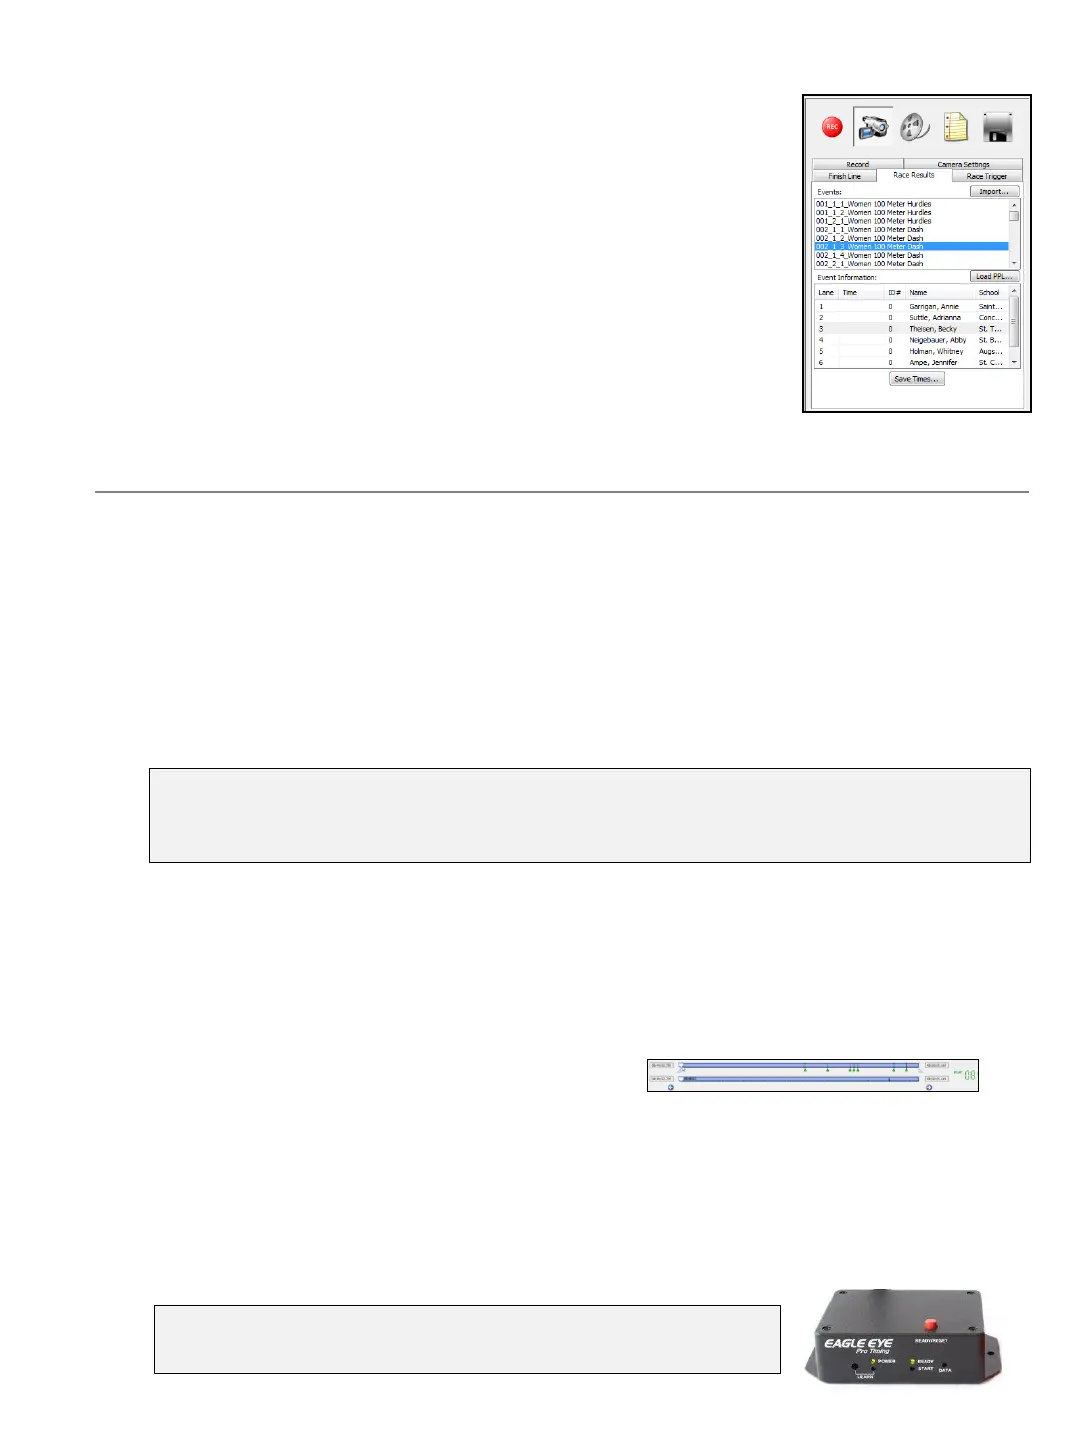
1. ➔ Arm the Wireless Trigger
PRESS the red button on top of the receiver to active the green ready light.
2. ➔ Arm the Software
PRESS Ctrl-F12 to ARM the system or the Arm button within the Race Trigger tab. The
word ARMED will appear when system is ready – and immediately change to TRIGGERED
upon the detection of the gun.
3. ➔ Record the Race
CLICK the red REC button to start recording prior to the athletes crossing the finish line.
Continue recording until ALL athletes have finished the race.
4. ➔ Create Event Markers “Bookmarks” (optional: Recommended for all distance events)
PRESS the SPACE BAR to mark finishing athletes just prior to crossing the finish-line. This
will create “Event Markers” on the recorded video time-line of each finishing athlete,
making it fast and easy to read distance events.
5. ➔ Stop the Race
CLICK the STOP button after the last athlete has crossed the finish line.
6. ➔ Signal the Start
PRESS the RED button (on top of the receiver) to active the ready light on the Starter’s
transceiver. This step is optional, however it serves as Red Flag to hold the Starter from
firing the gun before the timing operator is ready for the next event to begin. More info on
page 10 and 14.
8
Important: If at anytime the time-code is triggered prematurely by the Starter (from bumping
the transceiver, etc.) – simply RE-ARM the software with Ctrl-F12. The time-code will keep
running however upon TRIGGERING the time code will start over at zero.
Press RED button once to turn the Ready light RED. Press again to
turn ready light GREEN.