4. Camera Adjustment
The procedures on this page will help maximize your camera image quality while adapting easily
to changing lighting conditions.
With the camera aligned on the finish line, powered on and a picture on your computer screen:
A. At the Camera
1. ➔ TURN the focus dial (outside ring) slowly until you obtain
the best clarity.
2. ➔ TURN the aperture dial (inside ring) fully open (counter
clockwise when standing behind camera). The image
should appear washed out.
B . At the Computer (within the software)
3. ➔ SELECT the Live Adjustments tab and SELECT Exposure
from the features list.
4. ➔ SET the initial Exposure setting as low as possible.
Example: start at 50
5. ➔ RAISE the Exposure setting (if necessary) until the image is
optimized. Attempt to use the lowest exposure the lighting
conditions will allow.
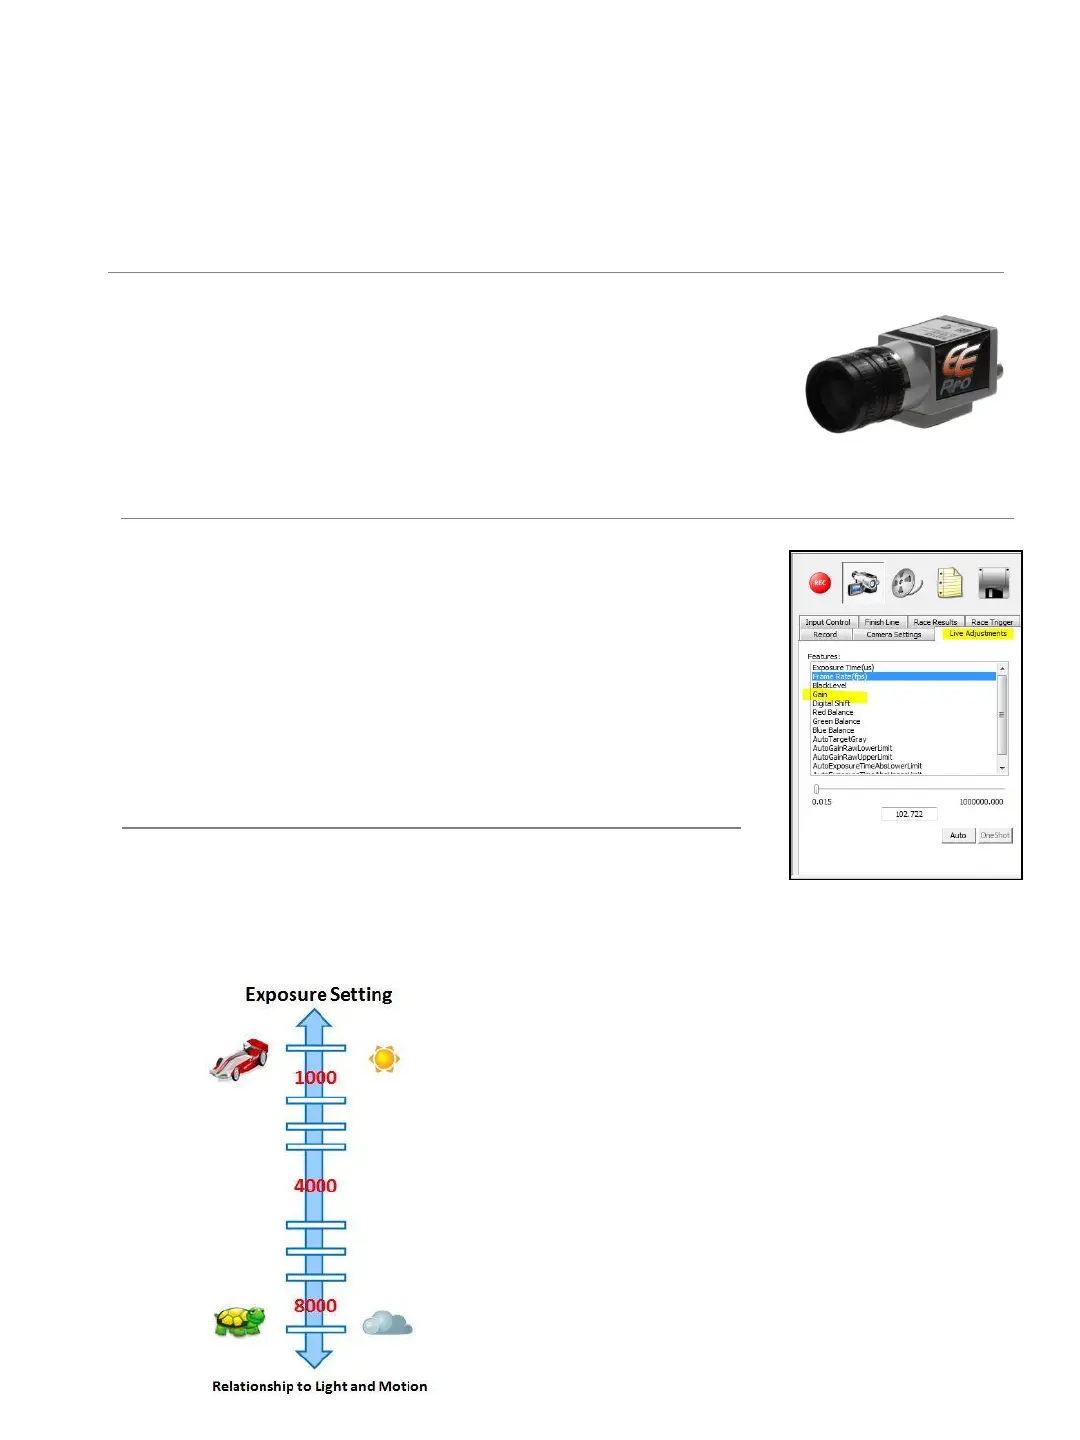
C. Adjusting to Changing Lighting Conditions
➔ Increase the Exposure settings as lighting decreases.
TIP: The graph on the left represents the relationship
between light and motion. The brighter the day and
the faster the race, the lower the Exposure setting. In
low light conditions, you may need to increase the
Exposure settings to maintain image clarity. Do not
exceed an exposure of 8000; doing so may impact
frame rate.
TIP: Think of the Exposure setting as ‘ Shutter Speed’
– however, instead of a high shutter speed number
you find on still cameras, your timing camera uses a
low exposure to achieve similar results. The lower the
Exposure setting the less motion blur.
17