DESCRIPTION AND INSTALLATION
2-16 25364 Issue 8 March 2018
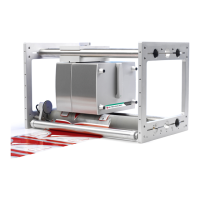
Connect Cables
Compact 32d, 32c and 53c
Note: Refer to page 2-33 for Connection Diagram when connecting
the printer to the mains, peripherals and network.
• Connect the cable from the PSU to the printer’s power input port
• If the printer is in CM, connect the encoder to the back of the printer
• If the printer is in IM, connect the start signal cable to the 15-pin
D-type connector
• If the printer in CM is receiving its ‘print go’ signals from an external
source, the 15-way I/O cable is used
• Connect the start signal and any error signals you wish to connect
• For the Compact 32c / 53c, load the ribbon and refit the cassette
• If a Compact Touchscreen is to be used, connect the USB cable into
the Compact Touchscreen’s mini USB port, then connect USB A into
the USB port on either the front or the back of the printer
• If a retained connection is required between the Compact Touchscreen
and the USB cable, the mini USB plug lead can be secured in place by
removing the rear cover of the Compact Touchscreen and fitting a
small cable tie to the mini USB plug
• If a retained connection is required between the power plug or USB
plug and the printer, secure the cables to the retained I/O cable using
cable ties
• If a retained connection is required between the power plug and the
printer, use the power cord retaining bracket provided
• The Compact Touchscreen USB cable supplied is 2m in length. A
maximum cable length of 3m can be used by either (a) fitting a 1m
extension or using a new 3m cable
CAUTION: Extensions and new cables must be sourced locally.
• Press the reset button on the printer to turn on the printer and
Compact Touchscreen.