DESCRIPTION AND INSTALLATION
2-48 25364 Issue 8 March 2018
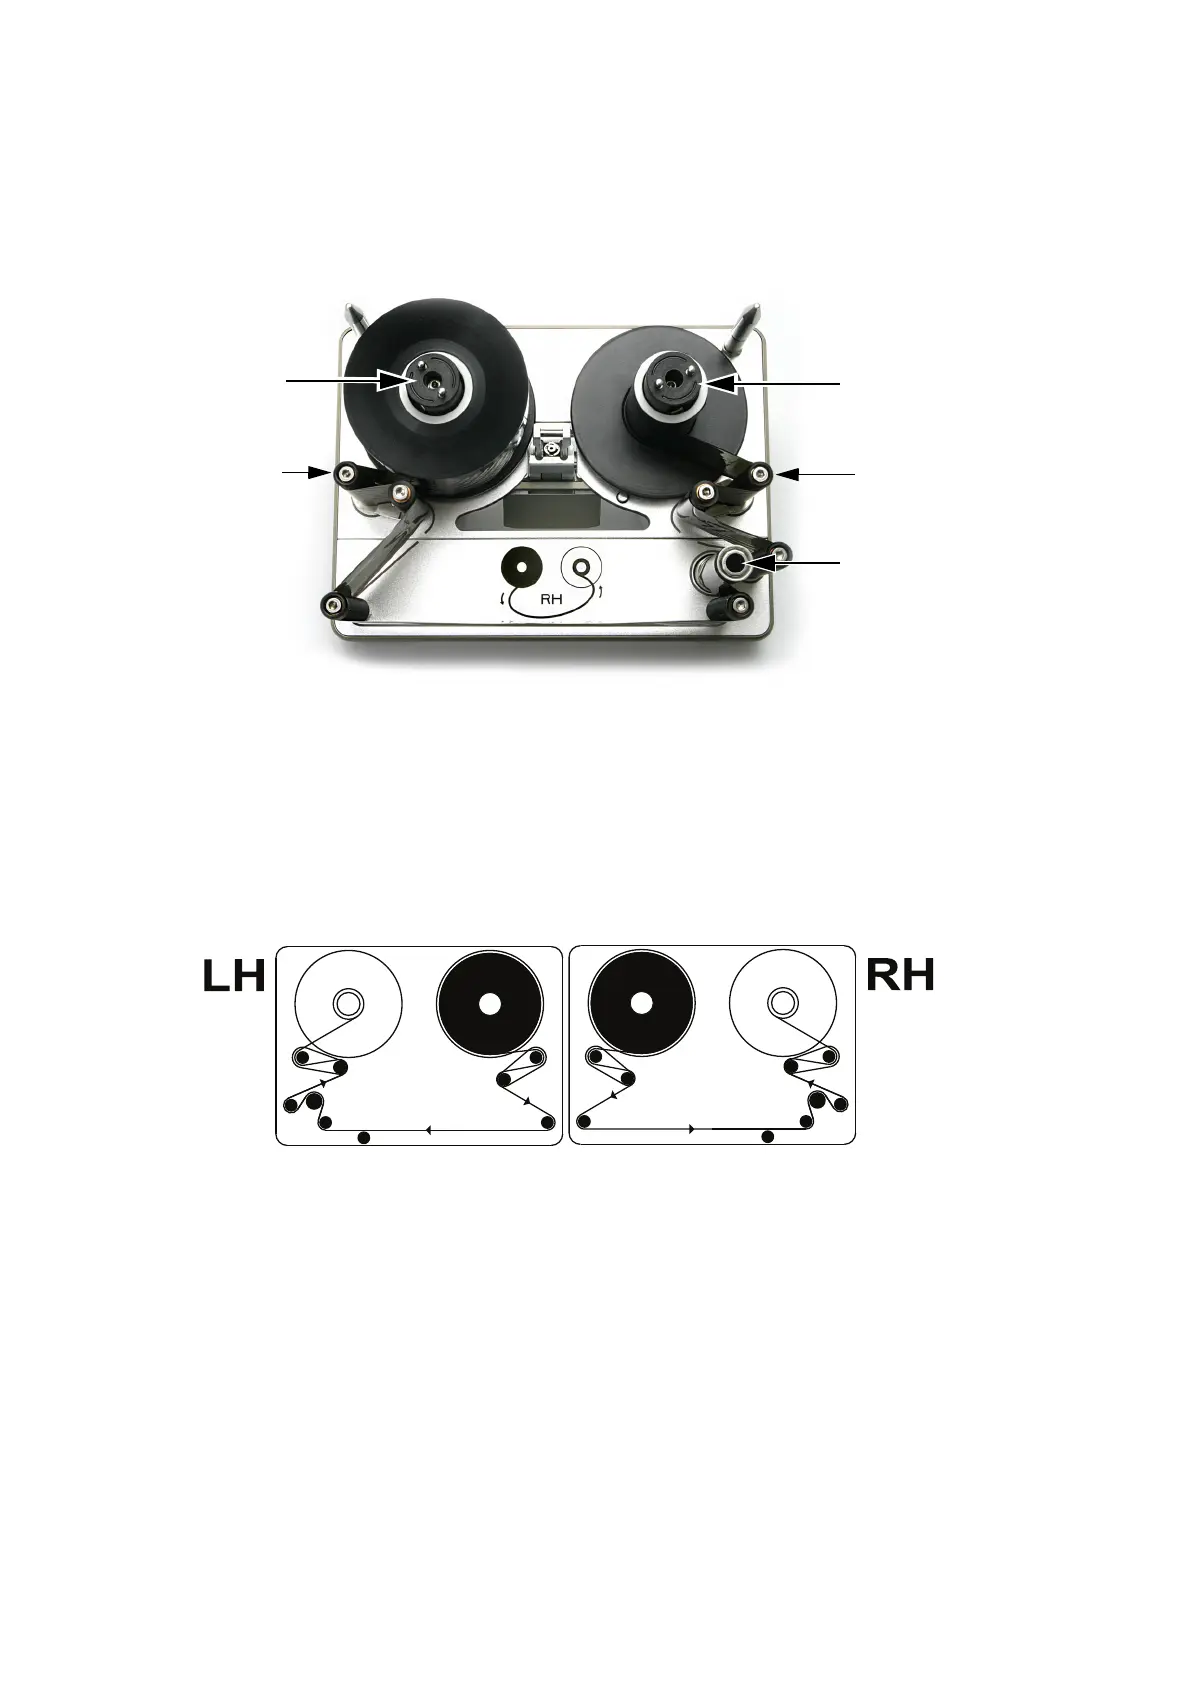
Compact 32c / 53c Ribbon Threading Procedure
(1) To remove the cassette, pull the latch down and gently pull the
cassette straight out towards you. Place it on a clean flat surface.
Compact 32c / 53c Cassette
Rewind
Spindle
Unwind
Spindle
Dancing
Arm
Dancing
Arm
Capstan
(2) Fit the new ribbon roll on the unwind spindle and the empty core to
the rewind spindle.
(3) The printer will be set up as either a right-hand printer or a left-hand
print
er. Referring to the ribbon path diagram labels on the printer
cover or in the following diagrams, determine whether the printer is
set up for left-hand or right-hand printing and then thread the ribbon
round the dancing arms, according to the appropriate diagram.
Left Hand
Compact 32c / 53c Ribbon Path
Right Hand
Note: To change the printer from left hand to right hand - or vice versa
- see “Changing Printer Configuration” on page 4-24.
(4) Wrap the ribbon around the empty rib
bon core several times, taking
up any slack in the ribbon path and between the bottom guide rollers
to complete the operation.