Eaton® 9390 (100–160 kVA) UPS Installation and Operation Manual 164201604—Rev F xiii
LLiisstt ooff FFiigguurreess
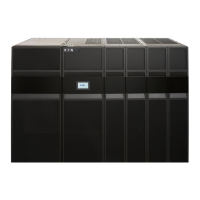
Figure 1. Eaton 9390 UPS (100–160 kVA) Cabinet..............................................................................................1
Figure 2. Eaton 9390 UPS (100–160 kVA) Cabinet as Shipped on Pallet ................................................................ 12
Figure 3. Removing Front Shipping Bracket on the Eaton 9390 UPS .................................................................... 16
Figure 4. Removing Rear Shipping Bracket on the Eaton 9390 UPS ..................................................................... 17
Figure 5. Eaton REPO Switch ...................................................................................................................... 28
Figure 6. REPO Wiring............................................................................................................................... 29
Figure 7. Eaton Hot Sync CAN Bridge Card..................................................................................................... 30
Figure 8. Supervisory Contact Module TB2..................................................................................................... 35
Figure 9. Main Elements of the UPS System .................................................................................................. 36
Figure 10. Path of Current Through the UPS in Normal Mode – RT ........................................................................ 38
Figure 11. Path of Current Through the UPS in Bypass Mode – RT ........................................................................ 40
Figure 12. Path of Current through the UPS in Energy Saver Mode – RT................................................................. 41
Figure 13. Path of Current Through the UPS in Battery Mode – RT ........................................................................ 42
Figure 14. Path of Current through the UPMs in Normal Mode – Parallel ................................................................ 44
Figure 15. Path of Current through the UPMs in Bypass Mode – Parallel ................................................................ 45
Figure 16. Path of Current through the UPMs in Battery Mode – Distributed Bypass................................................. 47
Figure 17. UPS Control Panel........................................................................................................................ 49
Figure 18. Parts of the LCD .......................................................................................................................... 50
Figure 19. Main Menu and Mimic Screen (Normal Mode).................................................................................... 51
Figure 20. Active Events Screen .................................................................................................................... 52
Figure 21. History Screen............................................................................................................................. 53
Figure 22. Unit Output Meter Screen.............................................................................................................. 54
Figure 23. Unit Input Meter Screen ................................................................................................................ 55
Figure 24. Unit Bypass Meter Screen ............................................................................................................. 55
Figure 25. Unit Battery Meter Screen ............................................................................................................. 56
Figure 26. Unit Output Current (Load) Meter Screen .......................................................................................... 56
Figure 27. Battery Discharge Log Summary Screen ........................................................................................... 57
Figure 28. Battery Discharge Log Screen......................................................................................................... 58
Figure 29. kW Demand Log Summary Screen .................................................................................................. 59
Figure 30. kW Demand Log Screen................................................................................................................ 60
Figure 31. Current kW Demand Log Setup Screen 1 .......................................................................................... 61
Figure 32. Current kW Demand Log Setup Screen 2 .......................................................................................... 62
Figure 33. Time Interval Monitored Setup Screen.............................................................................................. 63
Figure 34. Time Interval Monitored Setup Save Screen....................................................................................... 64
Figure 35. Maximum Level (kW) Setup Screen ................................................................................................. 65
Figure 36. Maximum Level (kW) Setup Save Screen .......................................................................................... 66
Figure 37. Maximum Current Log Summary Screen........................................................................................... 67
Figure 38. Maximum Current Log Screen (Three-Phase Measurement).................................................................. 68
Figure 39. Maximum Current Log Screen (Individual Phase Measurement)............................................................. 69

 Loading...