ADL 2010 / 01 56/57 599 72 63-27
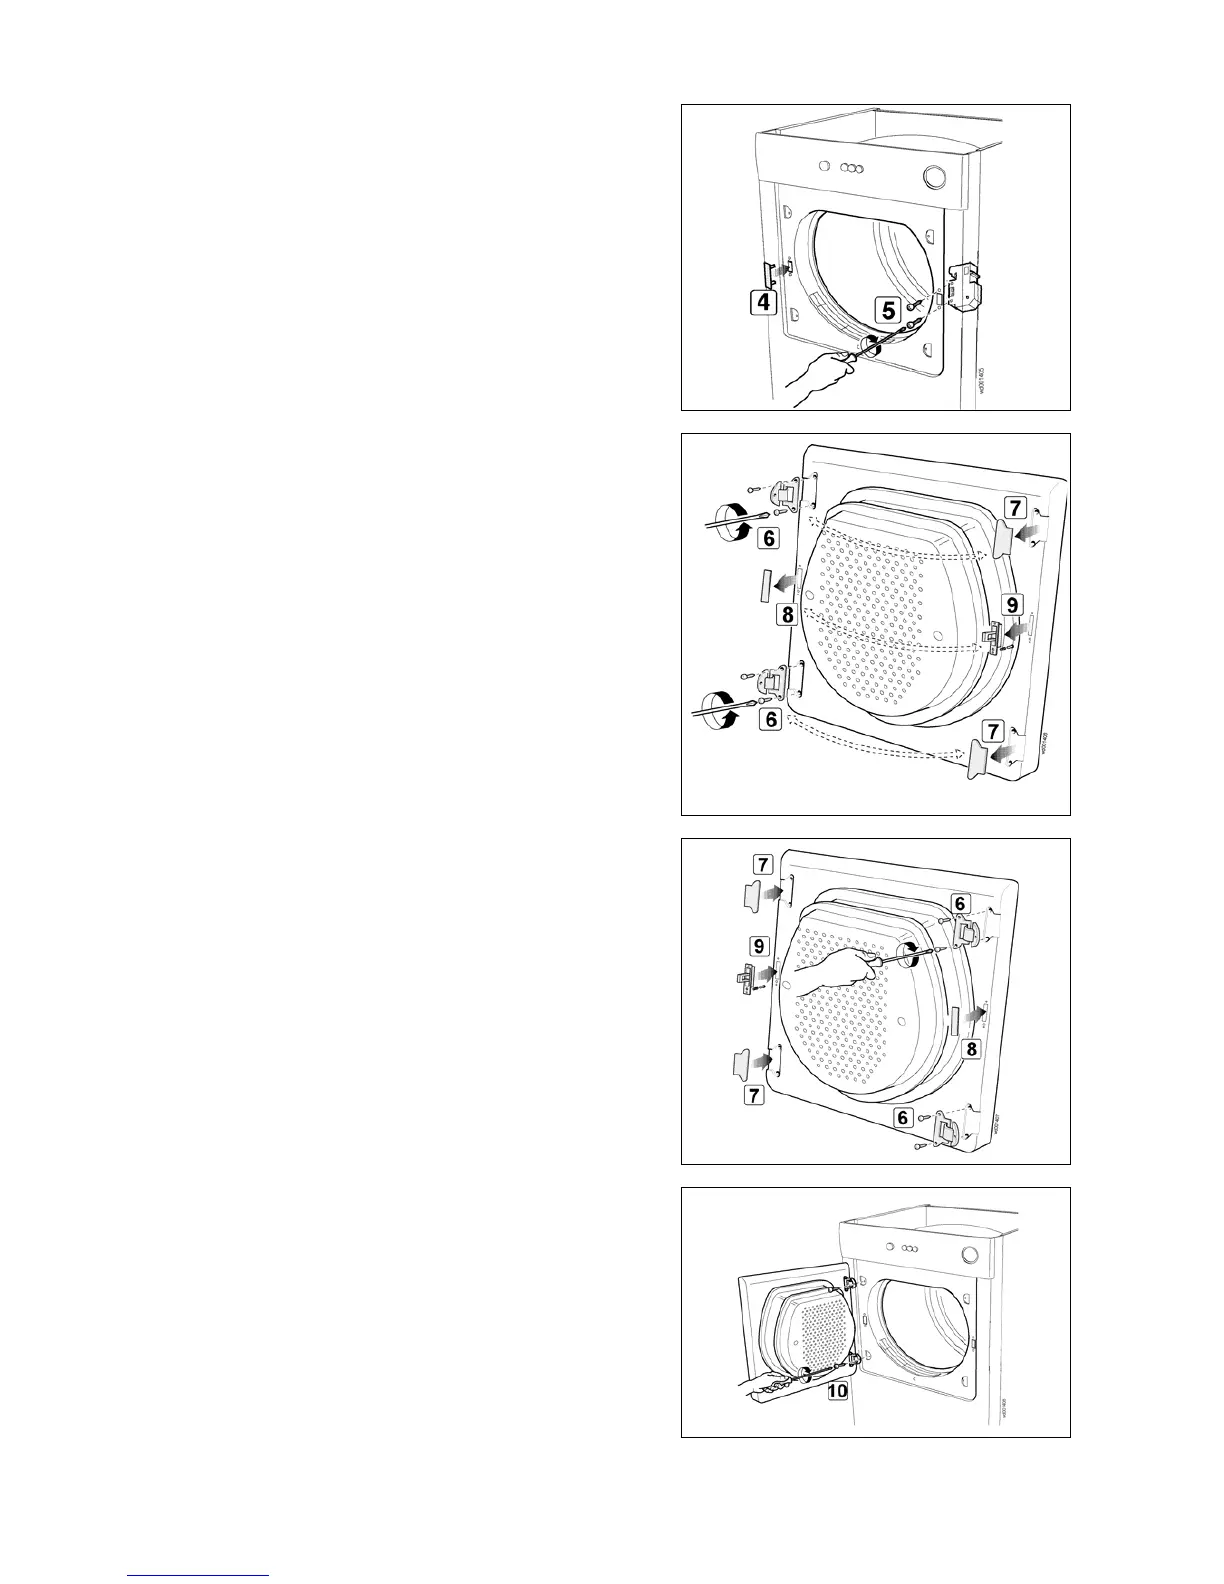
14. Insert the door lock connector and fasten it to the front
with the screws (5), making sure that the wires are not
crushed between the door lock and the front.
15. Check that the wires are properly inside all the hooks
from which the door lock wires have been extracted.
16. Insert the front opening plug at the point in which the
door lock (4) was previously located.
17. Remove the hinges after first removing the screws (6).
18. Remove door hinge covers (7).
19. Take out the door latch cover (8).
20. Take out the door latch (9) (see paragraph).
21. Insert the snap-on hinge covers (7).
22. Insert the door latch cover (8).
23. Insert the door latch (9).
24. Fix the hinges with screws (6).
25. Position the door on the opposite side of the tumble
dryer and fix the hinges with screws (10).
26. Replace the left and right sides (replace the fixing
screws in their origiinal positions, otherwise the earthing
connection will be broken).
27. Replace the worktop.
28. Replace the "Push-Push" sticker.