Commissioning
© Elma Schmidbauer GmbH BA_Elmasteam_8_Vers.07.2016
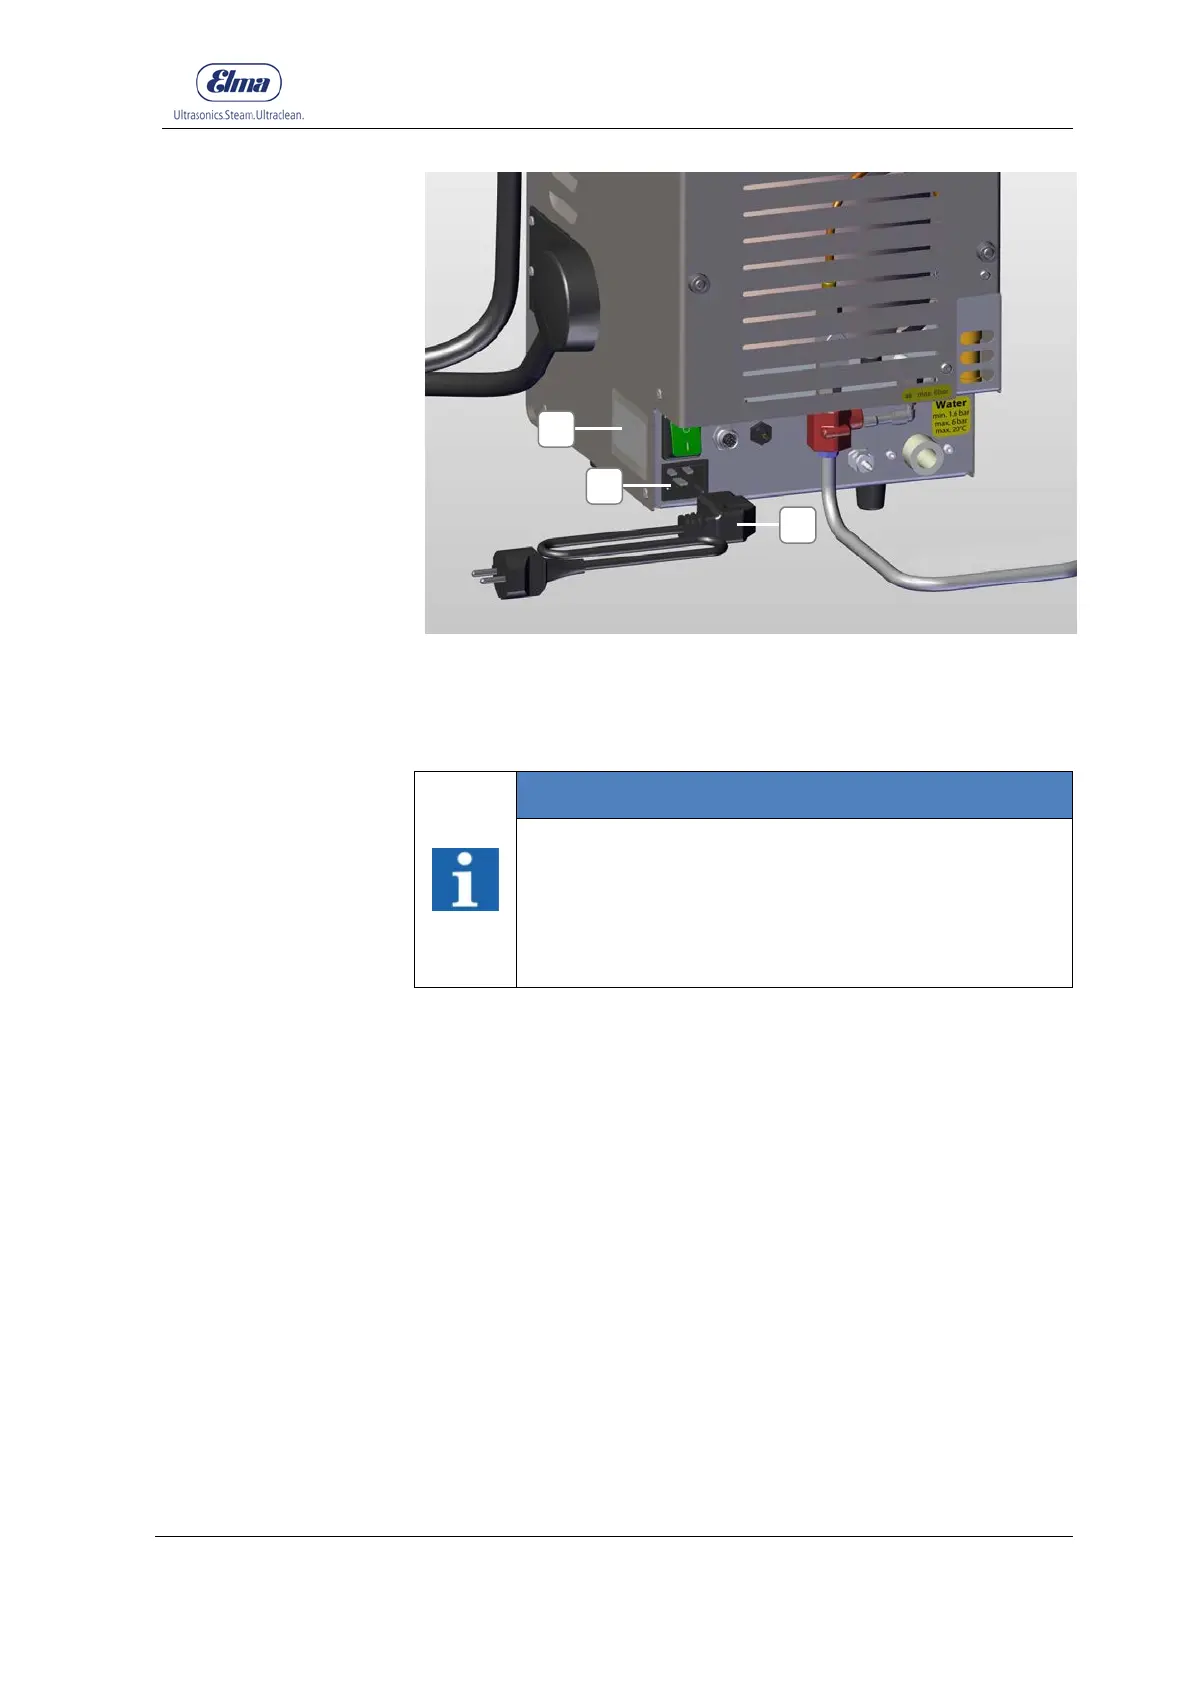
Figure 4.1.1: Mains Supply Cable
4.2 Assembling the Fixed Nozzle (Option)
INFORMATION
Only assemble the fixed nozzle with switched off
and depressurised devices!
• To prevent that people could be scalded by built-up
pressure causing accidentally escaping steam!
• Ensure that the device is switched off and
1. Remove the dummy plugs by unscrewing the nut (A) with an
open-ended spanner SW 12 mm (Figure 4.2.1).
2. Screw the fixed nozzle (B) with the nut (C) by hand (hand tight)
until it stops on the connecting piece (D) on the device (Figure
4.2.2).
3. Tighten the nut of the fixed nozzle with a quarter turn with an
open-ended spanner SW 12 mm.
4. Inspect whether the nut is tightened and the fixed nozzle is
fixed to the steam outlet downwards.
5. Slide the black protective cover in the arrow direction over the
nut (Figure 4.2.3.).
Fixed Nozzle