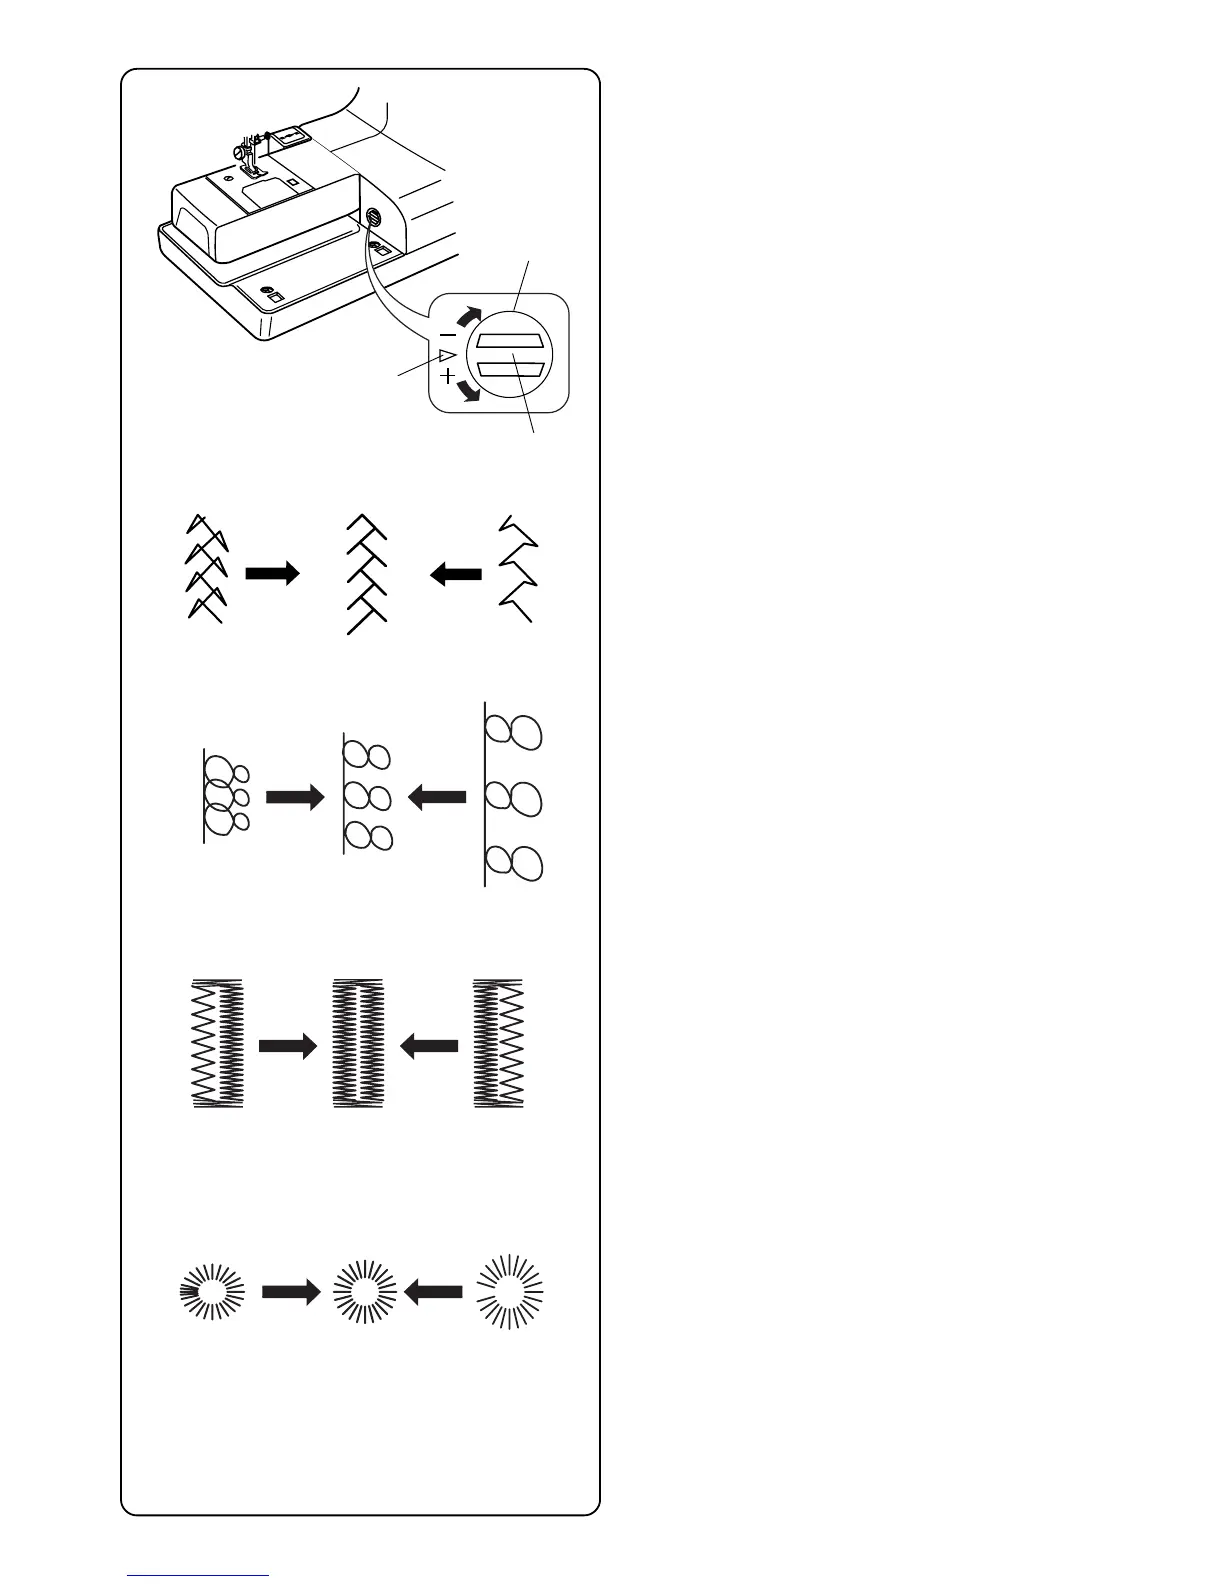
13
Using the Fine Adjustment Screw
Choice of fabrics and threads may affect the stitch
formation when sewing decorative stitches, letters and
numbers or classic 4 step programmable buttonhole 19.
The fine adjustment screw can be used to either
lengthen or shorten the stitch.
q Fine adjustment screw
w Standard mark
e Setting mark
To fine tune, use a screwdriver to move the setting mark.
• If stitches are too short r, correct by turning the
screw in the direction of “+”.
• If stitches are too long t, correct by turning the
screw in the direction of “–”.
• If letters are overlapped y, correct by turning the
screw in the direction of “+”.
• If letters are too spread out u, correct by turning the
screw in the direction of “–”.
19 Classic 4 Step Programmable Buttonhole (Applies
only to this style)
Always make the adjustment according to the left side.
• If left side of buttonhole is less dense (too open) i
compared to right side, correct by turning the screw
in direction of “+”.
• If left side of buttonhole is more dense (too closed)
o compared to right side, correct by turning the
screw in direction of “–”.
• If eyelet overlaps !0, correct by turning the screw in
direction of “+”.
• If eyelet is open !1, correct by turning the screw in
direction of “–”.
q
w
e
rt
(+)
(–)
y
u
(+)
(–)
io
(+)
(–)
(+)
(–)
!0 !1