– The plugs ( 1 / 2 / 3 / 4 / 5 / 6 ) should be unplugged.
– The 10 screws ( 7 and 8 ) should be removed.
See also chapters “Infrared baseline adjustments”, “IR source voltage setting” and “Infrared
power supply”
5.2.2 Changing the IR-source
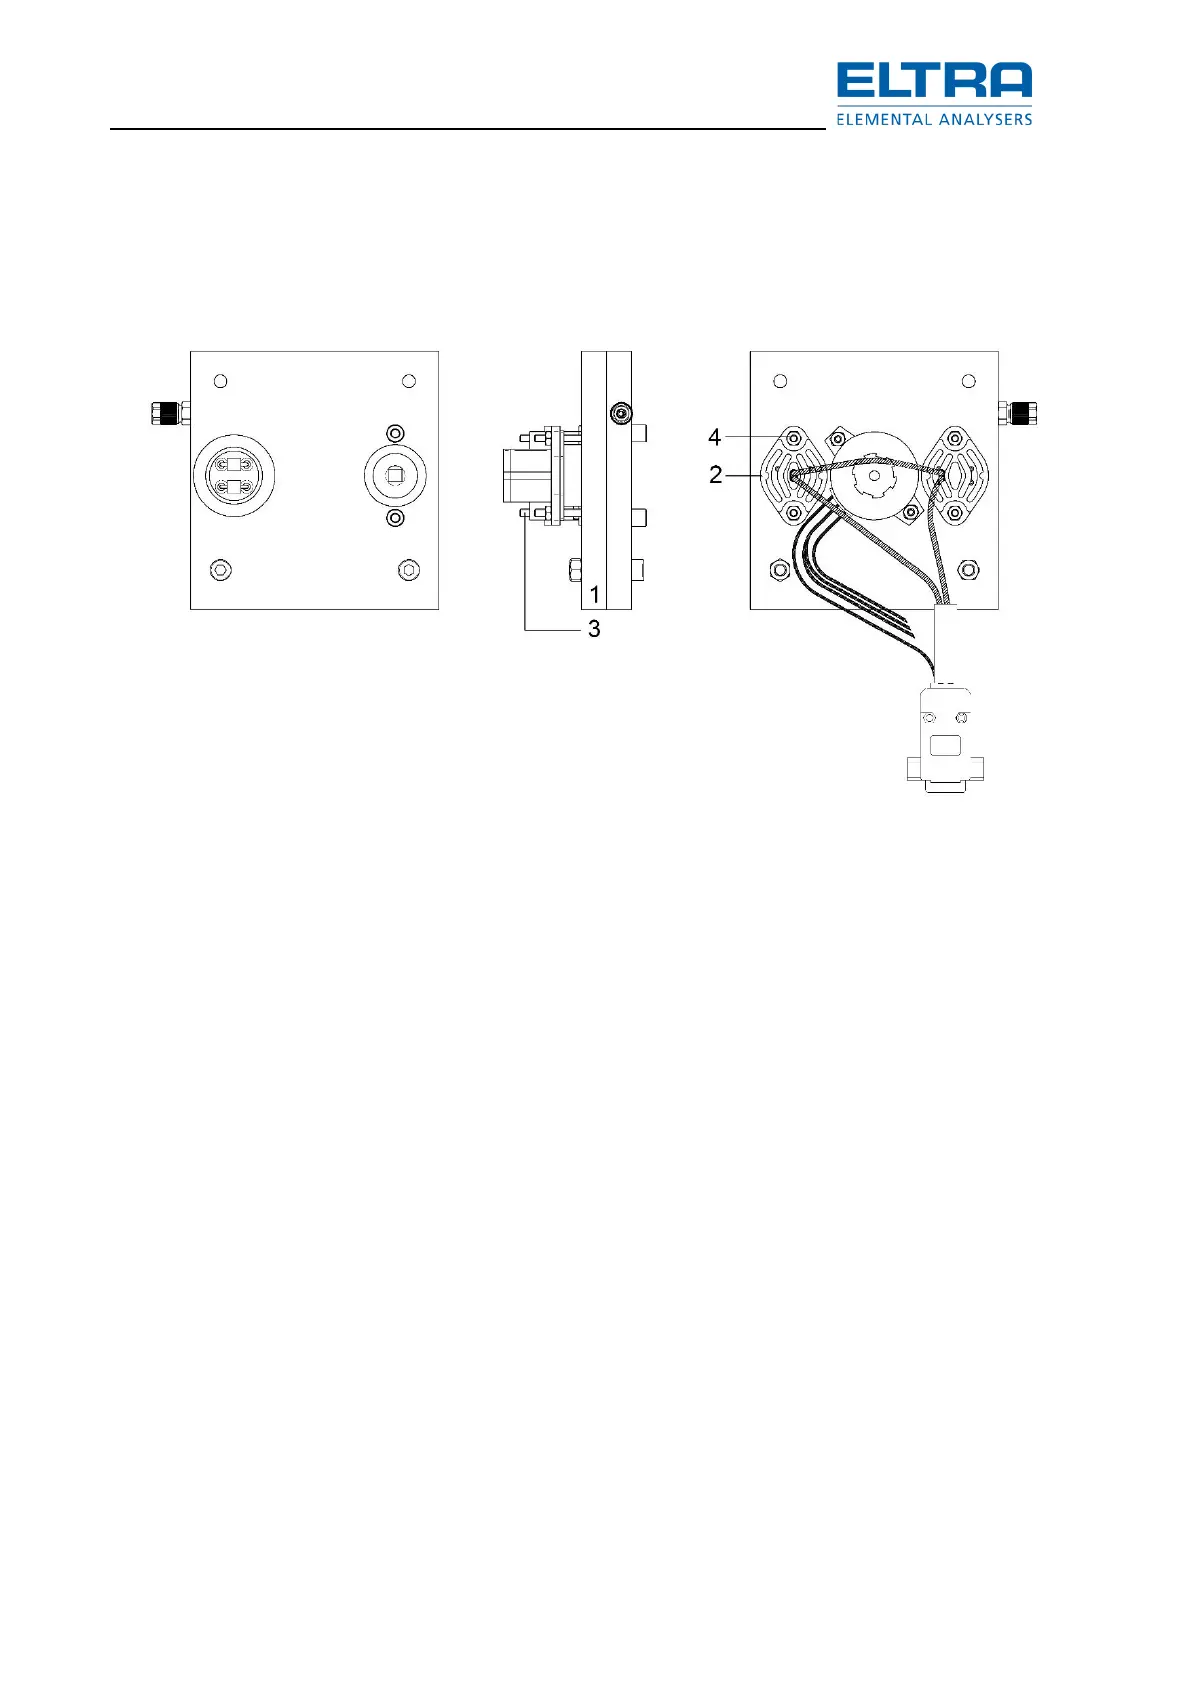
: Infrared source replacement
REMARK
– The IR sources (2) are fastened with the screws (3).
To install or removing the IR-source (2), the complete chopper motor assembly (1),
together with the mounted paths and pre-amplifier, should be removed from the infrared
unit. See chapter “IR paths cleaning and replacing”.
– The chopper motor housing (1) does not necessarily need to be unscrewed.
– In order to remove the IR-source, unscrew the nuts (4) with a (5.5 mm wrench).
– Unsolder the old IR source and solder the new one.
– Before re-assembling, check the position of the IR-source (2) and, if necessary, center
the position of the source in the source housing before reassembling. See graphics
below.
CAUTION
The wire of the IR source is hard, therefore do not move it back and forth. The wires of the
source can break when bending. Rather be careful to correctly position the source with one
attempt only.
For more details see chapter “Chopper”.