: Chopper
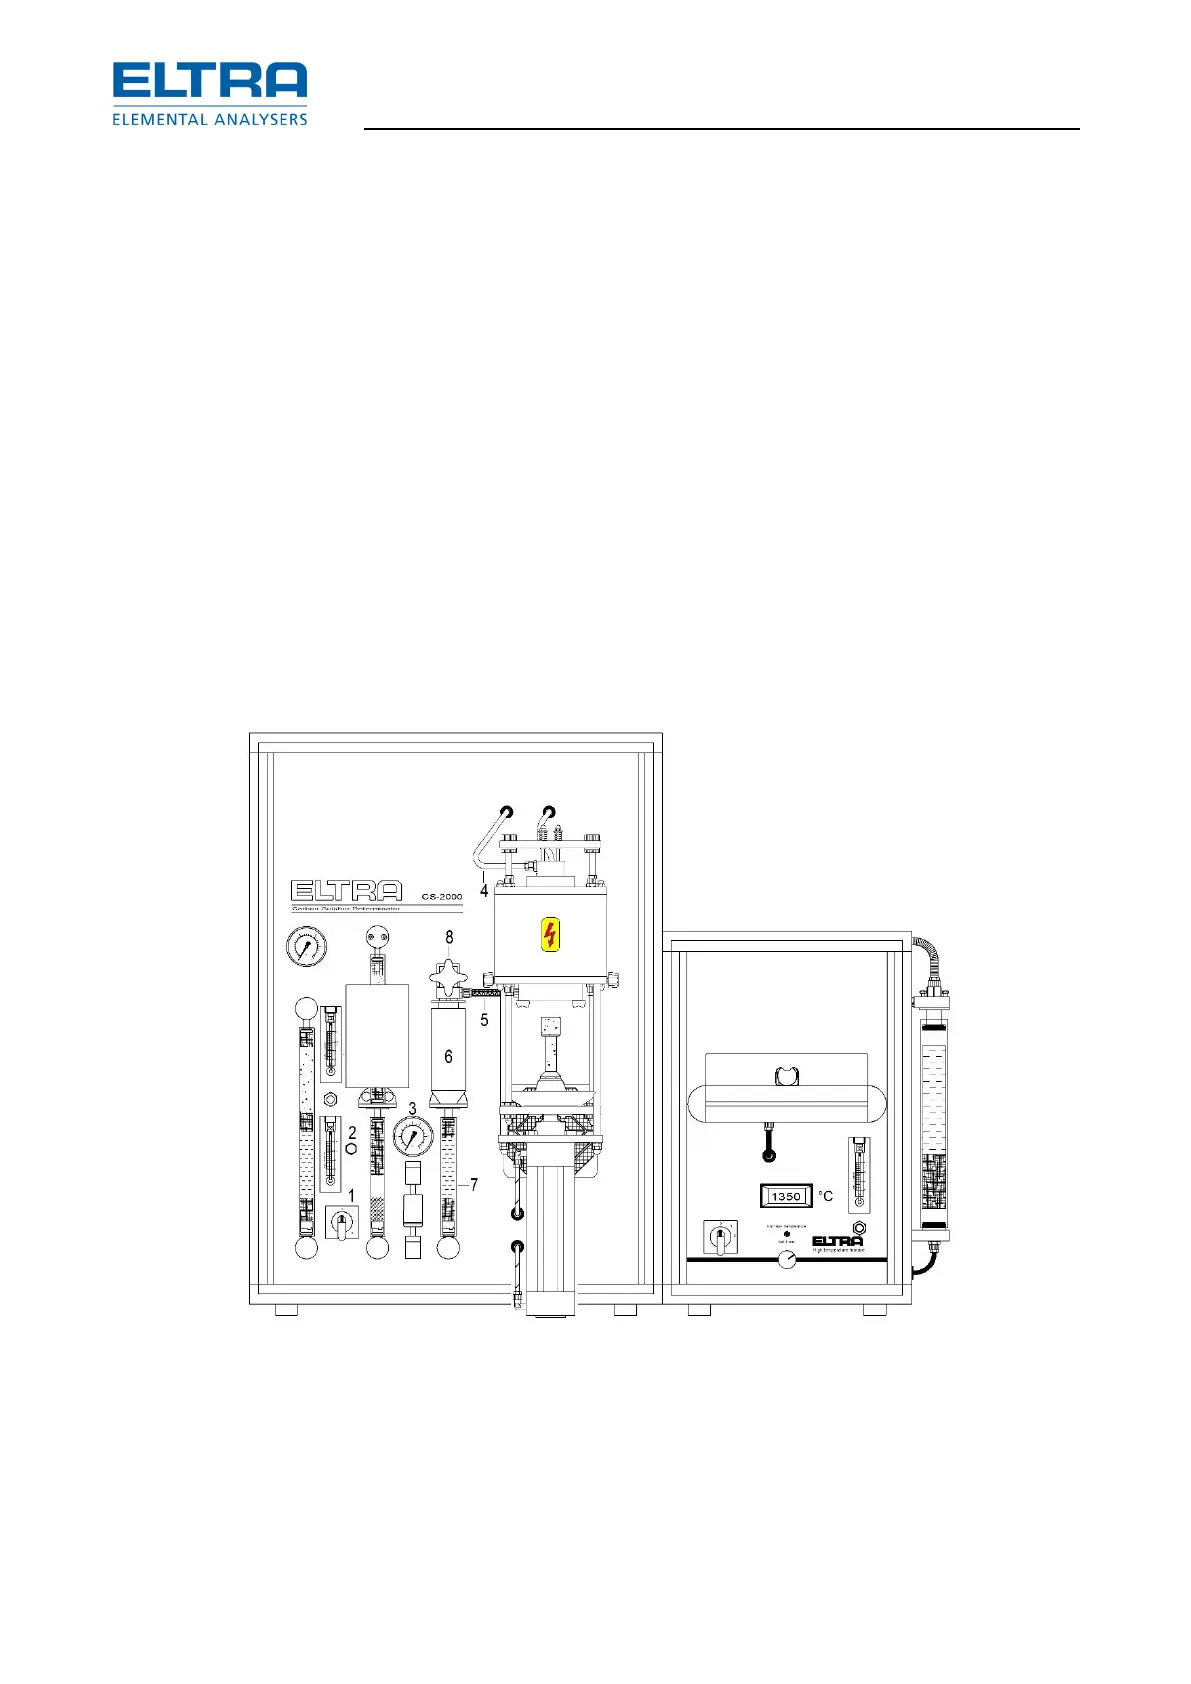
– Disassemble the plug (1) by removing the two screws (2).
– The cables (3) of the IR source (4) are then unsoldered from plug (1)
– Unscrew the nuts (5)
– Install the new motor (6)
– The IR source cables (3) are then soldered to the plug (1)
CAUTION
Due to the high current for the infrared cell; it is important that the soldering here is done
accurately, because two pins inside the plug (1) will be soldered together to form one group.
There are two such groups in one plug.
Each end of the IR-source cables (3) will then be soldered to each one of these groups. The
polarity is irrelevant.
– Afterwards, the chopper blade is refastened.
– Reassemble in the reverse order.
– After installing, the infrared cell should be adjusted, see chapter “Infrared base line
adjustment”.
Pos: 7.8 /0025 Ü berschriften/ELTR A 1.1 Übersc hriften/11 Leak c hecking ELTR A @ 6\mod_1 369642077339 _9.docx @ 4 2311 @ 2 @ 1
5.4 Leak checking
Pos: 7.9 /0010 ELTRA/0015 ser vice_instructions /CS-2000_ser vice/15 Ser vice_CS-2000/152 5 Modul Lea k checking @ 9\ mod_142554 3451001_9.docx @ 74754 @ 33 @ 1
: Leak checking
– Set the power switch (1) to pos. 3.
– Close the furnace.
– Press and hold the button (2).
The entire system is checked for leaks.