Section 6 Quick Start Guide
If you are already familiar with the P100 Controller, follow these steps to get your controller running:
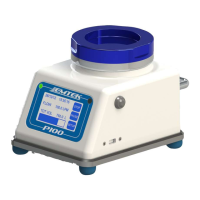
1. Turn the P100 power on using the On/Off power button on the right side of the unit. (Fig 5.1.1, #7)
NOTE: If the unit is not charged, plug the primary AC/DC power adapter cable into the power receptacle
on the rear of the P100 (Fig 5.1.2, #8), and then attach to an appropriate AC power supply source that is
100-240 VAC, and 50/60 Hz.
2. Set required sample run parameters using the touch screen interface. (See Section 7.1)
3. If a label/paper output is desired, ensure that the OPTIONAL printer is attached (Fig 5.2.1, #7), turned on,
printer output is ON, and that the unit has and adequate supply of paper/labels (Section 7.8).
4. Follow the appropriate procedure to collect the required samples.