Service and Maintenance Installation and Operation Manual - COMTEC
®
/
OXITEC
®
DustEx
10 Doc.-ID: COM_OXI_Dust_11022020
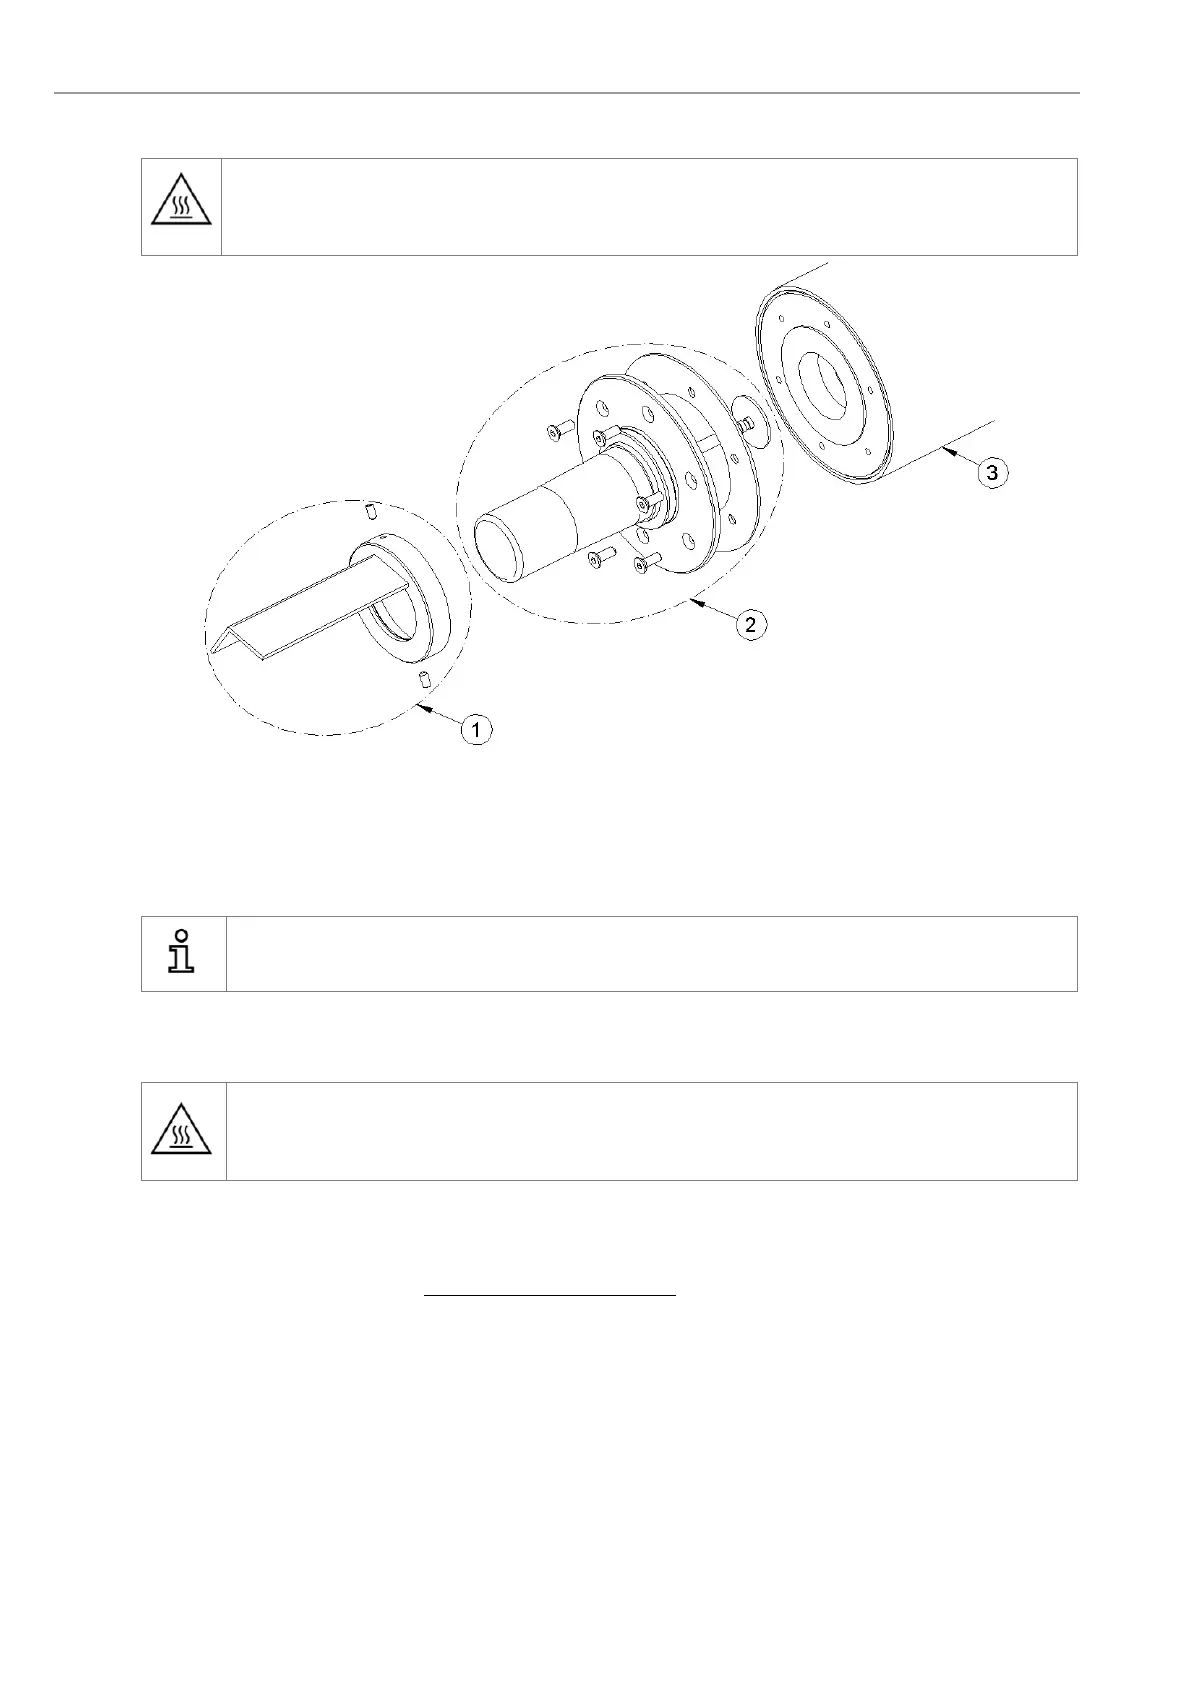
5.6 Replacing the Filter Head
Warning hot surface
The probe may only be removed with heat-insulated gloves. Before removing the probe, always switch off
the supply voltage to the electronic system. After removal, store the probe in a safe, protected place and
wait until it has cooled down below 35°C/95°F.
Figure 33 - Replacing the filter head
Loosen screws at the V-shield (1) and dismount the V-shield.
Remove the 6 screws from the filter flange (2) and remove filter with filter flange from the protection tube (3).
Mount the new filter with filter flange. Before the retaining ring is attached, the direction of the V-shield must be
adjusted towards the flue gas flow
Important
Probes in the DustEx protection tube have a made of sintered metal which is welded to the flange of the
filter
5.7 Replacing the probe
Warning Hot Surface
The probe may only be removed with heat-insulated gloves.
Before removing the probe, always switch off the supply voltage to the electronic system.
1. Disconnect the wires at the probe connection box.
2. Loosen the bolts connecting the probe to the counter flange and remove the probe
3. Insert the replacement probe using a new gasket. Consider the flue gas direction and adjust the V-Shield (filter
head) accordingly. See chapter 2.10 – Adjusting the V-Shield.
4. Tighten the flange bolts and reconnect the wiring at the connection box.
5. Switch on the power to the analyzer and wait for the probe to reach its setpoint temperature.
6. Carry out a 2-point calibration (under process conditions)