Service and Maintenance Installation and Operation Manual - COMTEC
®
/
OXITEC
®
DustEx
12 Doc.-ID: COM_OXI_Dust_11022020
5.9 Replacing the O
2
Sensor
Note
An exchange of the measuring cell is only necessary if the cell is leaking (erratic or incorrect measured
values)
Switch off the electronic unit, take the probe out of the protection tube and wait until it has cooled down.
Warning hot surface
The probe may only be removed with heat-insulated gloves. Before removing the probe, always switch off
the supply voltage to the electronic system. After removal, store the probe in a safe, protected place and
wait until it has cooled down below 35°C/95°F.
Pull out probe internal assembly (4-hole ceramic rod with signal measuring wire, thermocouple element and heater)
carefully. (See chapter 5.8)
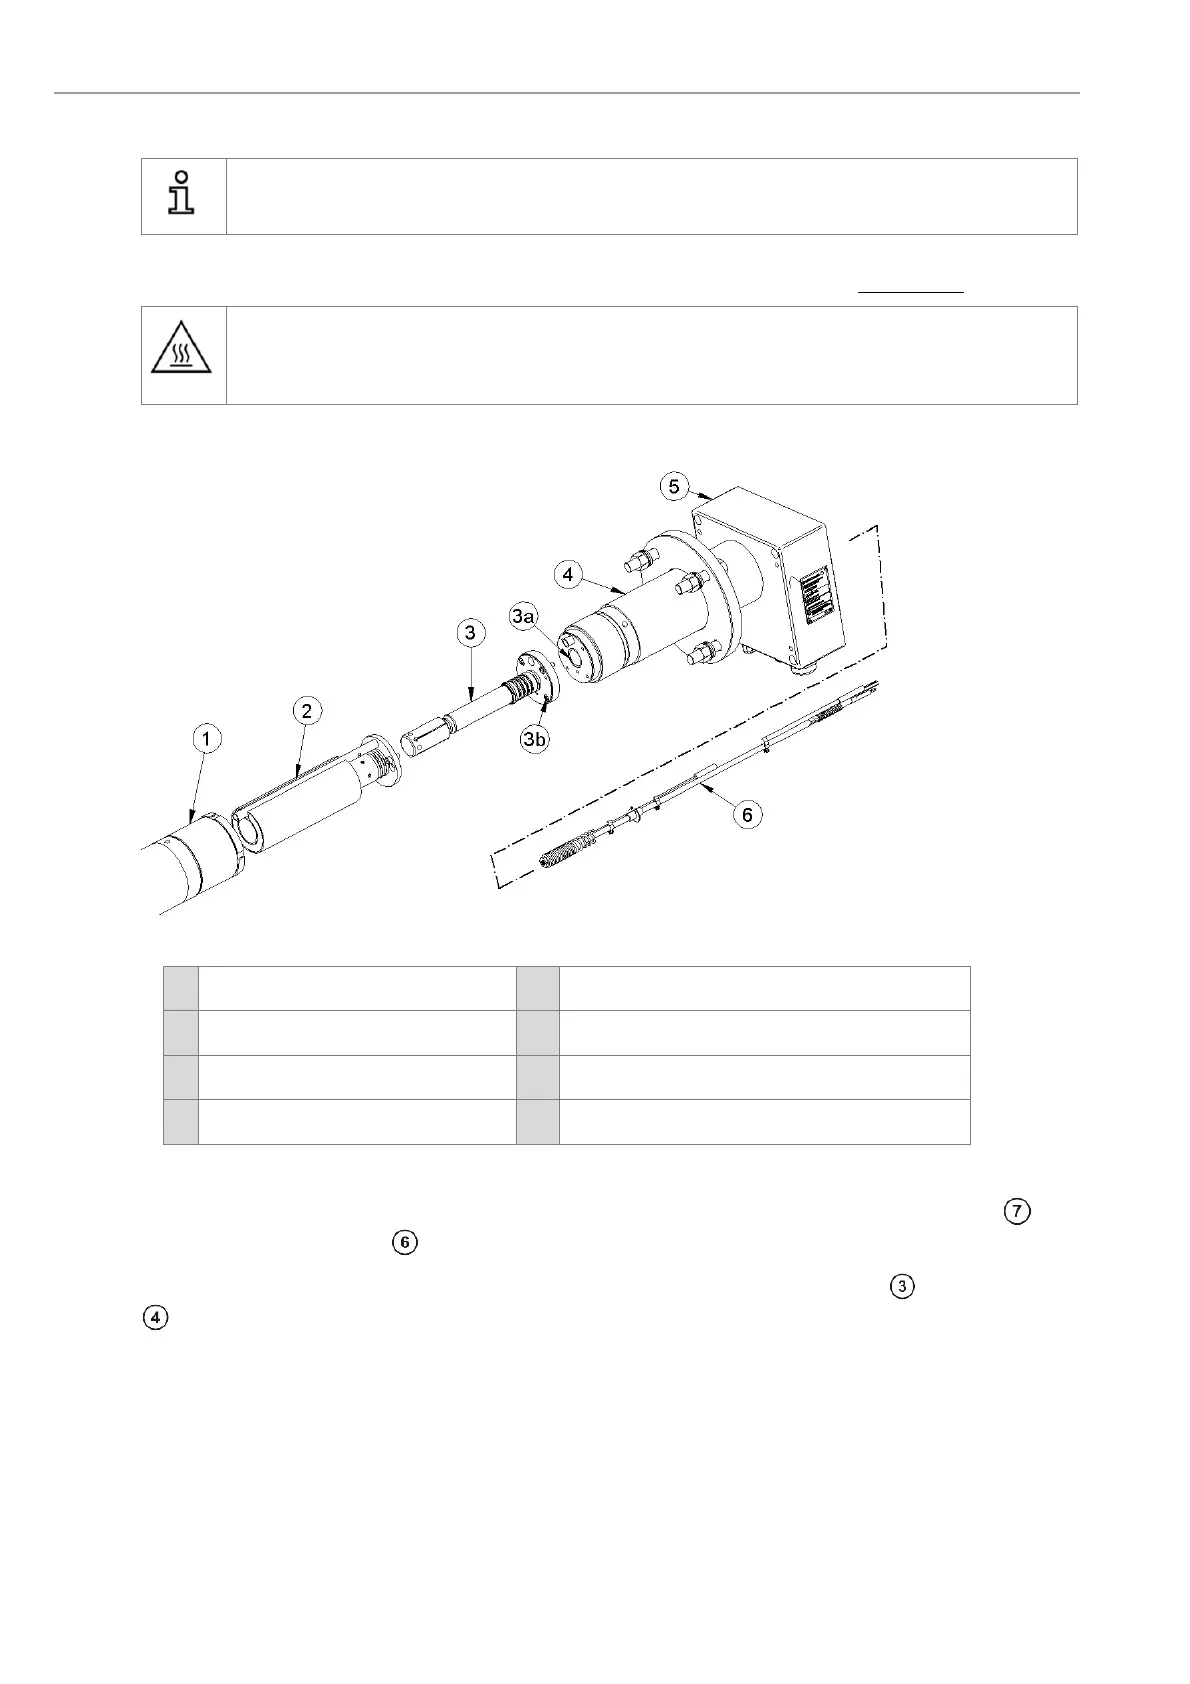
Figure 35 - Replacing the O
2
Sensor
1
Filter Head
3b
Sensor flange
2
Test gas distributor
4
Probe tube
3
O
2
Sensor
5
Probe terminal box
3a
Sensor flange seal
6
Probe inner part
Take the probe out of the protection tube and wait until it has cooled down.
Dismantle the probe inner part. Unscrew the filter head and dismantle the test gas distributor with guide tube , by
loosening the two allen screws.
Now remove the 4 Allen® screws at the Measuring cell flange and remove the measuring cell of the probe tube.
Remove also carefully the old measuring flange gasket
Clean the flange at the probe tube with fine sandpaper. Tighten the new measuring cell with a new metal gasket
sealing and four new screws at the measuring cell flange of the probe tube. Insert the probe inner part and ensure
that the inner part does not bind in the probe tube. Press the locking bolt against the spring, so that the inner parts
assembly is pressed against the measuring cell with enough spring tension. Tighten locking bolt and connect wires
as shown in Chapter 5.8